I know this is an older thread, but I wanted to share a solution that worked for me in case it helps others.
If you’re looking to set up S2S tracking, the process typically involves integrating a tracking code provided by your tracking software (e.g., Voluum). While Funnelish does not currently provide a dedicated guide for S2S tracking, you can follow these general steps to get started:
1. Get the tracking code:
Check the documentation of your tracking software (like for example Voluum) to obtain the tracking code. This code is usually a JavaScript snippet or a URL-based integration.
2. Add the tracking code to Funnelish:
Open the funnel where you want to add it
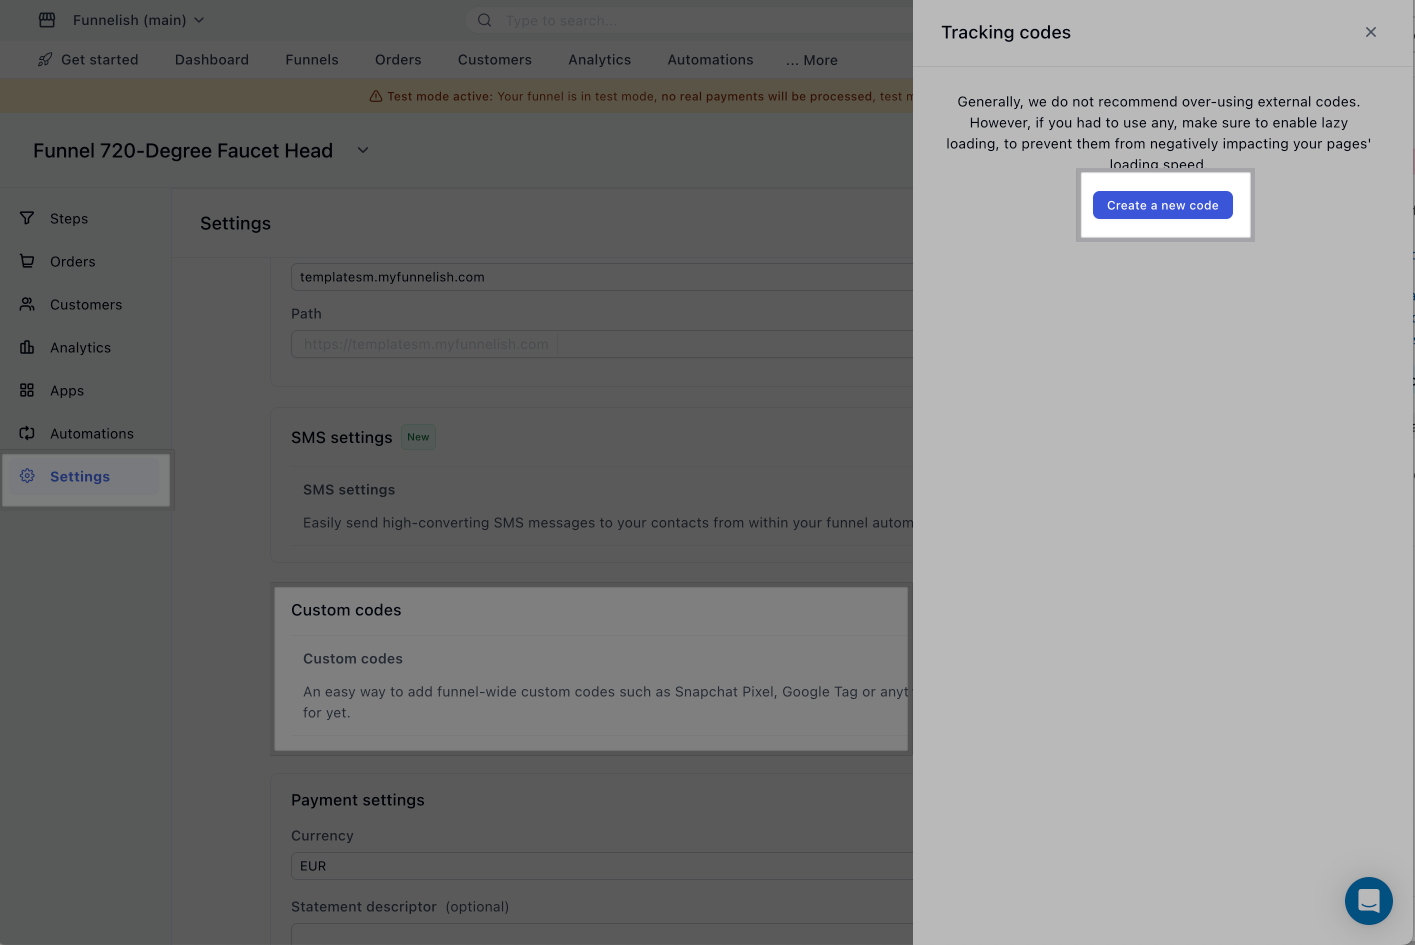
Click on the Settings (gear icon).
Look for the Custom Codes section and add the tracking code provided by your software here. This ensures the tracking code is implemented on all relevant funnel pages.
- Configure URL Parameters:
If your tracking setup involves URL parameters (e.g., ClickID), ensure these parameters are passed correctly through the funnel.
Add a JavaScript code within Funnelish’s custom code area to capture and store these parameters in hidden form fields. You can inspire from the one here:
const urlParams = new URLSearchParams(window.location.search);
const clickID = urlParams.get('clickid');
if (clickID) {
    let inputField = document.querySelector('input[name="clickid"]');
    if (!inputField) {
        inputField = document.createElement('input');
        inputField.type = 'hidden';
        inputField.name = 'clickid';
        document.querySelector('form').appendChild(inputField);
    }
    inputField.value = clickID;
}
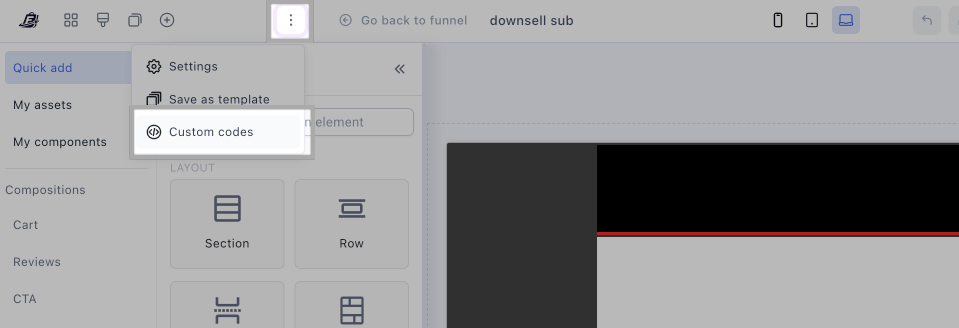
Then the custom code can be added to the whole funnel (under Funnel Settings as shown in the screenshot above) or inside the page custom codes > BODY HTML:
The goal for JS code is to then take the parameter from url (ClickID) and will store it into a hidden formElement box (the formElement box you can give it any custom data name like ClickID or something else).
Now when the customer submits the page or buys, that formElement value will be stored under the customer’s profile automatically just like name, email, address…etc (it will be stored under Meta data).
Inside Zapier you will be able to see that new field ClickID under Meta fields and can use it in zaps going forward.
- Capture and Store Click IDs:
Add a JavaScript snippet in the custom code section to extract the clickid or similar tracking parameters from the URL.
Store the parameter in a hidden form field within your funnel. For example:
Copy the following JS code
const urlParams = new URLSearchParams(window.location.search);
const clickID = urlParams.get('clickid');
if (clickID) {
    document.querySelector('input[name="clickid"]').value = clickID;
}
Paste it as well in custom codes > BODY HTML.
- Send Data Back to the Tracker:
Once the customer submits the form or completes a purchase, the stored metadata (including the ClickID) will be saved in their profile.
Use Zapier or a webhook to send this metadata back to your tracking software, such as Voluum.
3. Zapier Integration:
In Zapier, set up a zap to retrieve the ClickID or other tracking data from Funnelish.
Use this data to update your tracking software, ensuring proper attribution and reporting.
4. Testing:
Test the integration to ensure the tracking data is being passed correctly through the funnel and received by your tracking software.
Check the reporting in Voluum (or your chosen tracker) to confirm that events like clicks, conversions, or purchases are attributed accurately.
In the case that you need to push certain values through the script tag you can check out this thread https://community.funnelish.com/t/how-to-add-google-ad-conversion-code-on-thankyou-page/4404
ORDER NUMBER can be found by clicking on the order inside Funnelish.
Notes:
Refer to the documentation of your tracking software for specific guidelines on S2S implementation with external platforms.