Give your customers a choice between one-time purchase and subscription by adding a toggleable checkbox that updates the visible products dynamically.
 Step 1: Create Your Products
Start by creating 6 products inside your Funnelish funnel.
- First 3 products = Subscription
- Last 3 products = One-Time Purchase
You can name them clearly like:
Product 1 – Sub
Product 2 – Sub
Product 3 – Sub
Product 4 – One-Time
Product 5 – One-Time
Product 6 – One-Time
Step 2: Add Subscription Offer Section
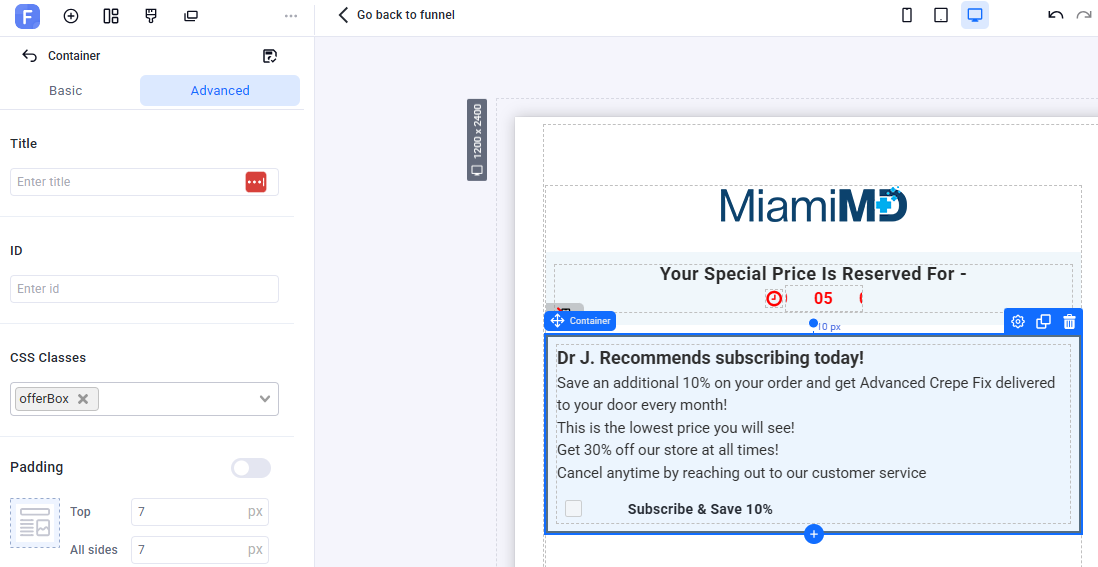
Now let’s add a container that promotes the subscription offer and contains the checkbox.
- Add a container element and give it the class:
.offerBox
- Inside this container, insert the following promotional text:
Dr J. Recommends subscribing today!

Save an additional 10% on your order and get Advanced Crepe Fix delivered to your door every month!

This is the lowest price you will see!

Get 30% off our store at all times!

Cancel anytime by reaching out to our customer service.
-
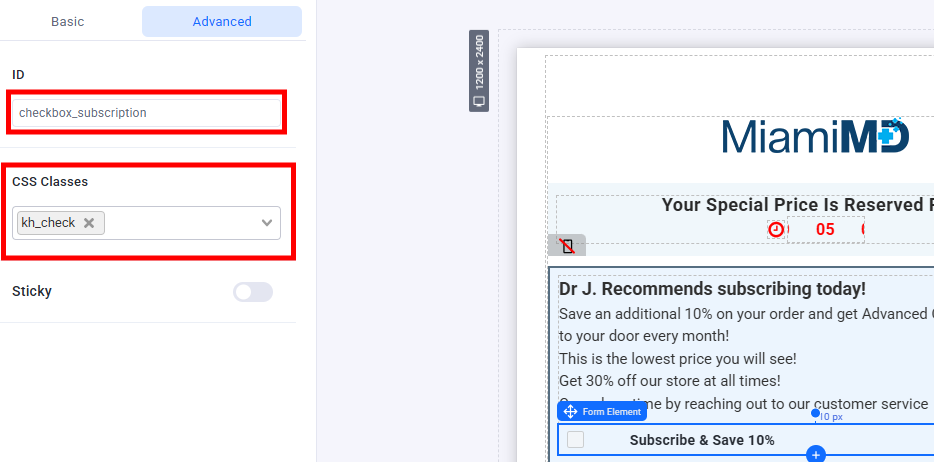
Add a Checkbox element from the form section:
- Give it the class:
.kh_check
- Assign it the ID:
#checkbox_subscription
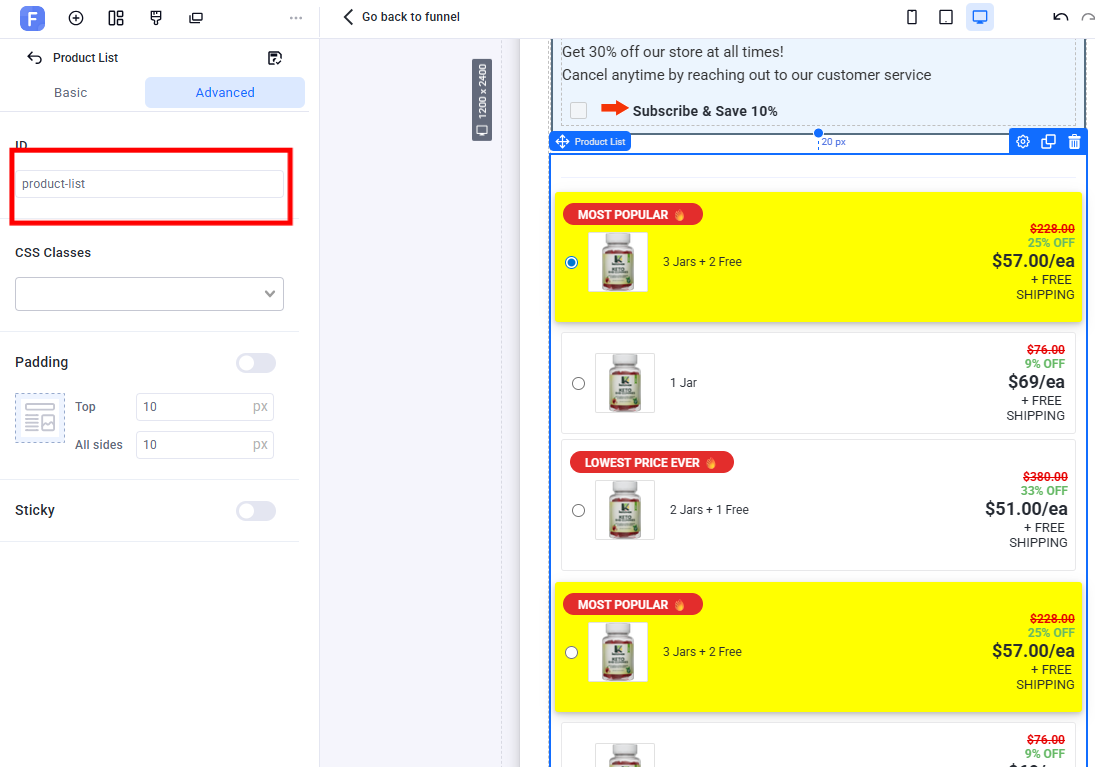
Step 3: Add the Product List
Next, add the Product List element to your funnel. This is where your products will appear and dynamically show/hide based on the checkbox.
- Set the Product List element’s ID to:
#product-list
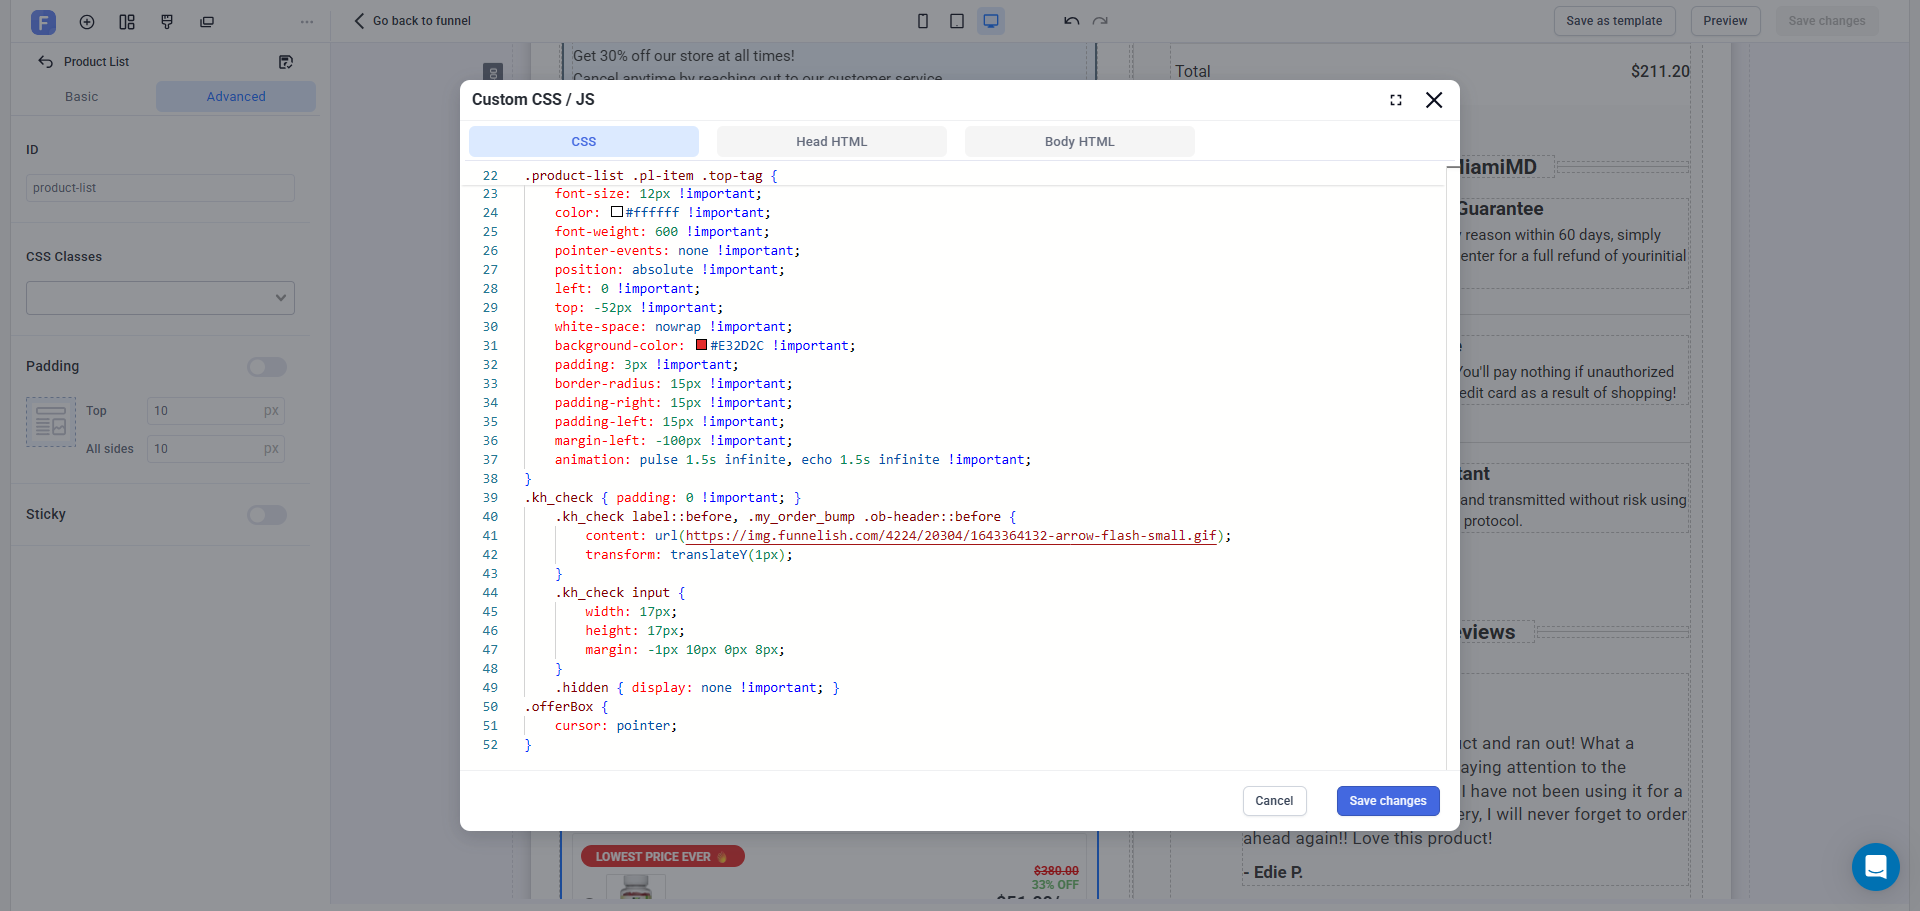
Step 4: Add Custom CSS Styling
To make everything look clean and responsive, go to:
More actions > Custom Codes > CSS
Paste the following CSS code:
.product-list .pl-item .top-tag {
    font-size: 12px !important;
    color: #ffffff !important;
    font-weight: 600 !important;
    pointer-events: none !important;
    position: absolute !important;
    left: 0 !important;
    top: -52px !important;
    white-space: nowrap !important;
    background-color: #E32D2C !important;
    padding: 3px !important;
    border-radius: 15px !important;
    padding-right: 15px !important;
    padding-left: 15px !important;
    margin-left: -100px !important;
    animation: pulse 1.5s infinite, echo 1.5s infinite !important;
}

.kh_check { padding: 0 !important; }

.kh_check label::before, .my_order_bump .ob-header::before {
    content: url(https://img.funnelish.com/4224/20304/1643364132-arrow-flash-small.gif);
    transform: translateY(1px);
}

.kh_check input {
    width: 17px;
    height: 17px;
    margin: -1px 10px 0px 8px;
}

.hidden { display: none !important; }

.offerBox {
    cursor: pointer;
}
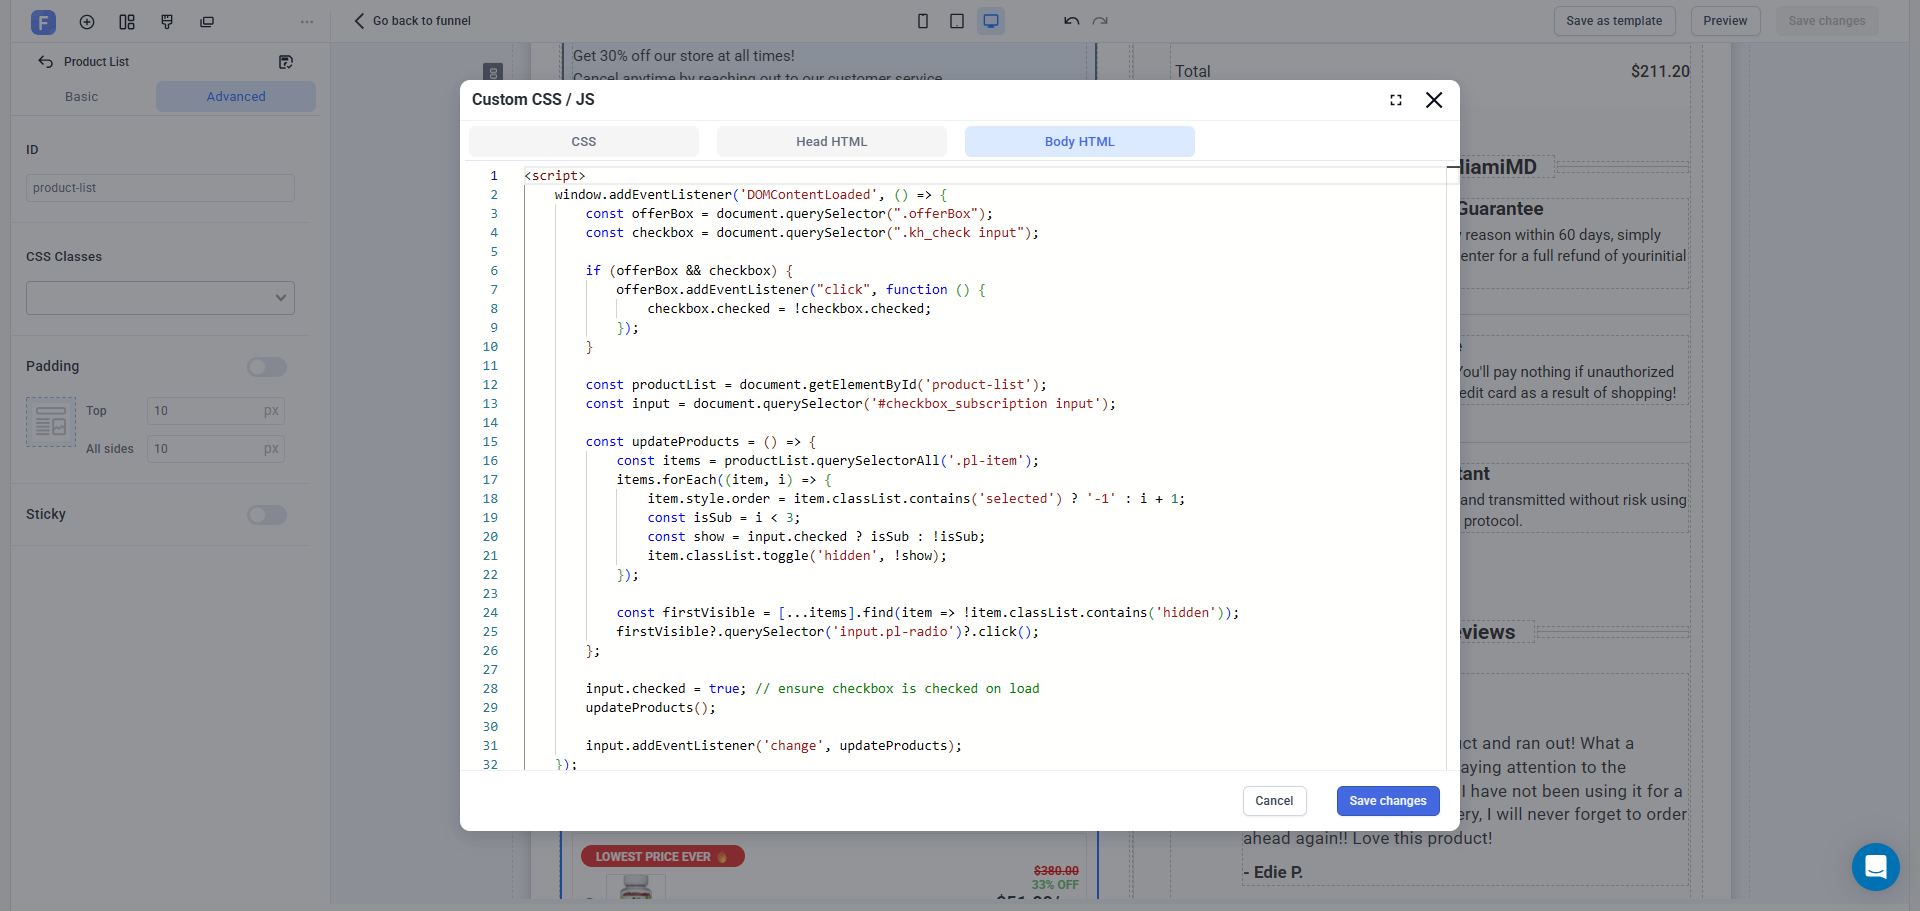
Step 5: Add Custom JavaScript Logic
Finally, go to:
Custom Codes > Body HTML
Paste the following script to enable the interactive toggle behavior:
<script>
    window.addEventListener('DOMContentLoaded', () => {
        const offerBox = document.querySelector(".offerBox");
        const checkbox = document.querySelector(".kh_check input");

        if (offerBox && checkbox) {
            offerBox.addEventListener("click", function () {
                checkbox.checked = !checkbox.checked;
            });
        }

        const productList = document.getElementById('product-list');
        const input = document.querySelector('#checkbox_subscription input');

        const updateProducts = () => {
            const items = productList.querySelectorAll('.pl-item');
            items.forEach((item, i) => {
                item.style.order = item.classList.contains('selected') ? '-1' : i + 1;
                const isSub = i < 3;
                const show = input.checked ? isSub : !isSub;
                item.classList.toggle('hidden', !show);
            });

            const firstVisible = [...items].find(item => !item.classList.contains('hidden'));
            firstVisible?.querySelector('input.pl-radio')?.click();
        };

        input.checked = true; // ensure checkbox is checked on load
        updateProducts();

        input.addEventListener('change', updateProducts);
    });
</script>
What This Does:
-
Toggling .offerBox checks/unchecks the checkbox
-
Based on the checkbox state:
- Shows Subscription products (first 3) or One-Time products (last 3)
-
Automatically selects the first visible product
 You’re Done!
Now when users click the offer box or checkbox, the product list will update in real-time, showing either subscriptions or one-time purchase options.