In this brief tutorial I will be going through how to add a sticky section/row to your page in Funnelish.
This is commonly used to make the Call-to-action section sticky to the bottom of a landing page.
As of now Funnelish does not have a native feature to allow such functionality thus we will need to use some custom codes to get the same effect.
Step 1: Create a section at the bottom of your page
Make sure the section has a background color or image, and it’s set to “Full Width”.
Add your call to action button elements and text to it.
Step 2: Add The Sticky Class to your CSS
Go to the “Code Editor” > Custom CSS
Paste this code into the box:
.sticky {
   position: fixed;
   bottom: 0;
   display: none;
   z-index: 10;
}
.sticky.visible {
    display: flex;
}
Step 3: Adding Custom Code to Custom JS (body)
Now in the same popup move to the Custom JS (body) box
And paste this code into the box:
<script>
/* The number of pixels a visitor should scroll down to see the sticky bar */
var SHOW_AFTER = 300;

var sticky = document.querySelector(".sticky");
window.onscroll = function() {
    if (window.pageYOffset > SHOW_AFTER) {
        sticky.classList.add("visible");
    } else {
        sticky.classList.remove("visible");
    }
};
</script>
The number in 3rd line is the distance in pixels your visitors need to scroll down for to see the sticky call-to-action bar, you can increase/decrease the number.
Once done save changes.
Step 4: Add class “sticky” to your section/row
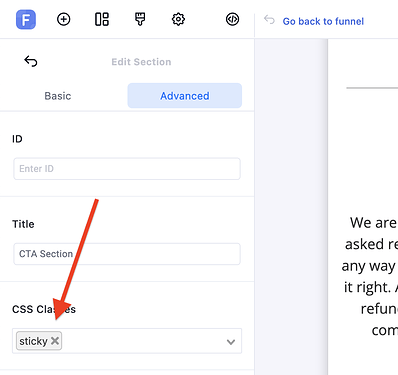
Now select your call to action section and go to Advanced properties and add "sticky" to the CSS Classes box.
Save your changes and enjoy!


