In this brief tutorial, I will be going through how to add a “same as billing” CheckBox to your page in Funnelish Just like this:

This is useful because it will save more time for the customer whose billing address is the same as their shipping address, so they won’t have to retype the same address.
Currently, Funnelish does not have a native feature to allow such functionality thus we will need to use a custom script to get the job done.
Step 1: Adding shipping details:
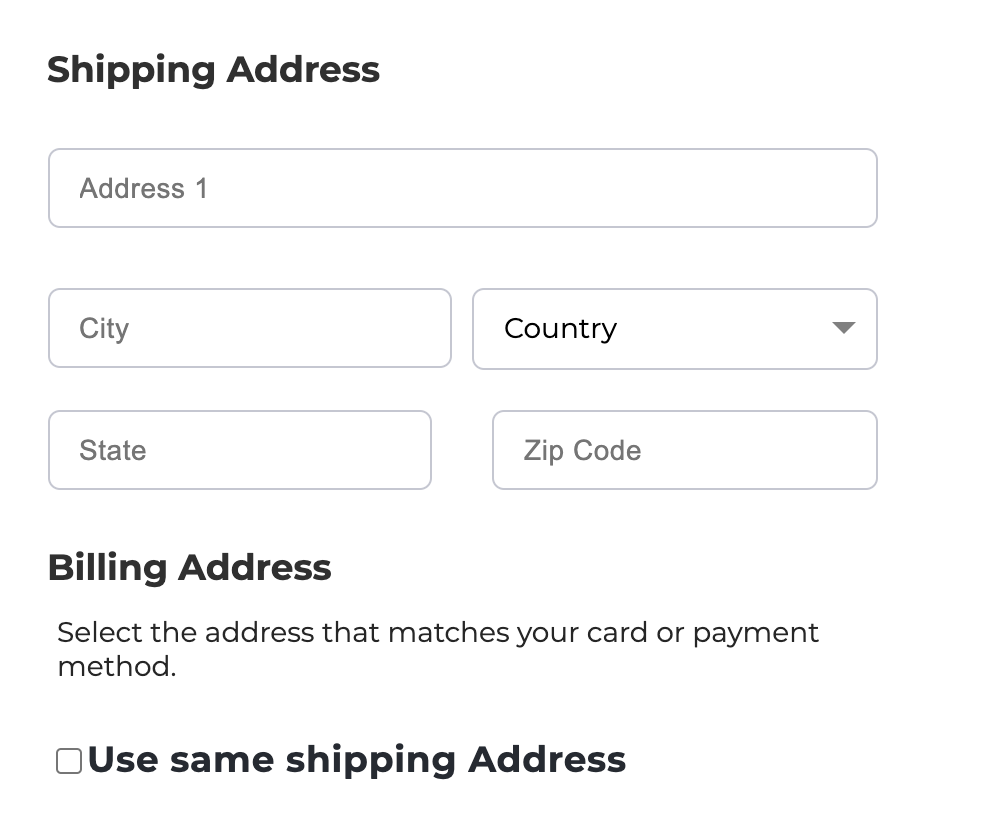
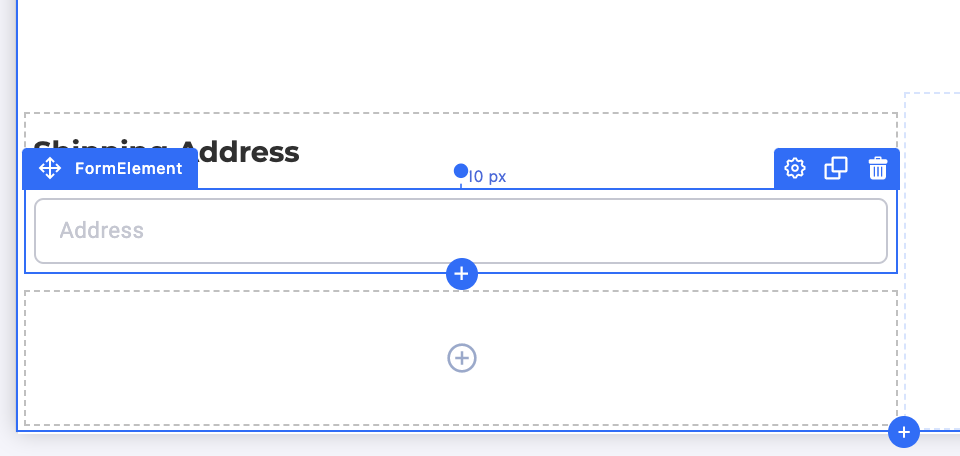
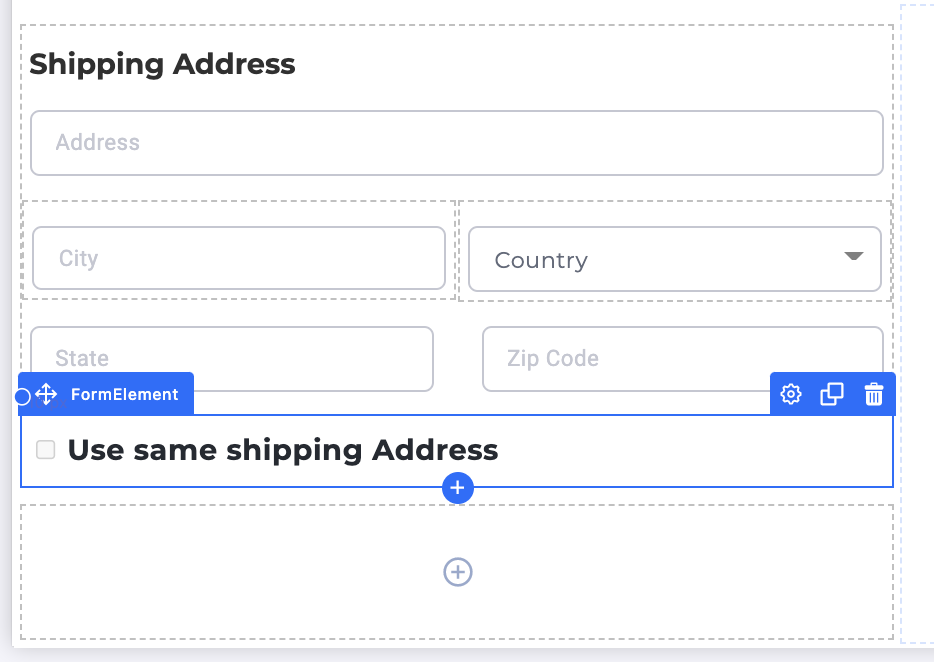
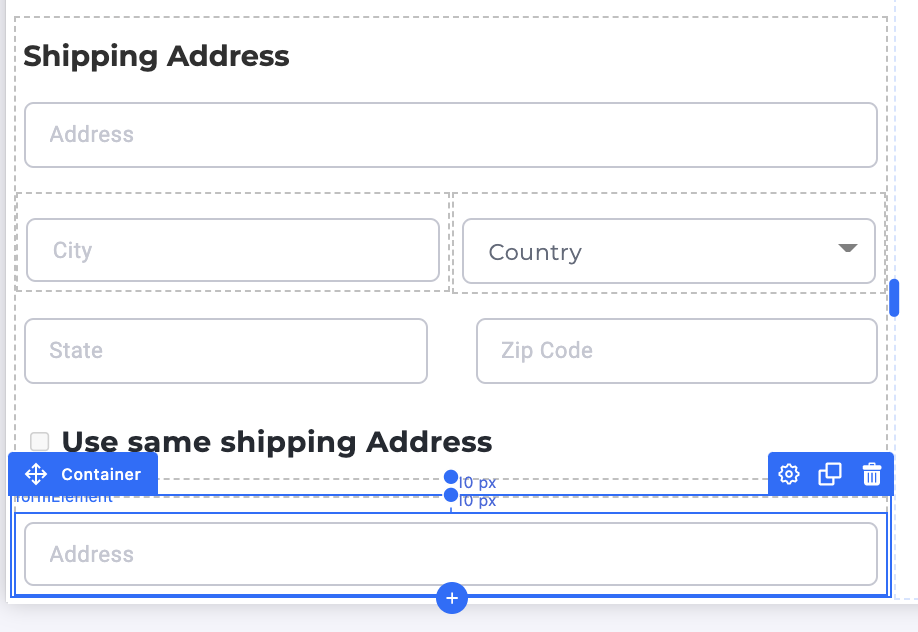
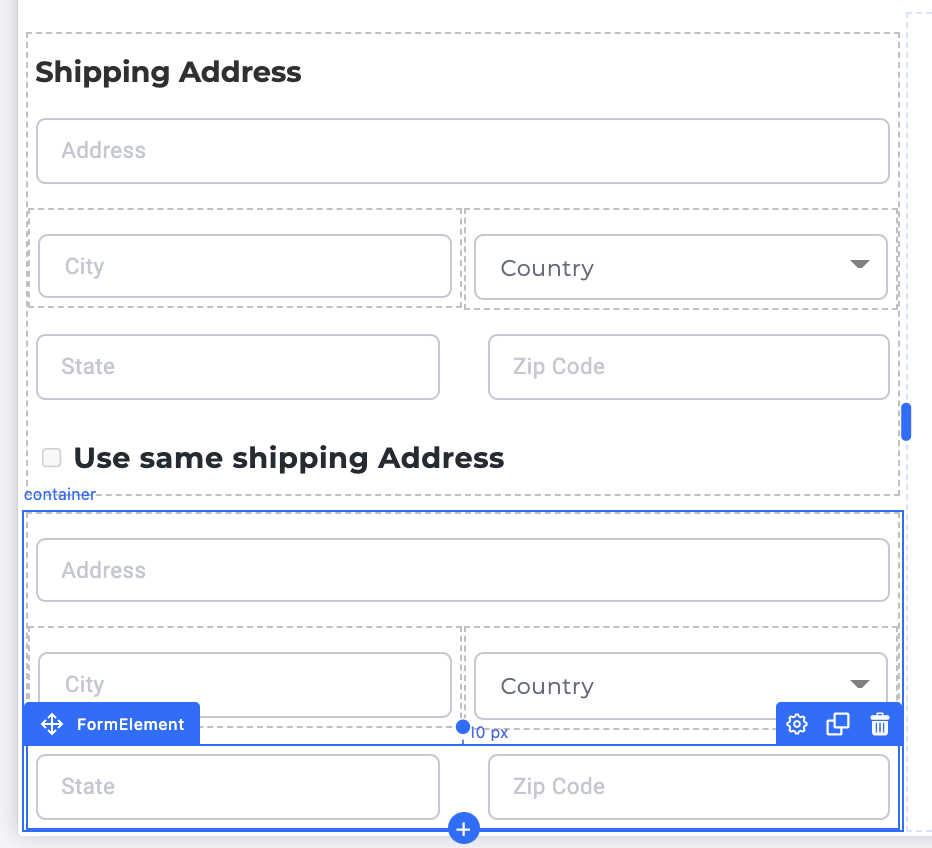
Add all of the shipping details just like the image below, and all other elements here are some details that need to be followed.
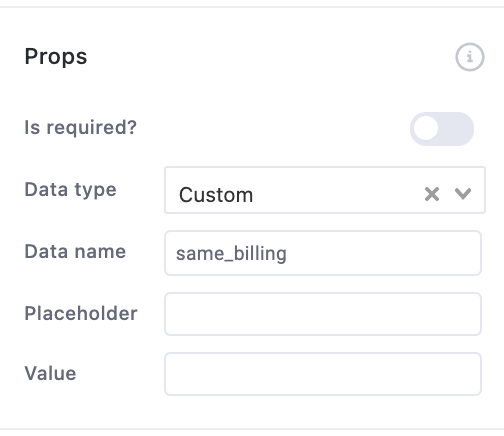
Make sure you set data names correctly.
-
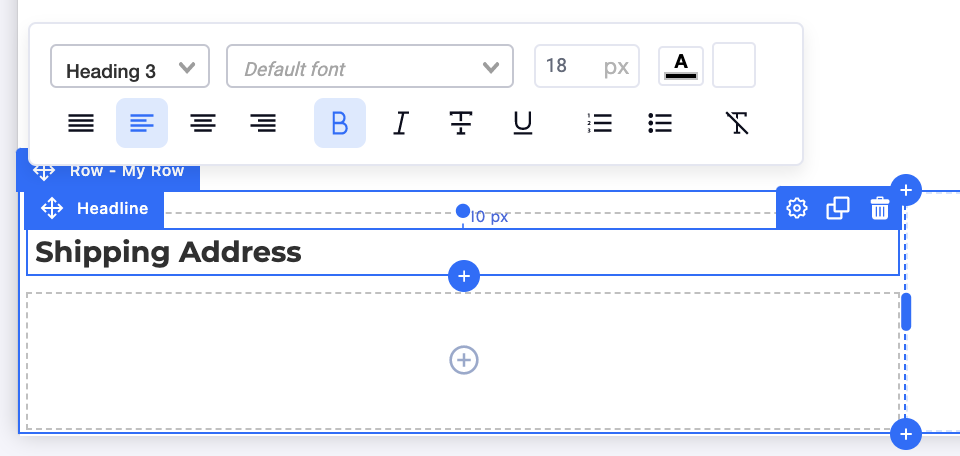
Shipping Address title.
-
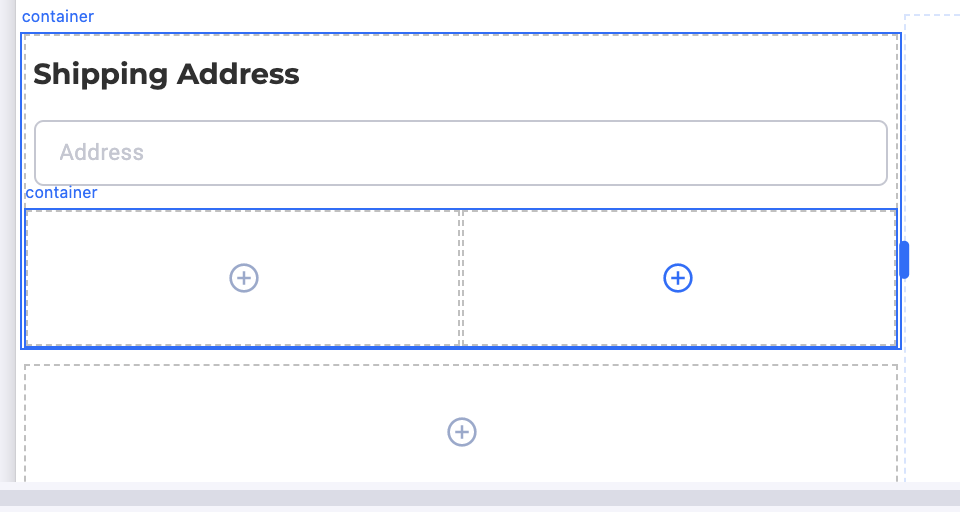
Shipping address information fields.
-
Input form for Address.
-
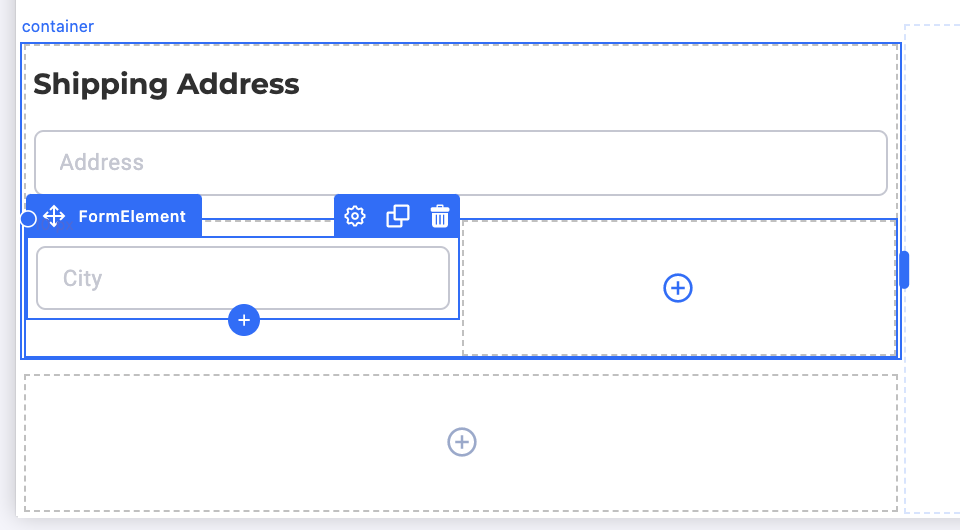
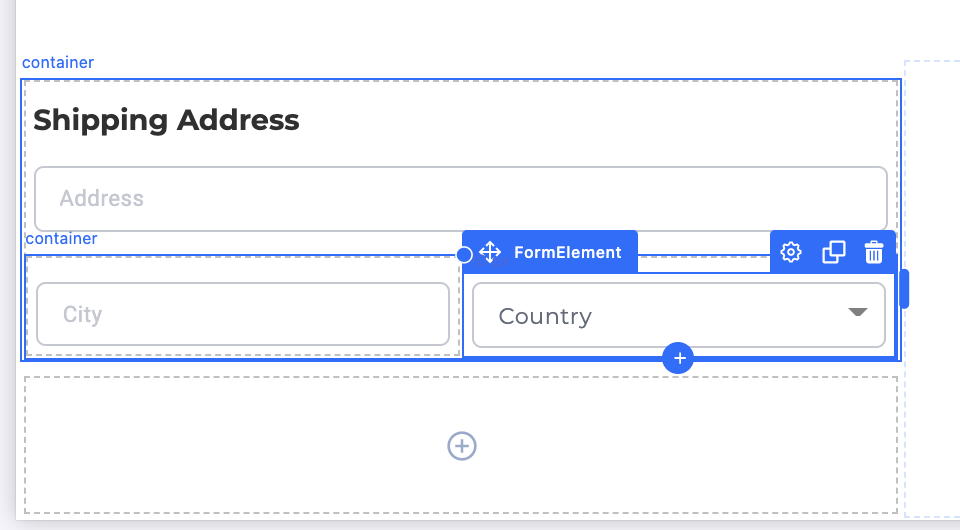
Container with two boxes containing.
-
Shipping City input Field.
-
Select the field for Shipping Country.
-
-
A double input Form Element (shipping state/shipping zip).
-
-
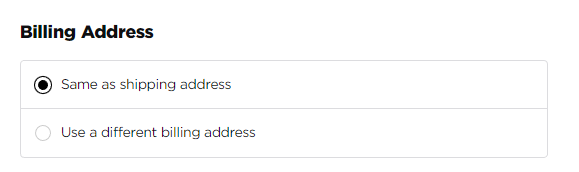
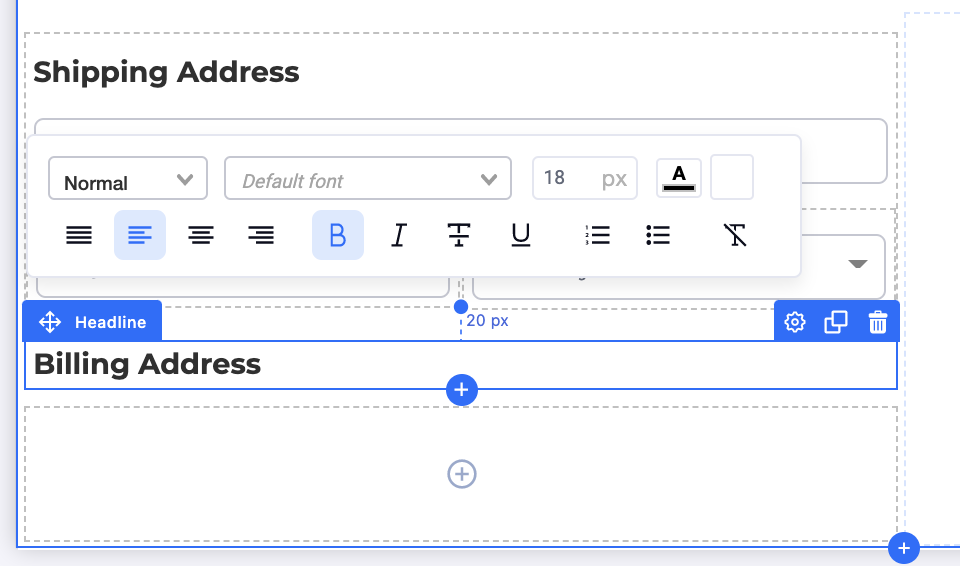
Billing Address Title
-
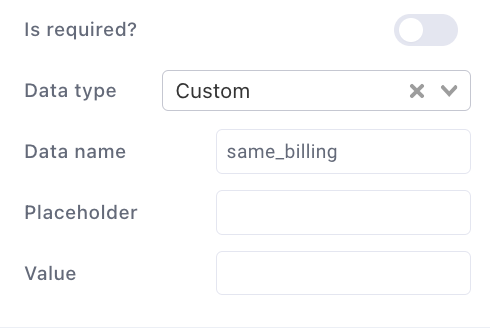
An Input Form of Type CheckBox (used to hide the billing address fields).
=> Ps: Now that you added the CheckBox form element make sure to give it the following details:

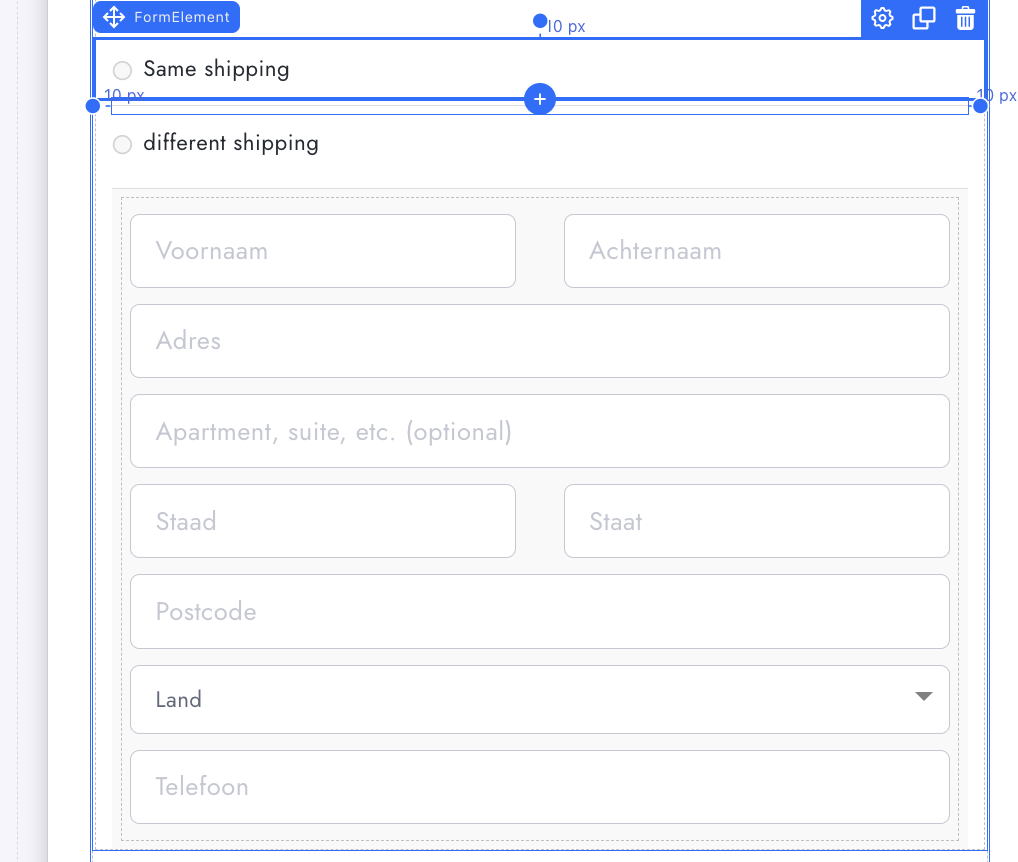
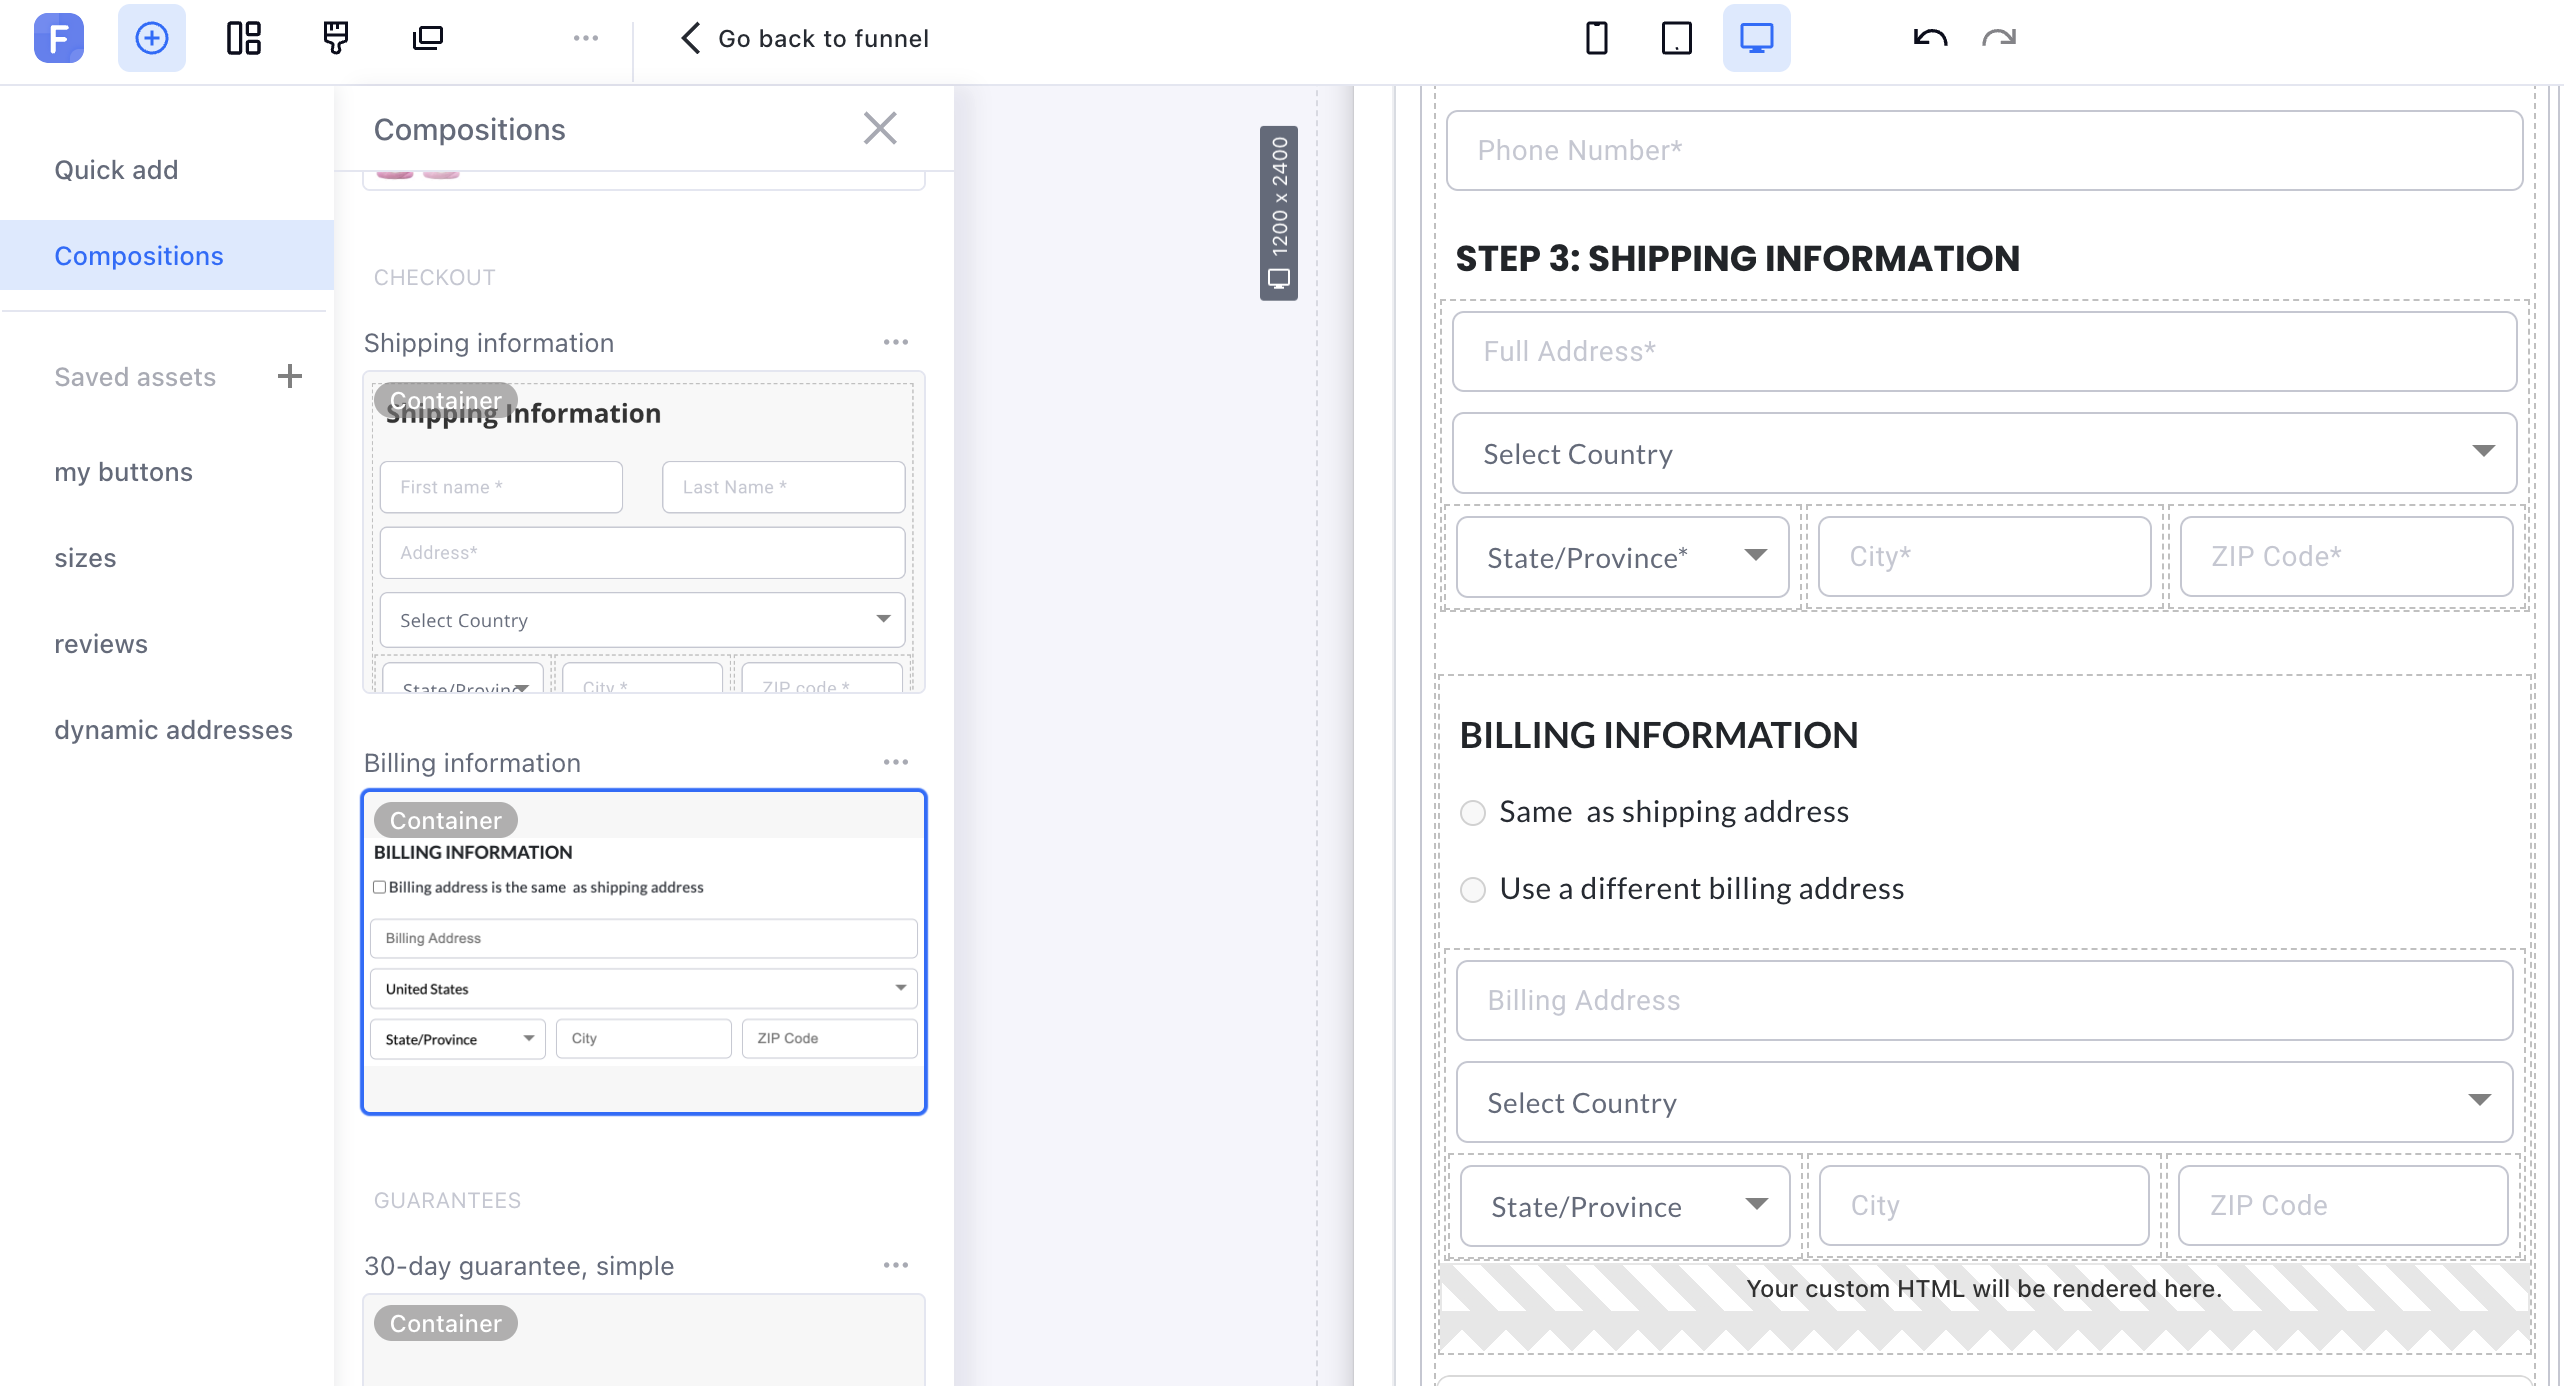
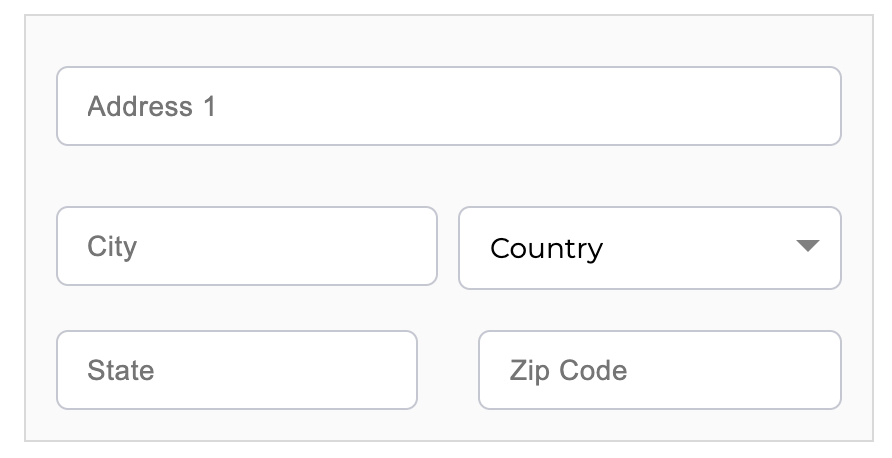
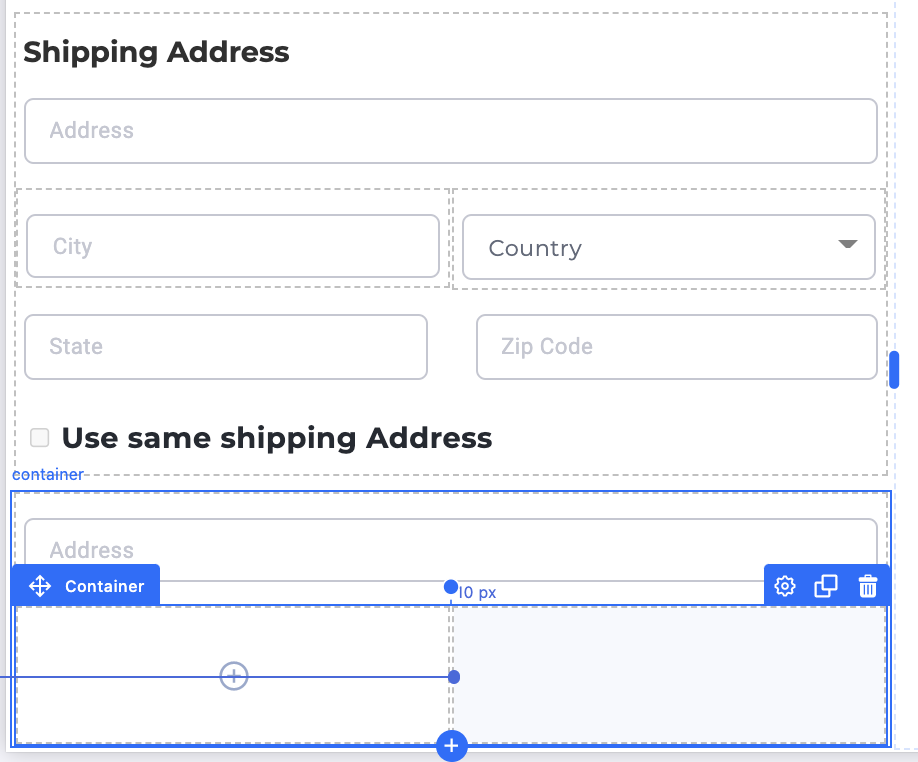
Step 2: Adding Billing details (Will be hidden when the checkbox is checked):
Same as shipping details, except that the elements should be combined in a single container, just make sure to set data names correctly.
Here is how we need it to be.
All the elements are combined inside a Container with a unique ID to be used to hide it using our script, you can do so by selecting the Container then heading to the left menu and clicking on Advanced, then giving it the ID “billing_container”.
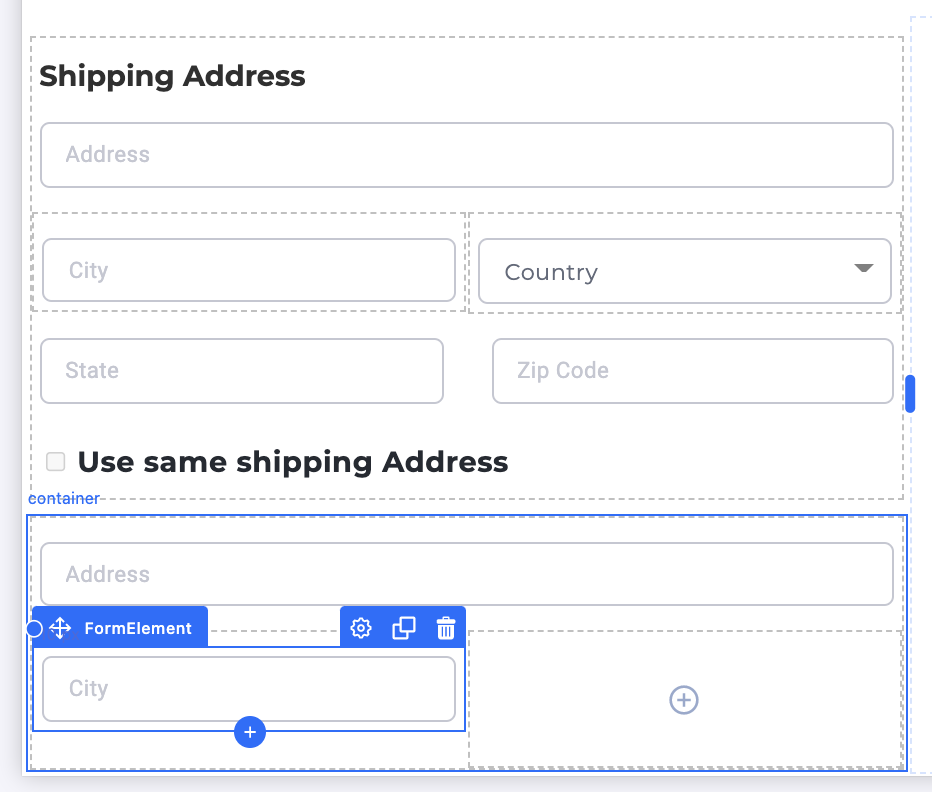
=> Here are the fields we need to add to the container:
- Billing Address information fields.
-
Input form for Address.
-
Container with two boxes.
-
An input for Billing City.
-
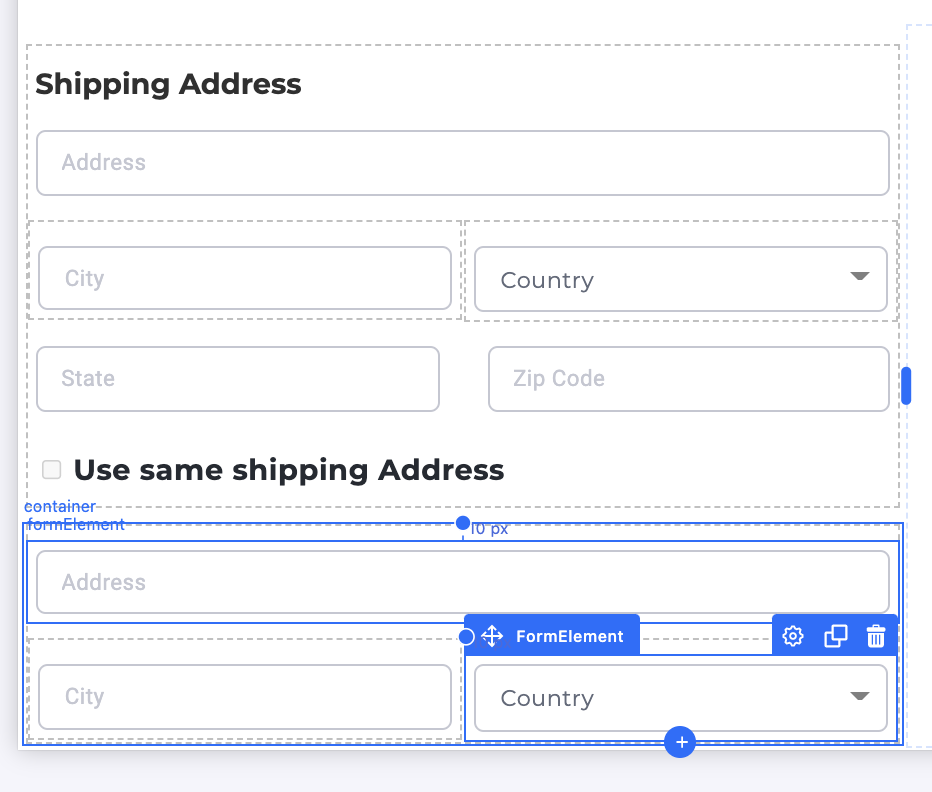
A Select Form Element for shipping City.
-
-
A double input Form Element.
-
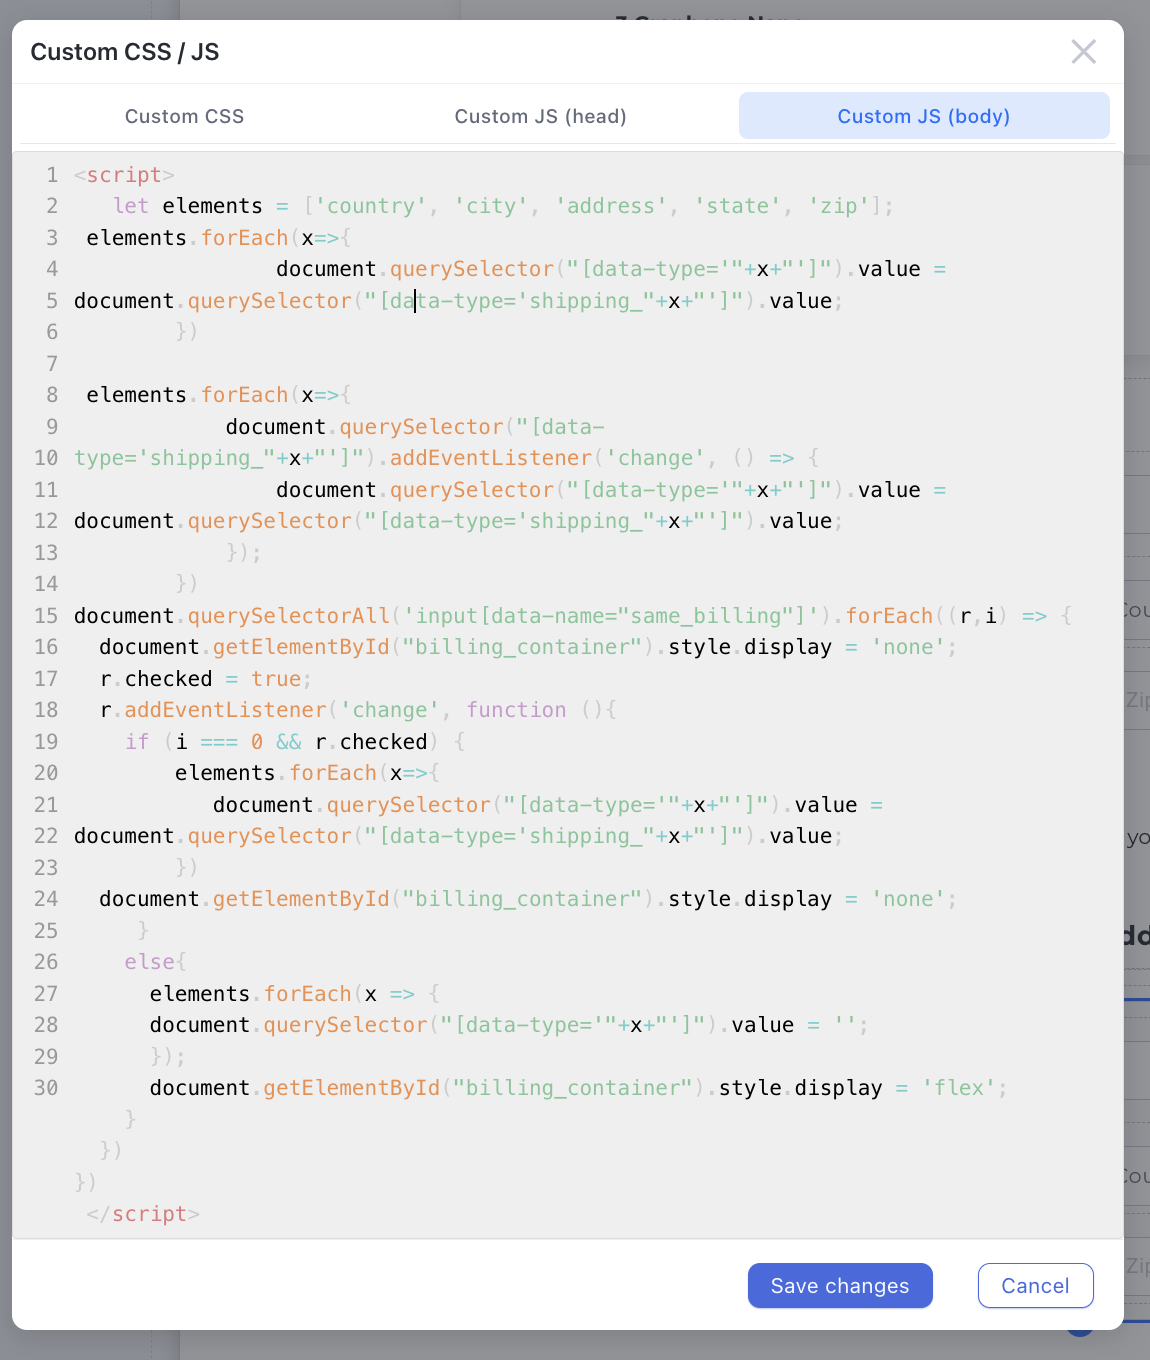
Step 3: Adding The Custom Code to Custom JS (body).
Again to the left Menu head to Custom Codes > Custom JS (Body) and paste this code into the box:
<script>
   let elements = ['country', 'city', 'address', 'state', 'zip'];
 elements.forEach(x=>{
                document.querySelector("[data-type='"+x+"']").value = document.querySelector("[data-type='shipping_"+x+"']").value;
        })

 elements.forEach(x=>{
            document.querySelector("[data-type='shipping_"+x+"']").addEventListener('change', () => {
                document.querySelector("[data-type='"+x+"']").value = document.querySelector("[data-type='shipping_"+x+"']").value;
            });
        })
document.querySelectorAll('input[data-name="same_billing"]').forEach((r,i) => {
  document.getElementById("billing_container").style.display = 'none';
  r.checked = true;
  r.addEventListener('change', function (){
    if (i === 0 && r.checked) {
        elements.forEach(x=>{
           document.querySelector("[data-type='"+x+"']").value =  document.querySelector("[data-type='shipping_"+x+"']").value;
        })
  document.getElementById("billing_container").style.display = 'none';
     }
    else{
      elements.forEach(x => {
      document.querySelector("[data-type='"+x+"']").value = '';
      });
      document.getElementById("billing_container").style.display = 'flex';
    }
  })
})
 </script>
Step 3: Styling (Optional).
Container 1:
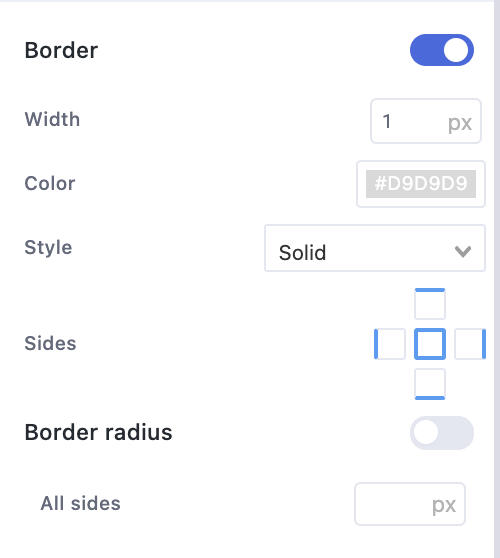
- Select the container and then at the left menu click background color:
and past this color:#FAFAFA - Scroll down then add a Border to the container: border-width:
1px; and border Color:#D9D9D9; style:solid;
You can also add some padding to the container (head to the Advanced tab in container options).
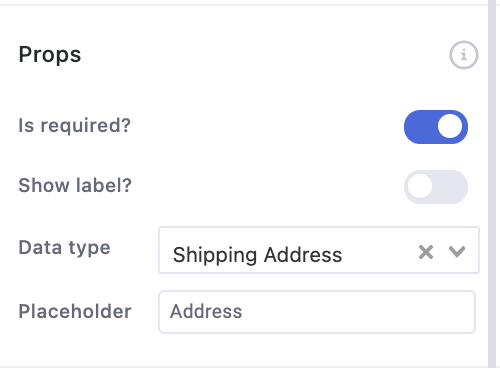
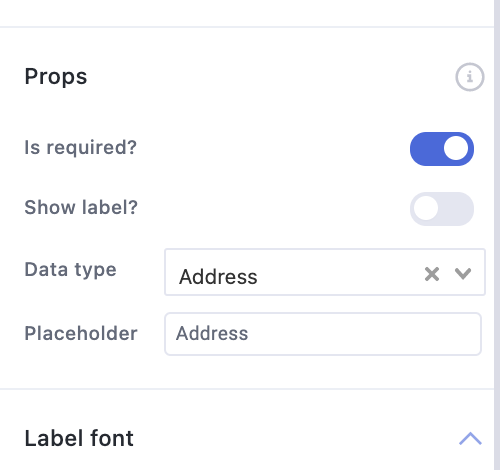
how to Set data names for input fields?
All input fields in the shipping container need to have properties look something like this:
PS: Data type needs to be changed for each element to the data the element is supposed to get.**Example (for the Address field)
>Shipping address field needs to have these options:
>Billing address field needs to have these options: