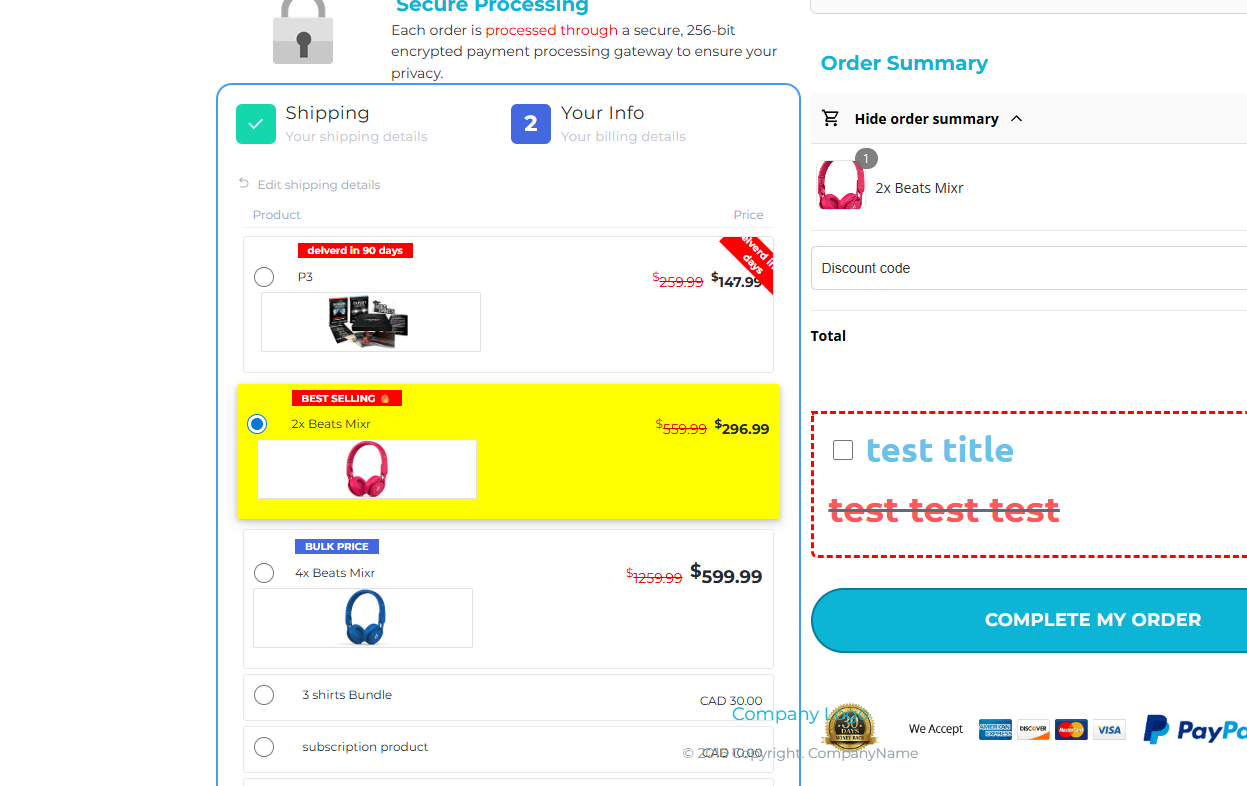
When customizing your funnel or product upsell on Step 2, you may want the product image to appear below the title, and the title and radio button to share the first row evenly. This can be done using custom CSS and JavaScript.
In Custom CSS, add the following code:
.pl-name {
  display: grid !important;
  grid-template-columns: 50% 50%;      /* first row: two equal columns */
  grid-template-rows: auto auto;       /* two rows */
  grid-template-areas:
    "radio title"   /* row 1 */
    "image image";  /* row 2: image spans full width */
  align-items: center;  /* vertically center row 1 items */
  gap: 8px;              /* spacing between rows and columns */
  width: 100%;
}

/* Assign grid areas */
.pl-radio {
  grid-area: radio;
}

.pl-nvalue {
  grid-area: title;
}

.pl-image {
  grid-area: image;
  width: 100%;           /* image fills full row */
  max-width: 220px;      /* adjust as needed */
  justify-self: center;  /* center image horizontally */
}

.pl-image img {
  width: 100%;
  height: auto;
  display: block;
}

label.pl-inner {
    align-items: baseline;
}

.product-list .pl-item .pl-image{
width: 100%
}
Go to Body HTML in your funnel editor and add:
<script>
setTimeout(() => {
document.querySelectorAll(‘.pl-item’).forEach(item => {
const nameWrapper = item.querySelector(‘.pl-name’);
const image = item.querySelector(‘.pl-image’);
const title = item.querySelector(‘.pl-nvalue’);
if (nameWrapper && image && title) {
// Move image below the title
nameWrapper.insertBefore(image, title.nextSibling);
}
});
}, 1000);
</script>