PostHog is a powerful product analytics tool that helps you understand how users interact with your funnel, from page views to clicks, experiments, and more.
In this guide, we’ll walk through how to correctly add PostHog tracking to your Funnelish funnel so you can start monitoring behavior and running experiments.
Step 1: Copy Your PostHog Web Snippet
- Log in to your PostHog account
- In the left sidebar, go to Settings
- Locate the Web snippet section
- Replace
'identified_only'toperson_profiles: 'always' - Copy the full JavaScript snippet provided by PostHog
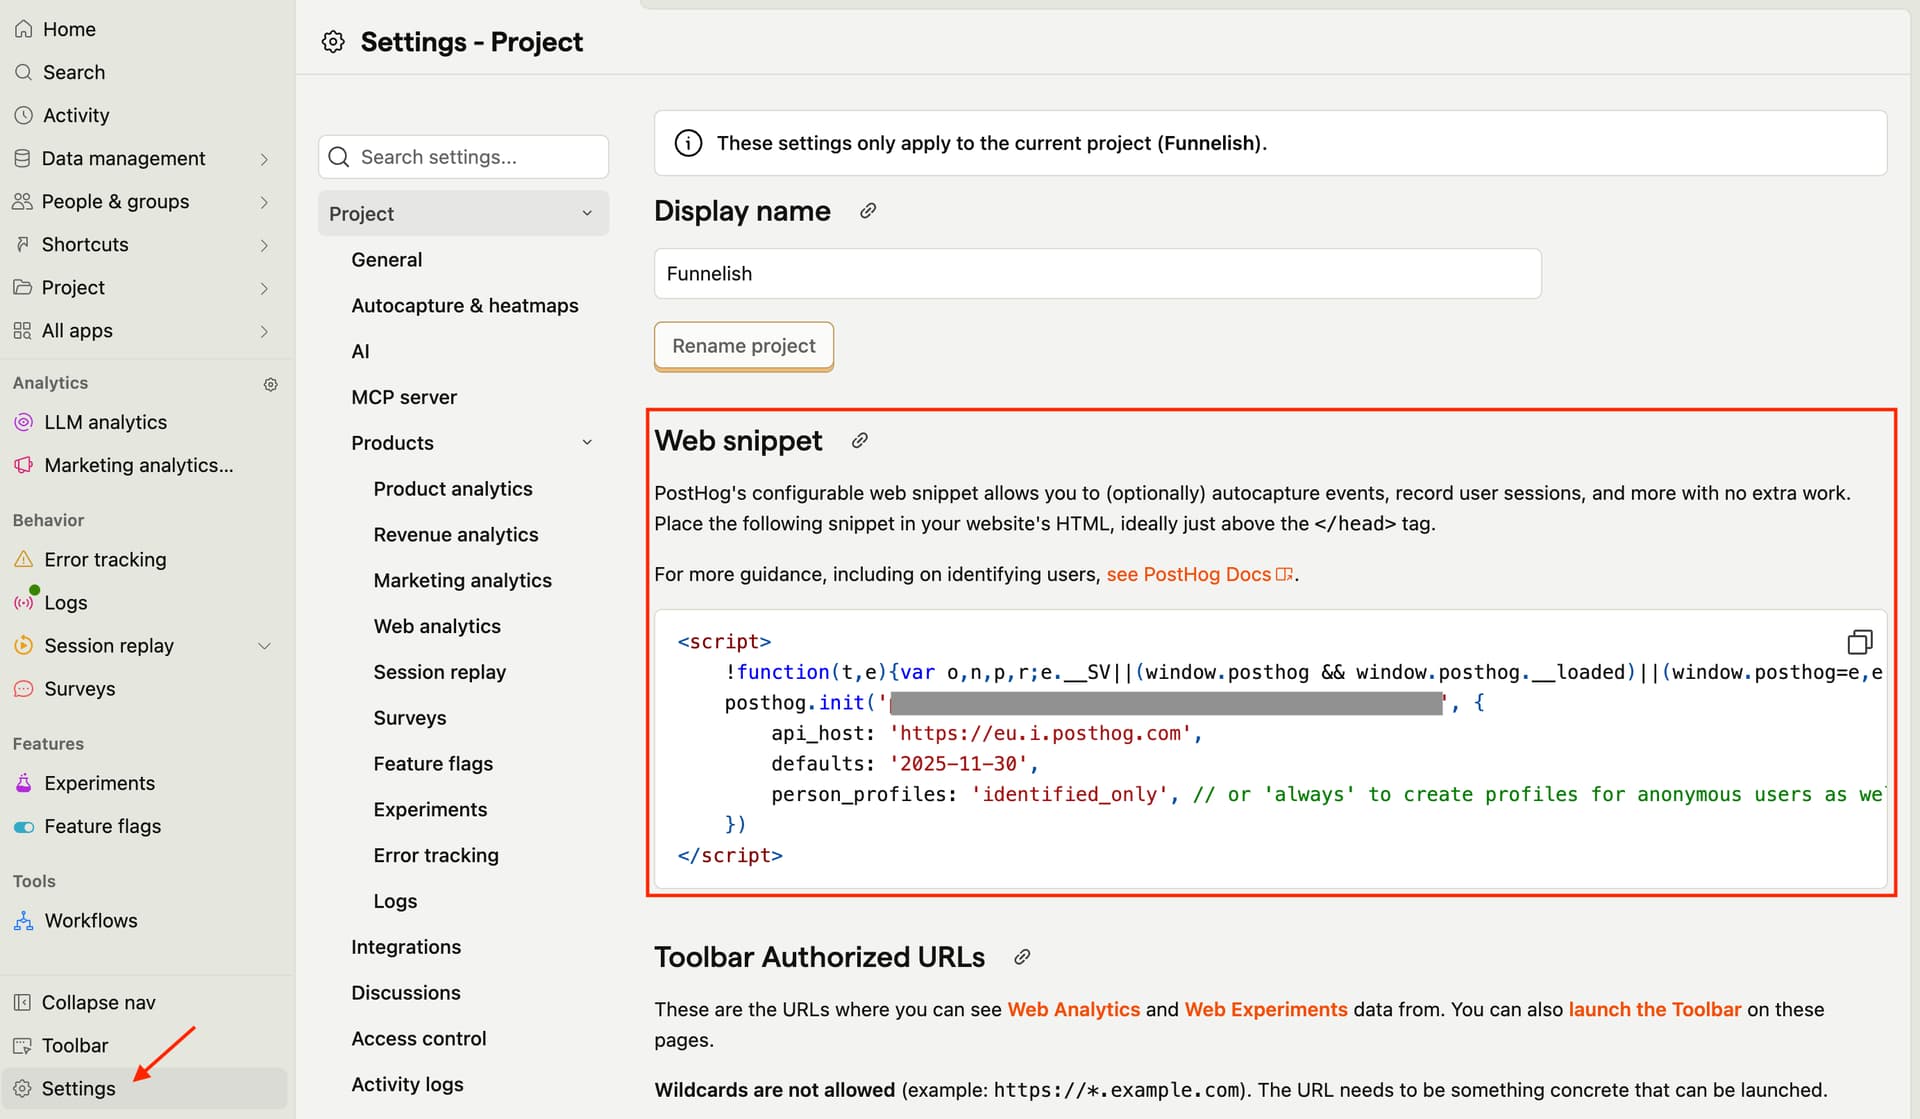
This snippet is what enables tracking on your funnel pages.
Step 2: Add the Snippet to Funnelish
- Log in to your Funnelish account
- Open the funnel you want to track
- In the left sidebar, go to Funnel Settings
- Click Custom Codes
- Paste the PostHog snippet into: Custom Codes → Head*
- Save your changes
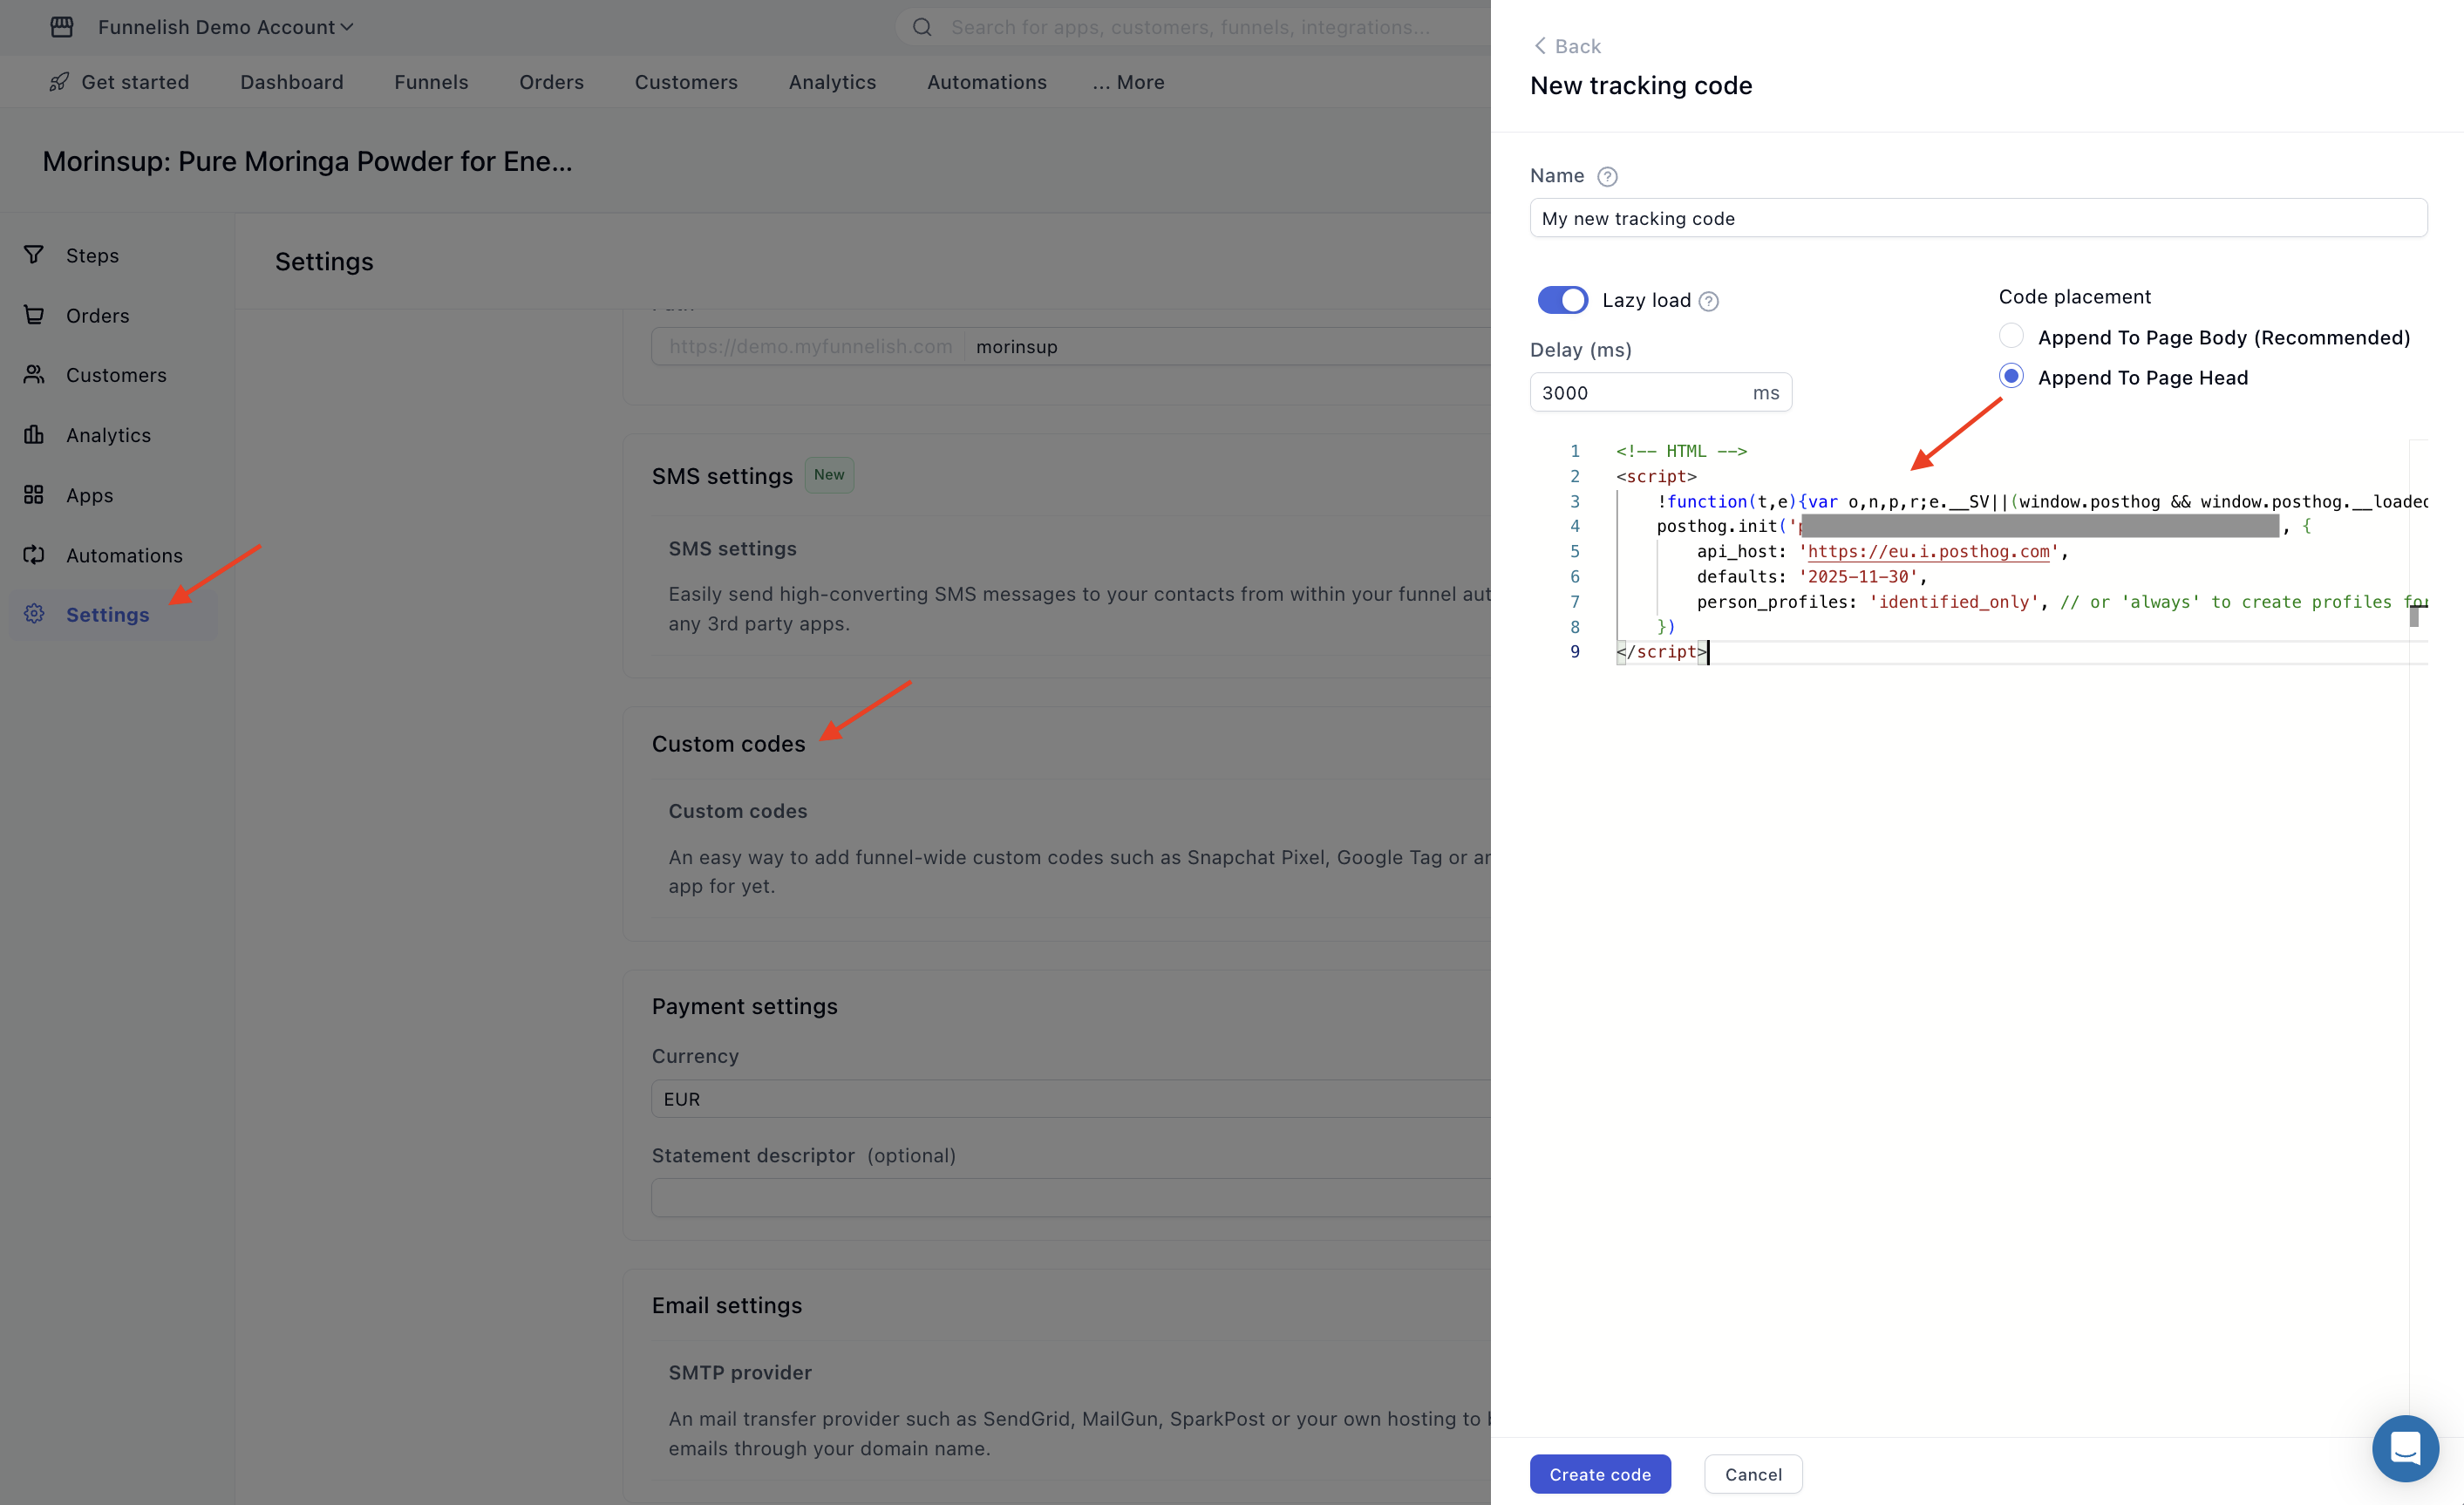
Once saved, PostHog will load on all pages within that funnel.
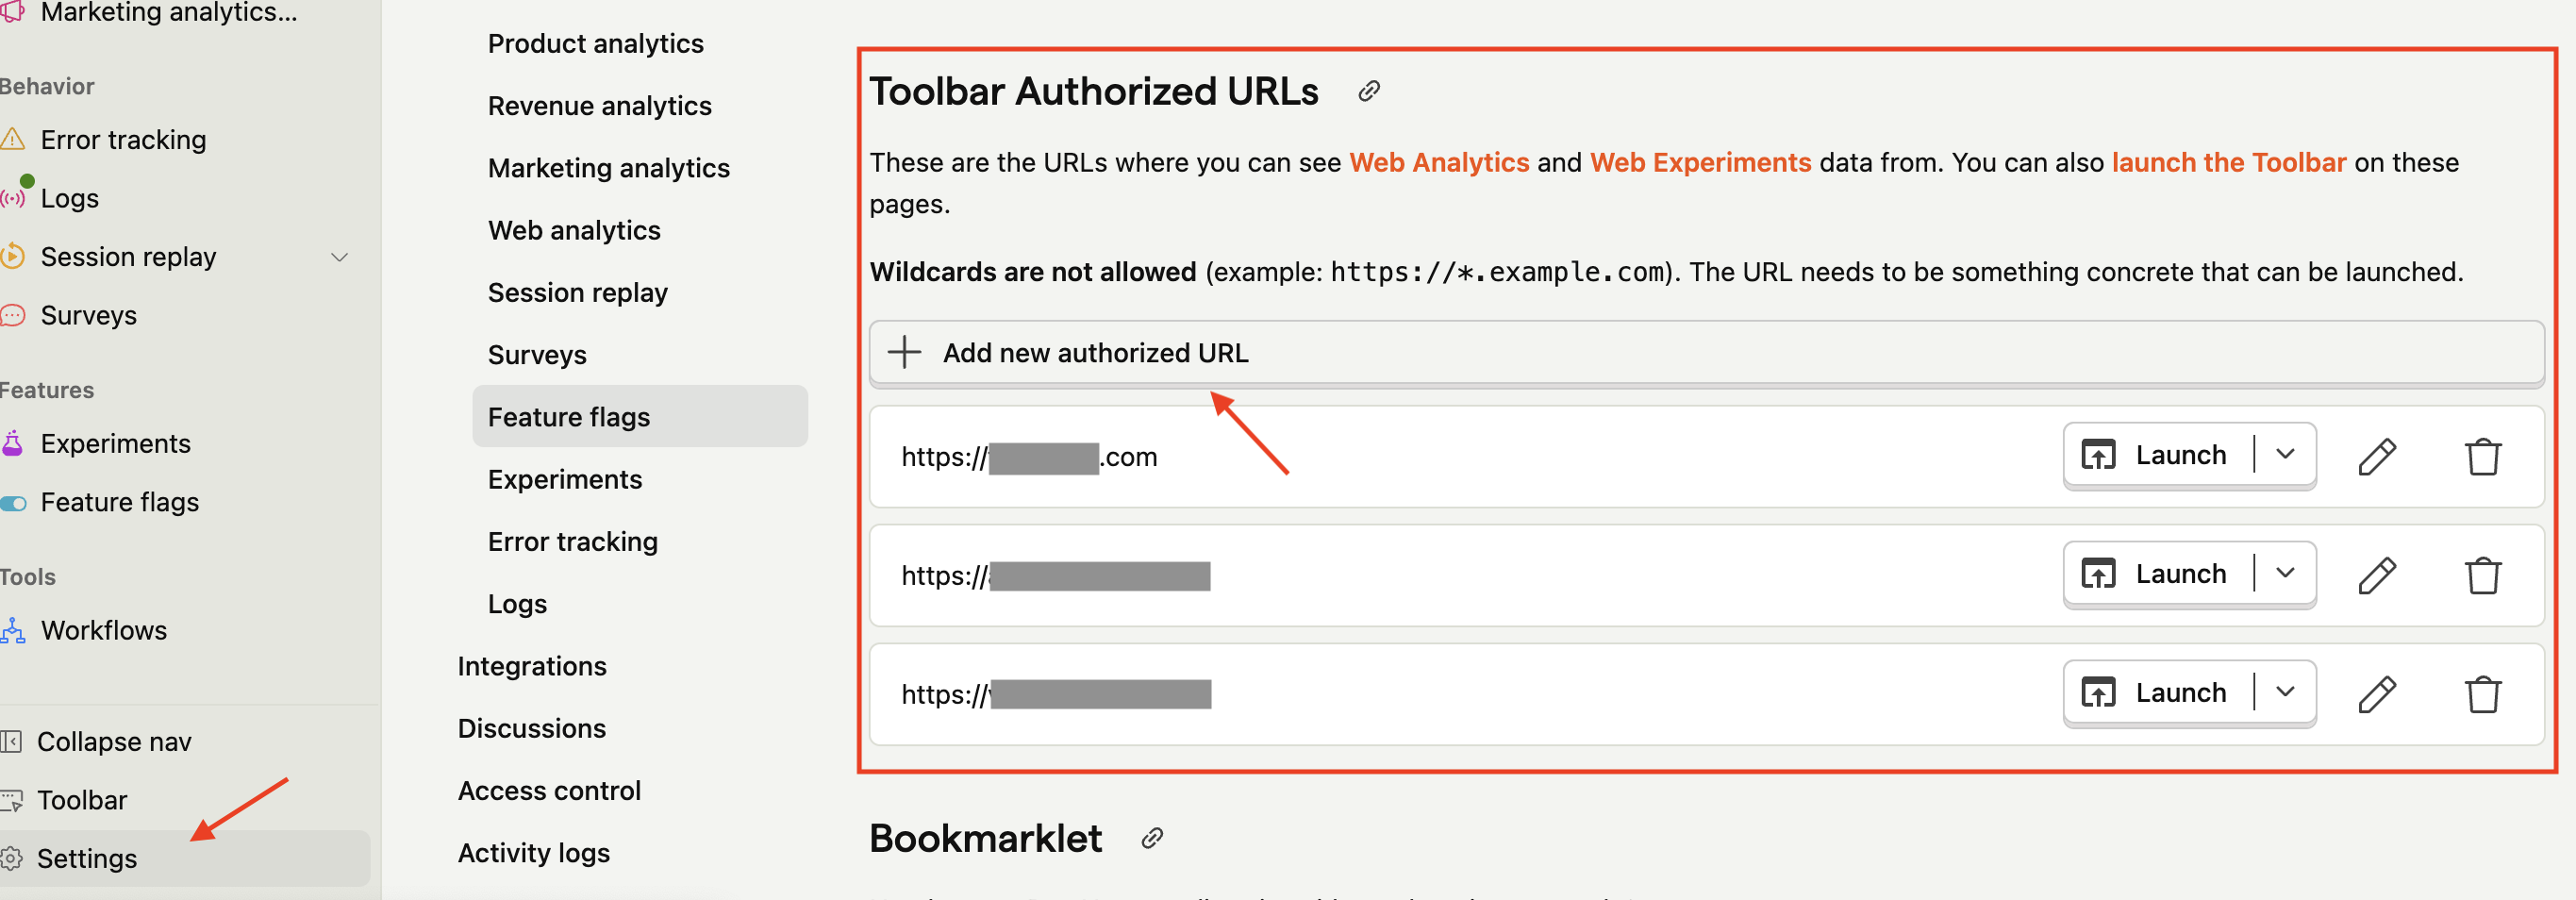
Step 3: Add Authorized URLs in PostHog (Important)
To fully use PostHog features like Web Analytics, Experiments, and the Toolbar, you need to authorize your funnel URLs.
- Go back to PostHog
- Navigate to Settings
- Find Toolbar Authorized URLs
- Add your Funnelish funnel URLs (for example: your live domain or preview domain)
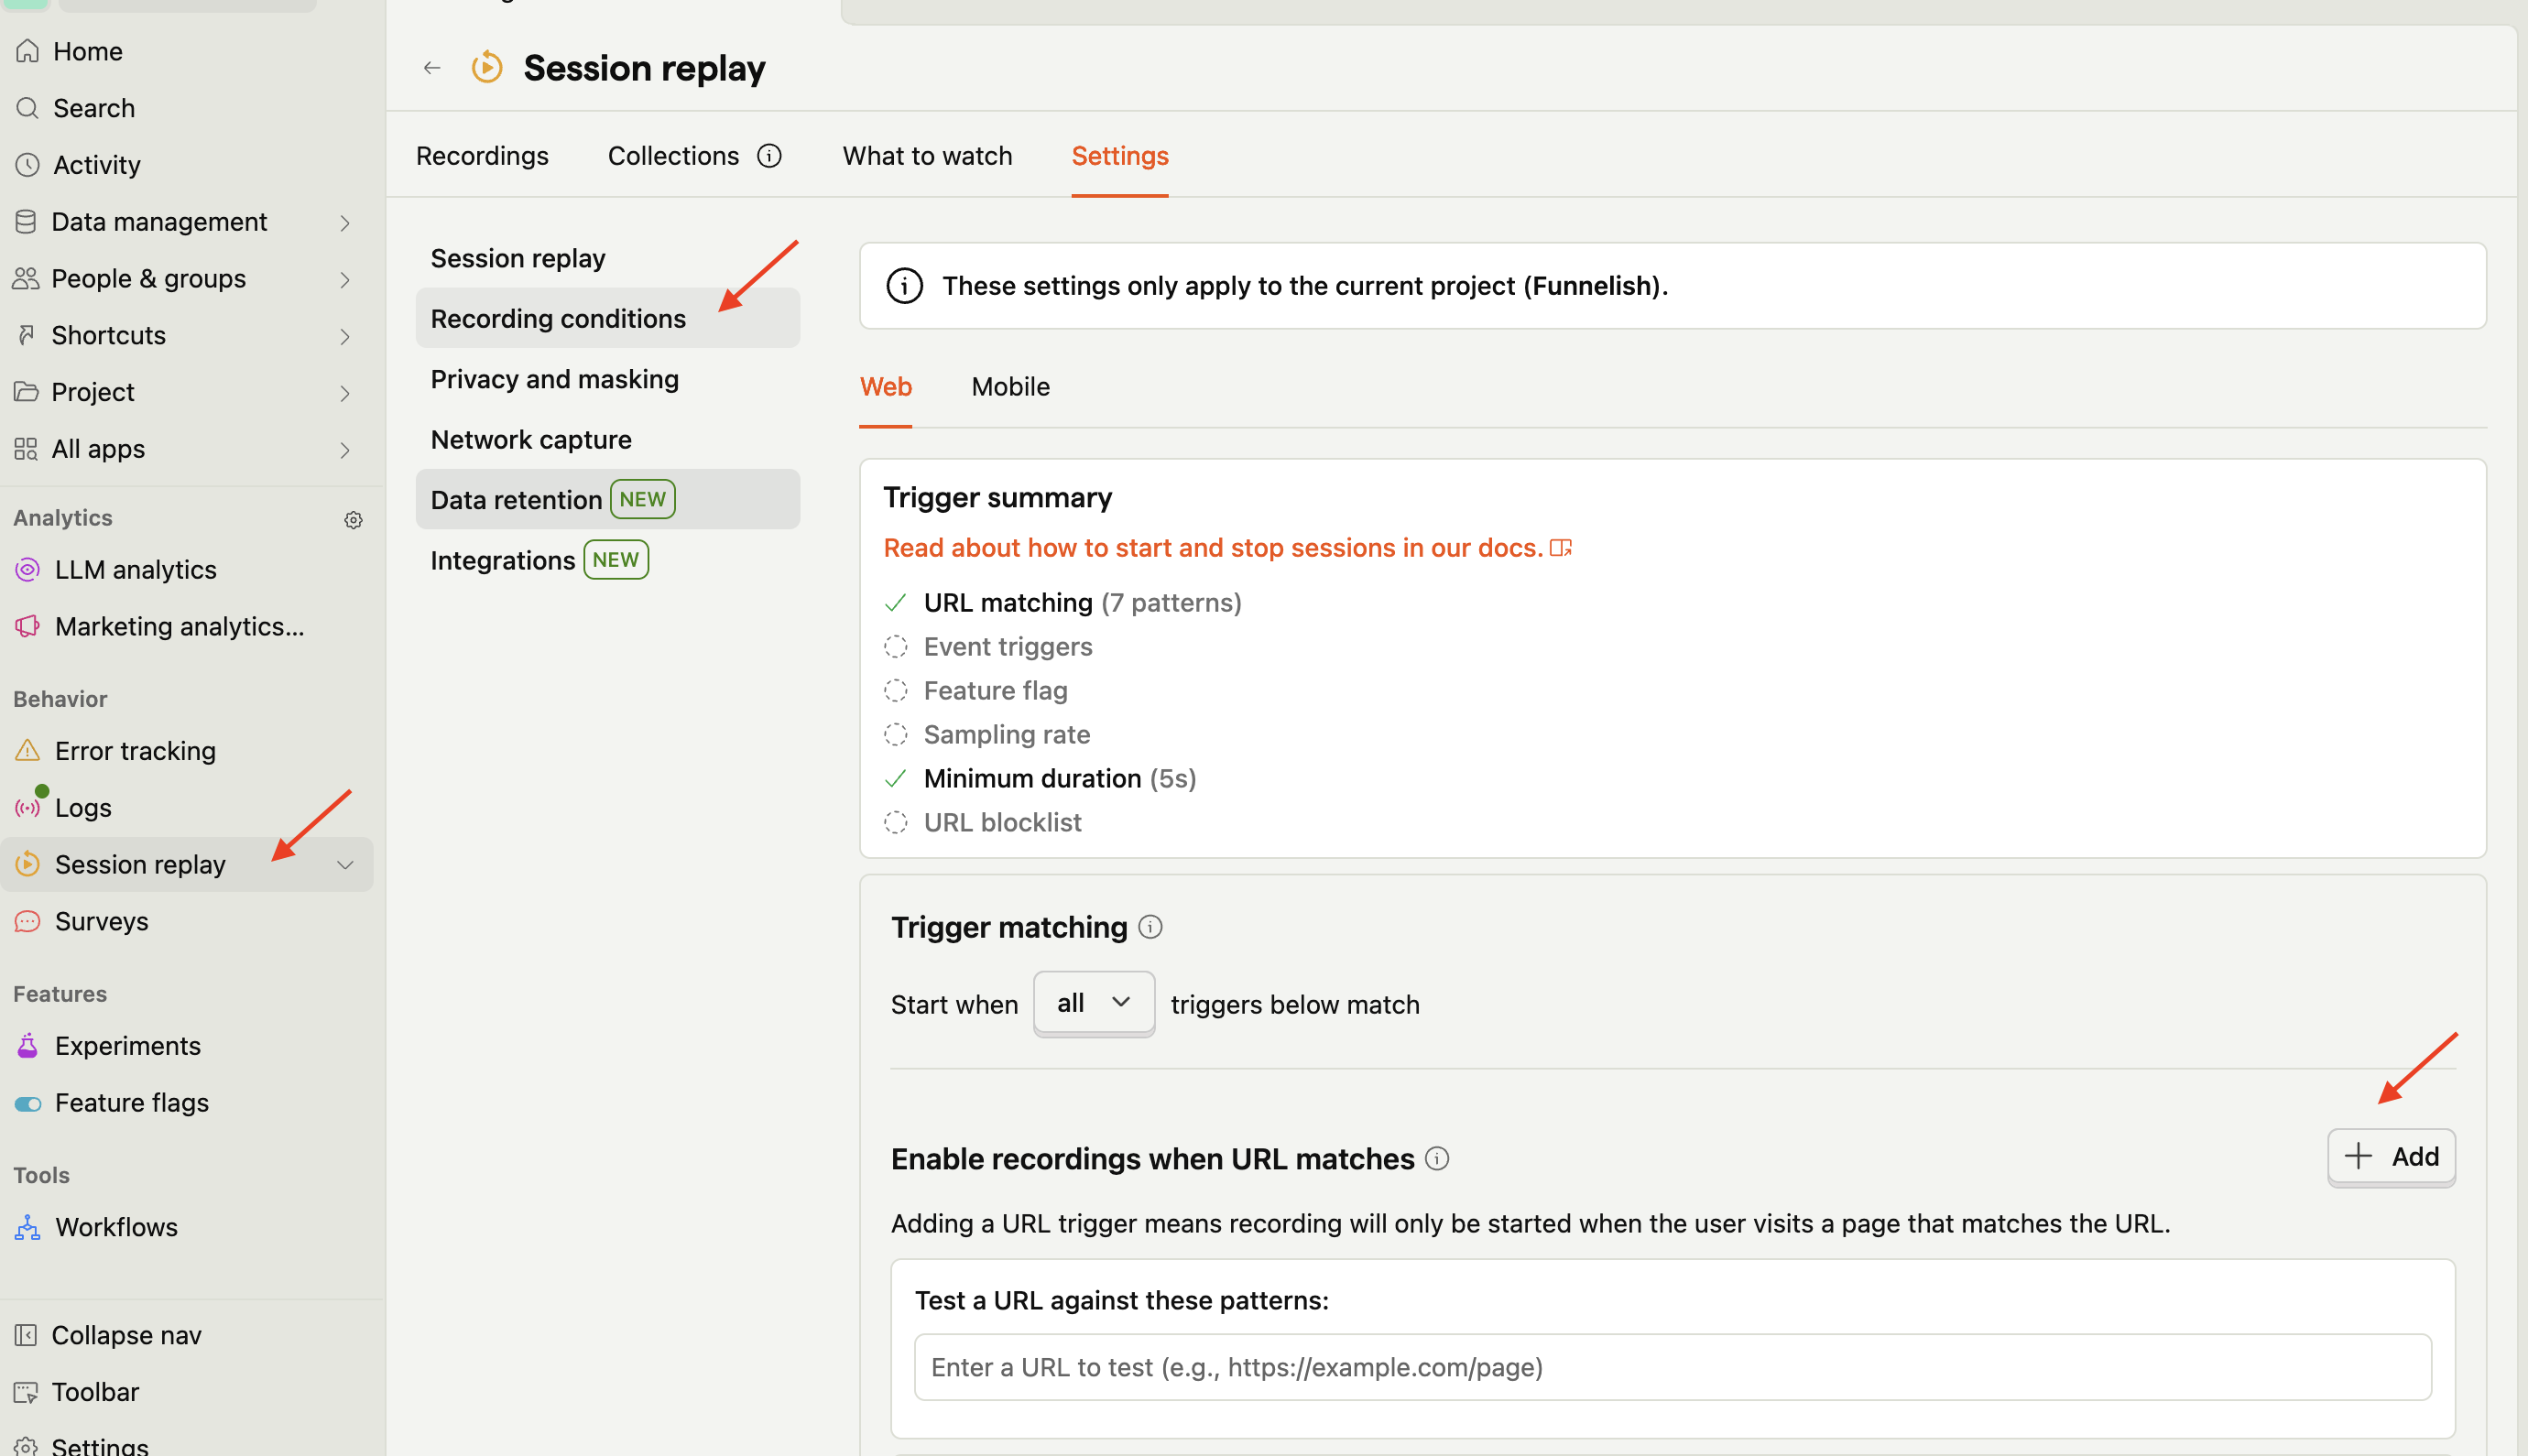
- Lastly, head to Session Replay > Recording Conditions > URL’s and re-add your URL’s
These URLs allow you to:
- View Web Analytics data
- Run and inspect experiments
- Launch the PostHog Toolbar directly on your funnel pages
That’s It 
Once these steps are complete:
- PostHog will start tracking visits and interactions
- You’ll be able to analyze funnel behavior
- You can use experiments and insights to optimize conversions
If you don’t see data immediately, give it a few minutes and refresh your PostHog dashboard.