Want to pinpoint your ad ROI with laser accuracy and seamlessly segment your customers based on their exact behavior?
By natively integrating Funnelish with Hyros, you can effortlessly track leads and orders, passing crucial data back to your tracking platform to feed your ad algorithms and trigger targeted follow-up campaigns.
Watch the quick setup overview here:

Setting up your Hyros integration requires just two steps: linking your accounts via API, and creating an automation inside your funnel to tell Funnelish when to send data.
Step 1: Link Your Hyros Account
First, you need to grab your API key from Hyros so Funnelish has permission to send data to your workspace.
Copy Your Hyros API Key
- Log in to your Hyros account.
- Click Settings on the left-hand navigation menu.
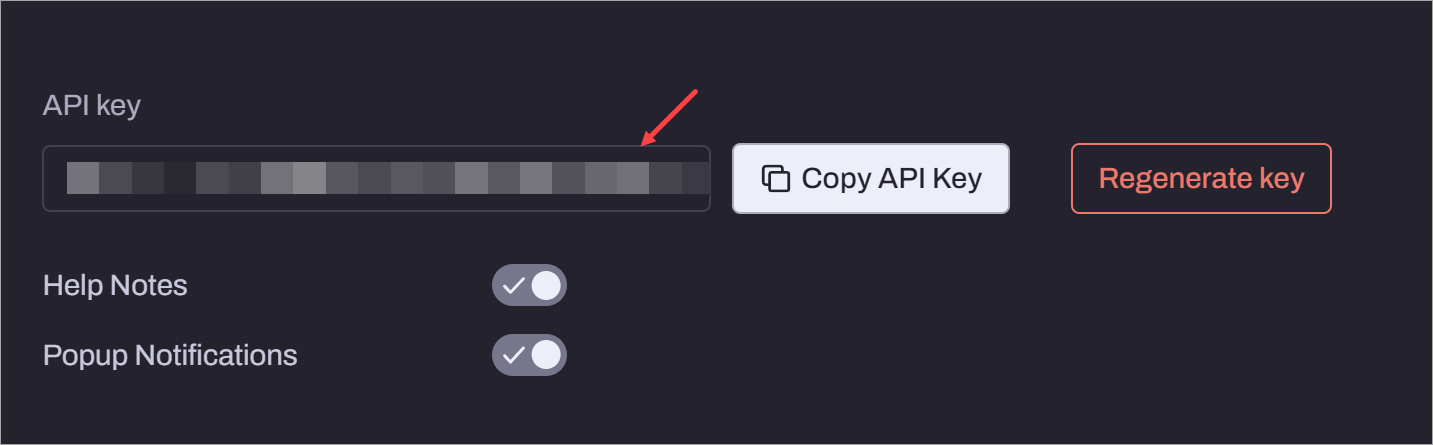
- Scroll down to the API section.
- Copy your existing API key (or generate a new one specifically for Funnelish).
Connect the Integration in Funnelish
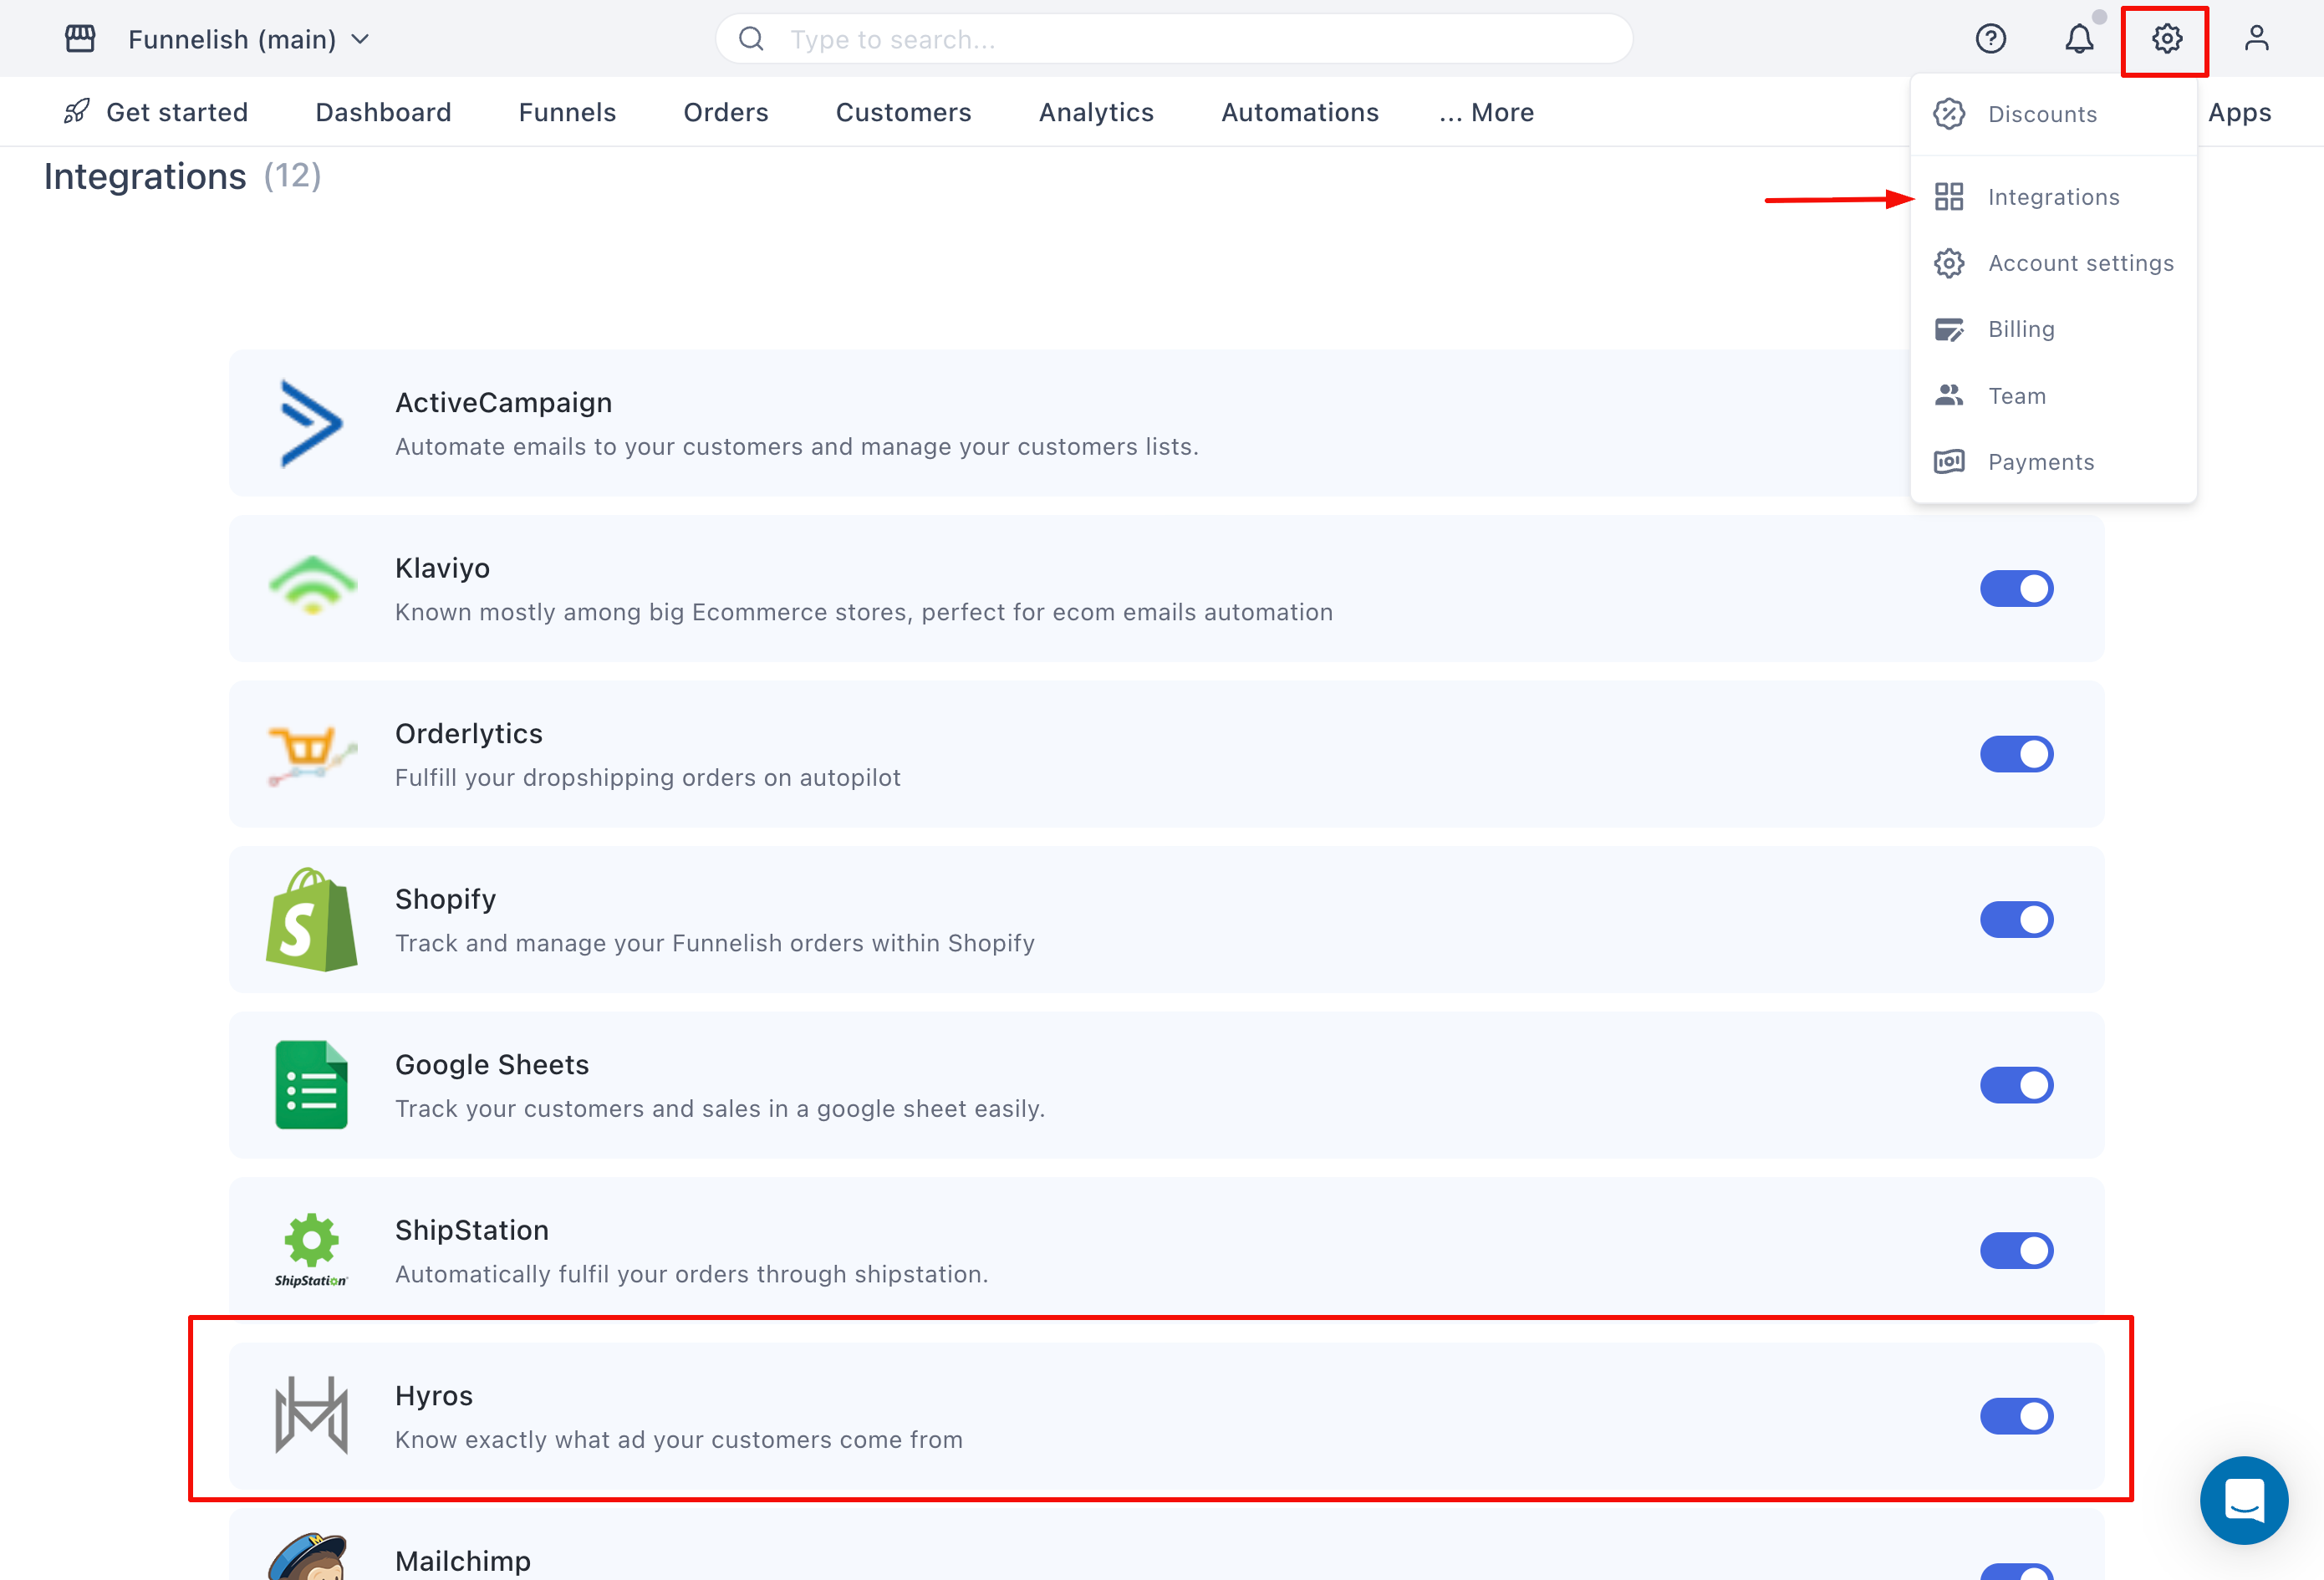
- Open up your Funnelish dashboard.
- Click the Settings icon in the top right corner.
- Select Integrations from the menu.
- Scroll through the app list and click Hyros.
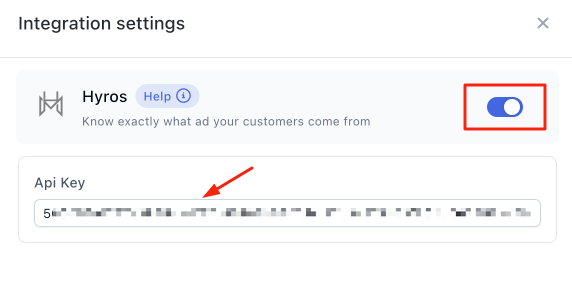
- Click the toggle switch to turn the integration On.
- Paste the API key you copied from Hyros into the empty field.
- Click Save changes.
You are now successfully connected to Hyros! Now, let’s build the automation to start passing data.
Step 2: Build Your Funnel Automation
You need to tell Funnelish which funnel actions should trigger data to be sent to Hyros.
Set the Trigger
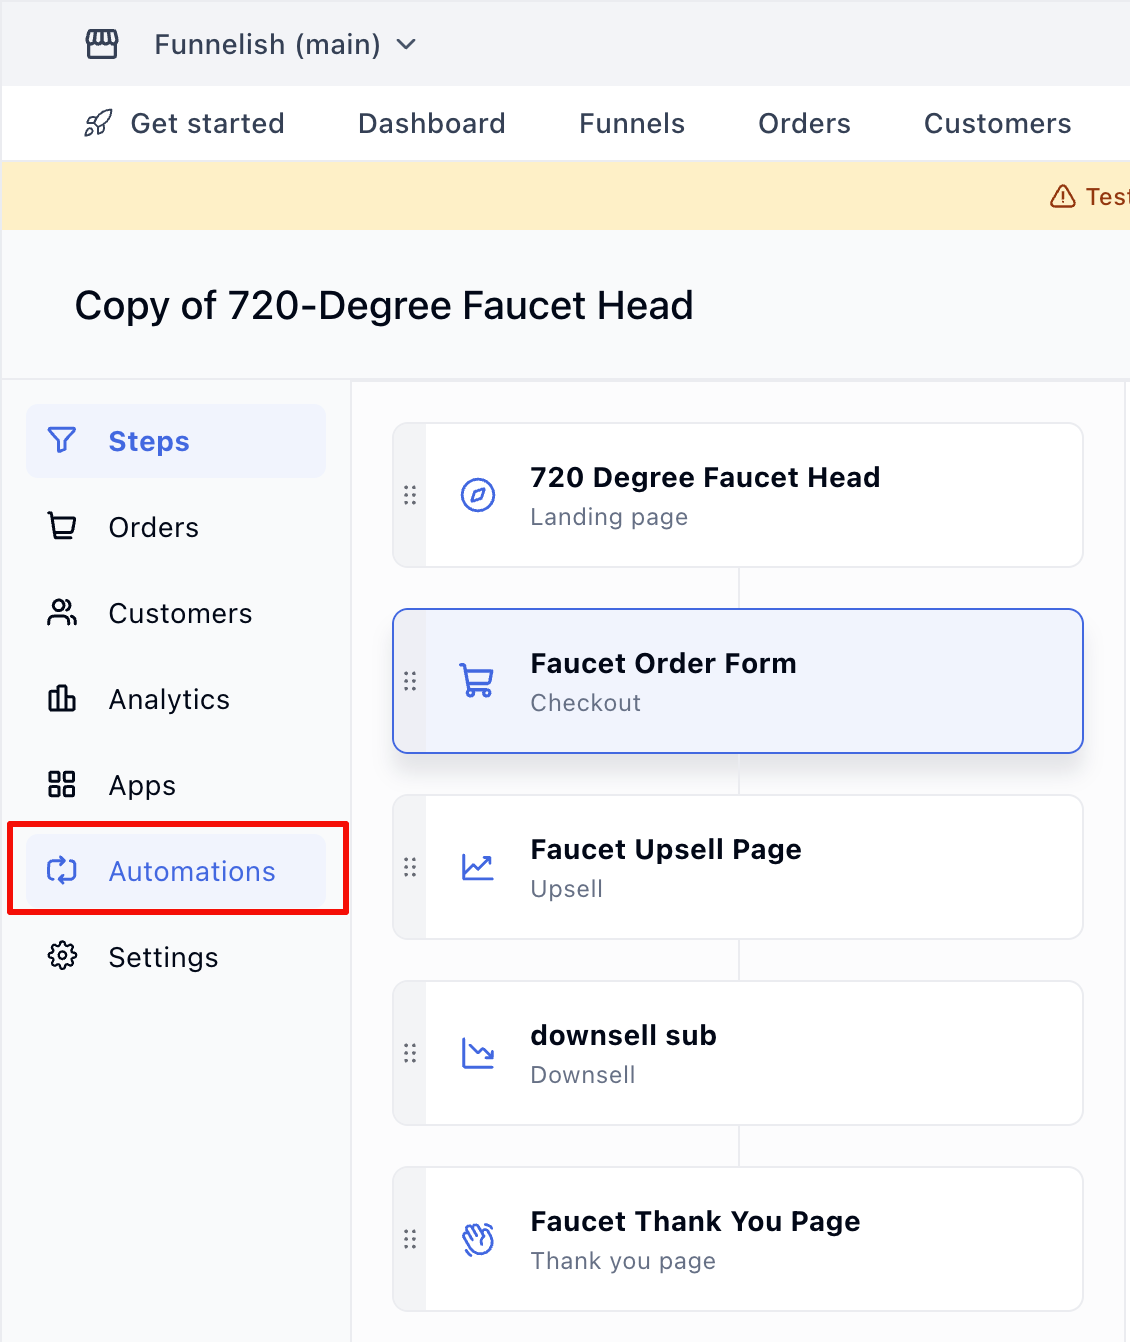
- Open the specific funnel you want to track.
- Click on Automations in the left-side panel.
- Click Create a new automation, select Start from scratch, and hit Create.
- Click Add a new trigger.
- Choose the action that will start the automation (e.g., On Purchase to track buyers, or On Optin to track leads).
- Under the Trigger on field, select the specific funnel step(s) where this action occurs.
- Click Create.
Configure the Hyros Action
Now you will tell Funnelish what to do when that trigger fires.
- Click the plus (+) icon below your newly created trigger.
- Go to Integration > Hyros.
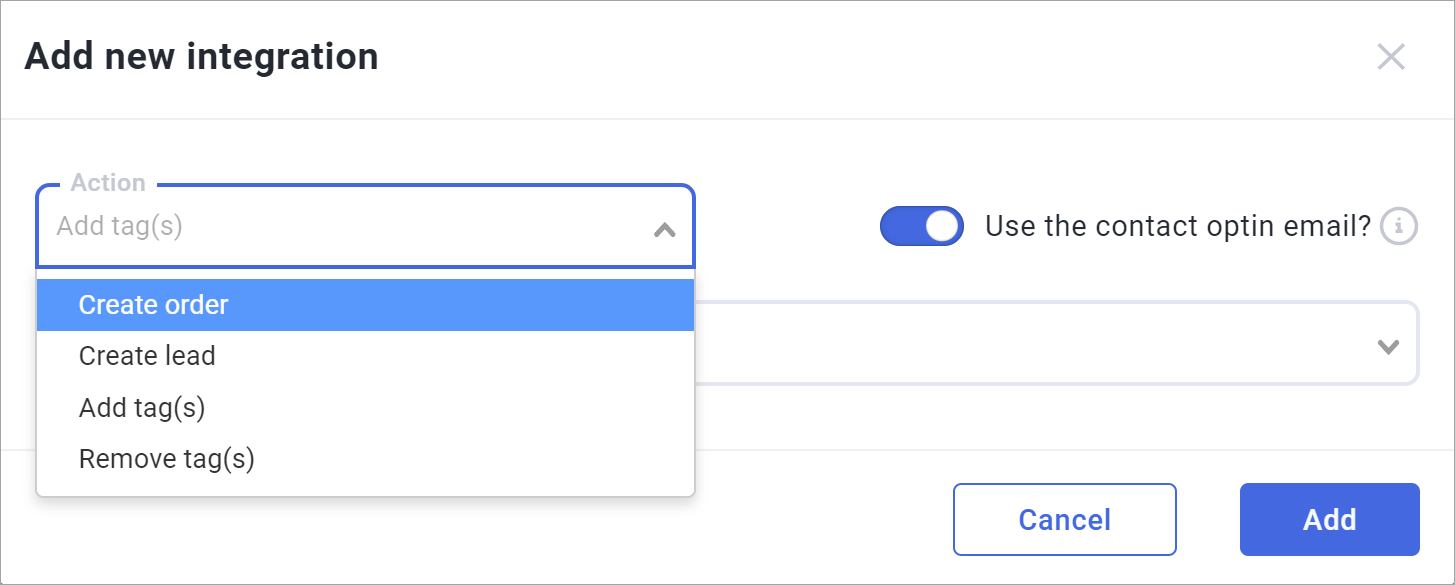
- Click the Action drop-down field and select what you want to do: Create order or Create lead.
Important Update: Please do not select the tag options (Add Tag or Remove Tag). These tag actions are being deprecated. Use “Create order” or “Create lead” instead.
- (Optional) You can toggle on the option to trigger from the contact’s opt-in email, which is helpful if they use a different email for their purchase.
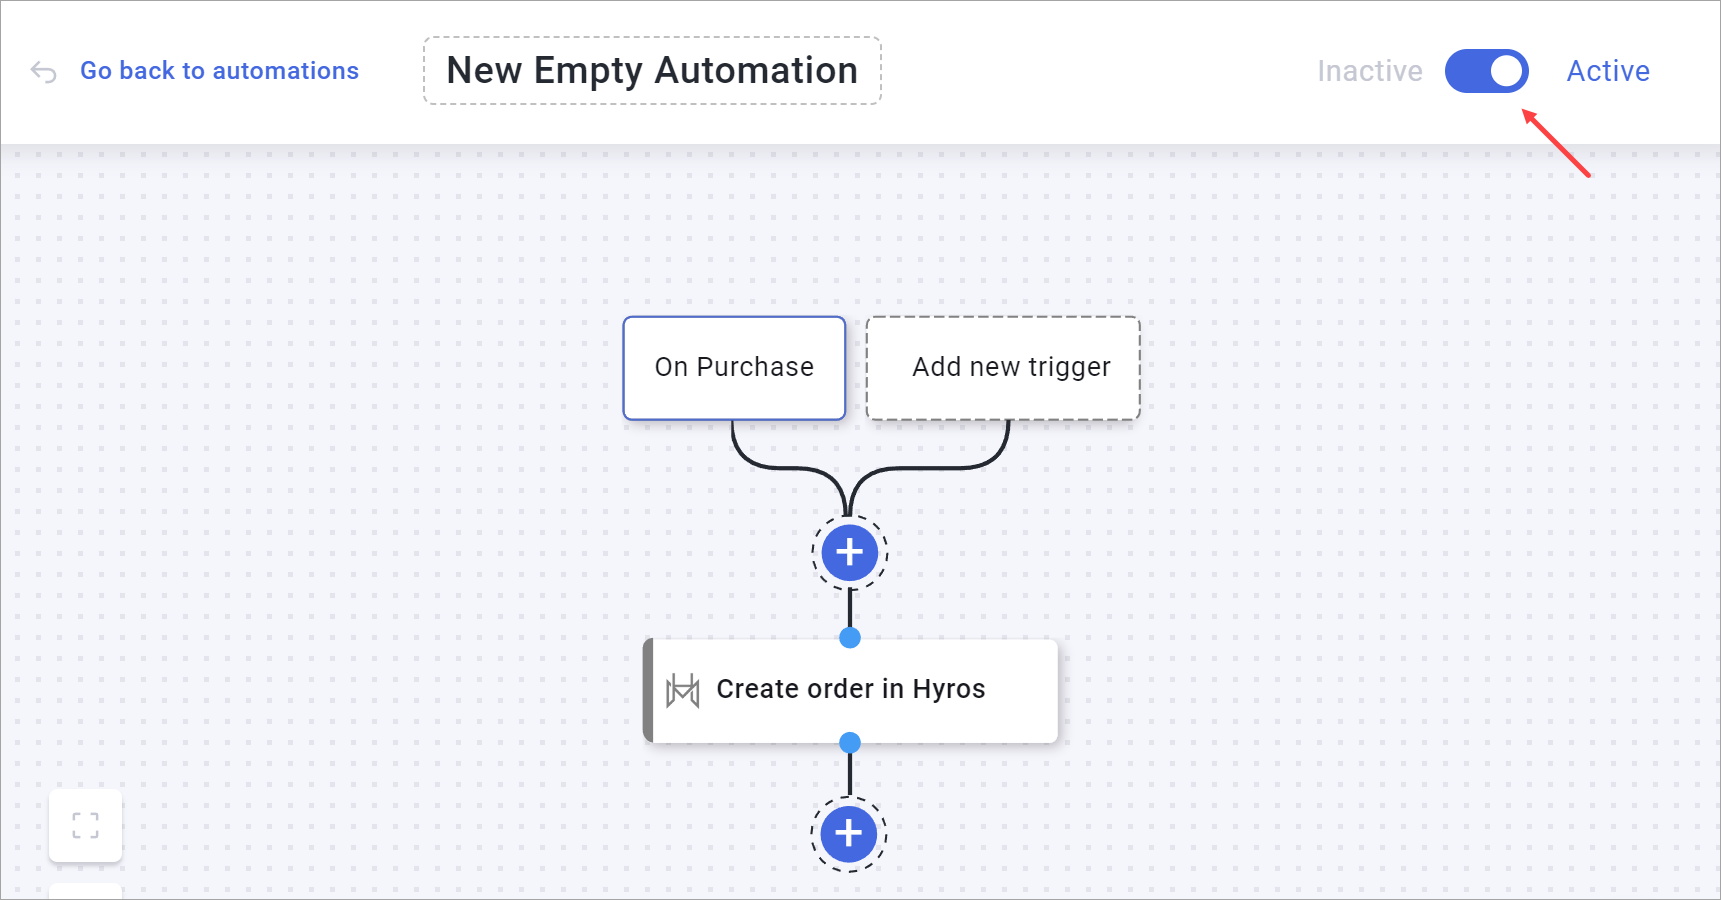
- Click Add to save the action.
- Finally, make sure to switch the Active toggle in the top right corner to turn your automation on!
How to View Your Data in Hyros
Once your automation is active and you start getting traffic, Funnelish will automatically push that data over to your Hyros account. Here is where you can find it:
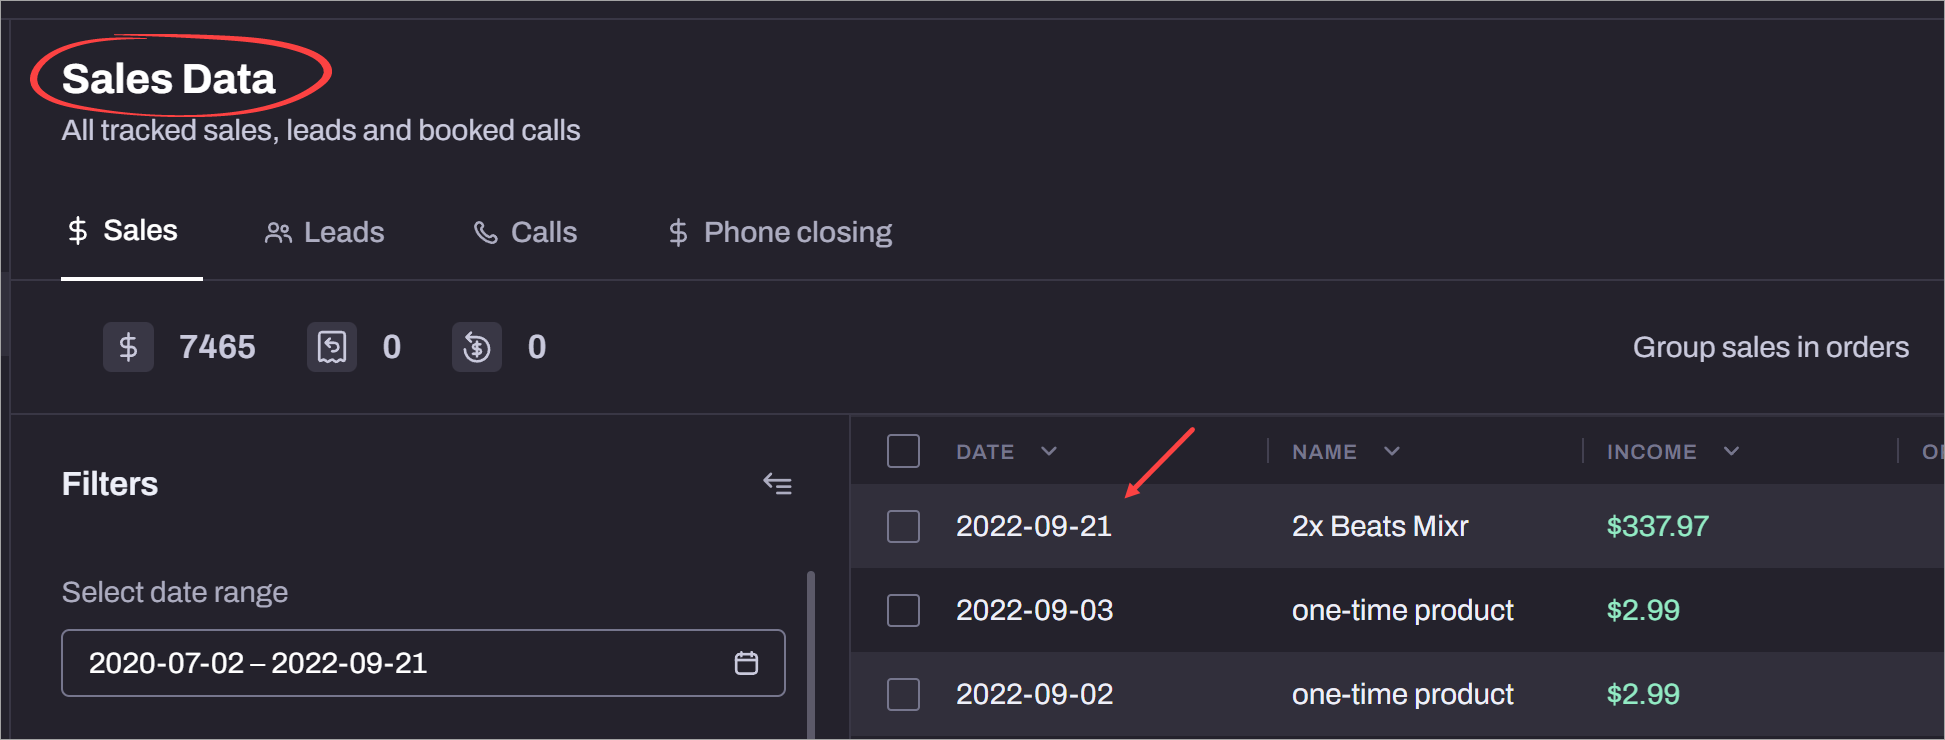
If you selected “Create order”:
The automation will send customer and product details. To view this order information, go to your Hyros dashboard and navigate to Sales Data > $ Sales.
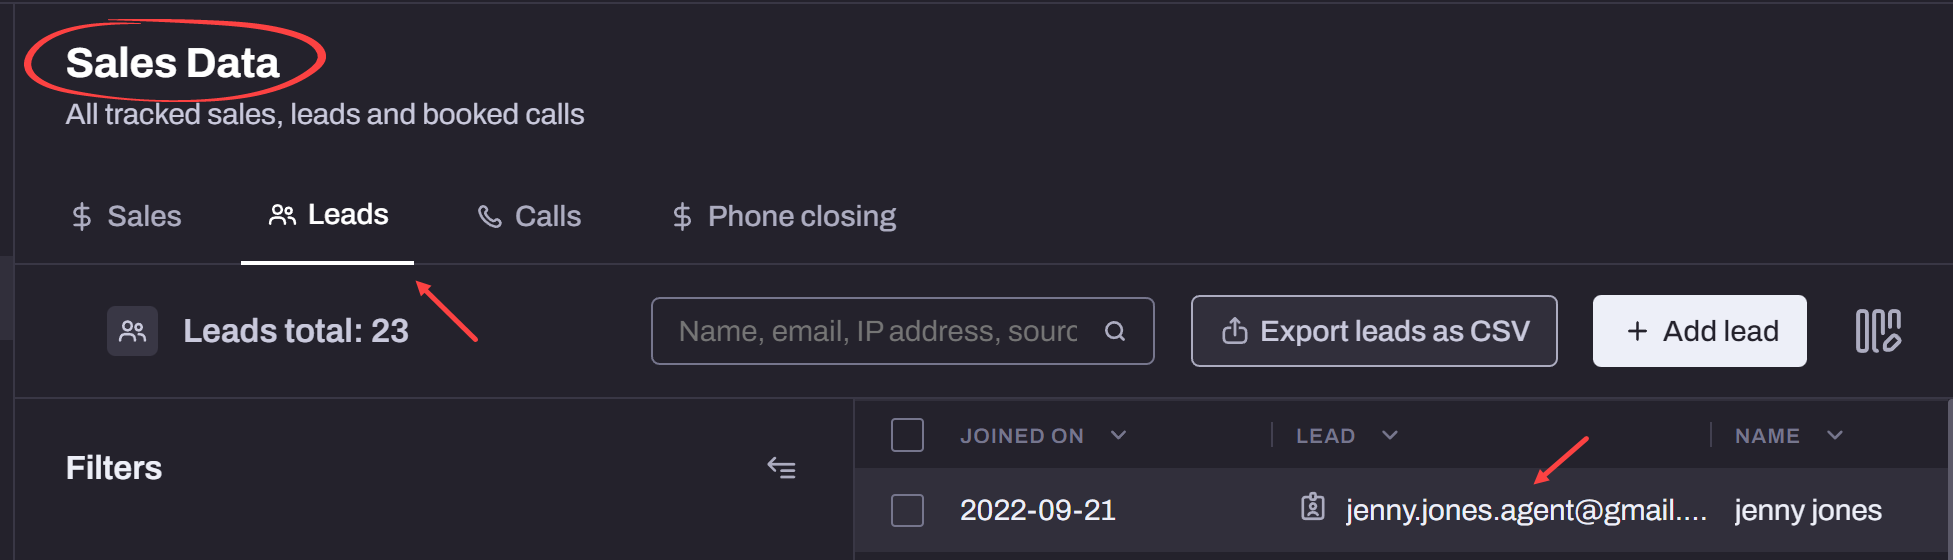
If you selected “Create lead”:
The automation will send standard lead/opt-in details. To view this contact data, go to your Hyros dashboard and navigate to Sales Data > Leads.