Use this guide to connect your Mailgun account to Funnelish so you can send transactional emails, receipts, and order confirmations directly from your funnels!
Step 1: Get Your Mailgun Credentials
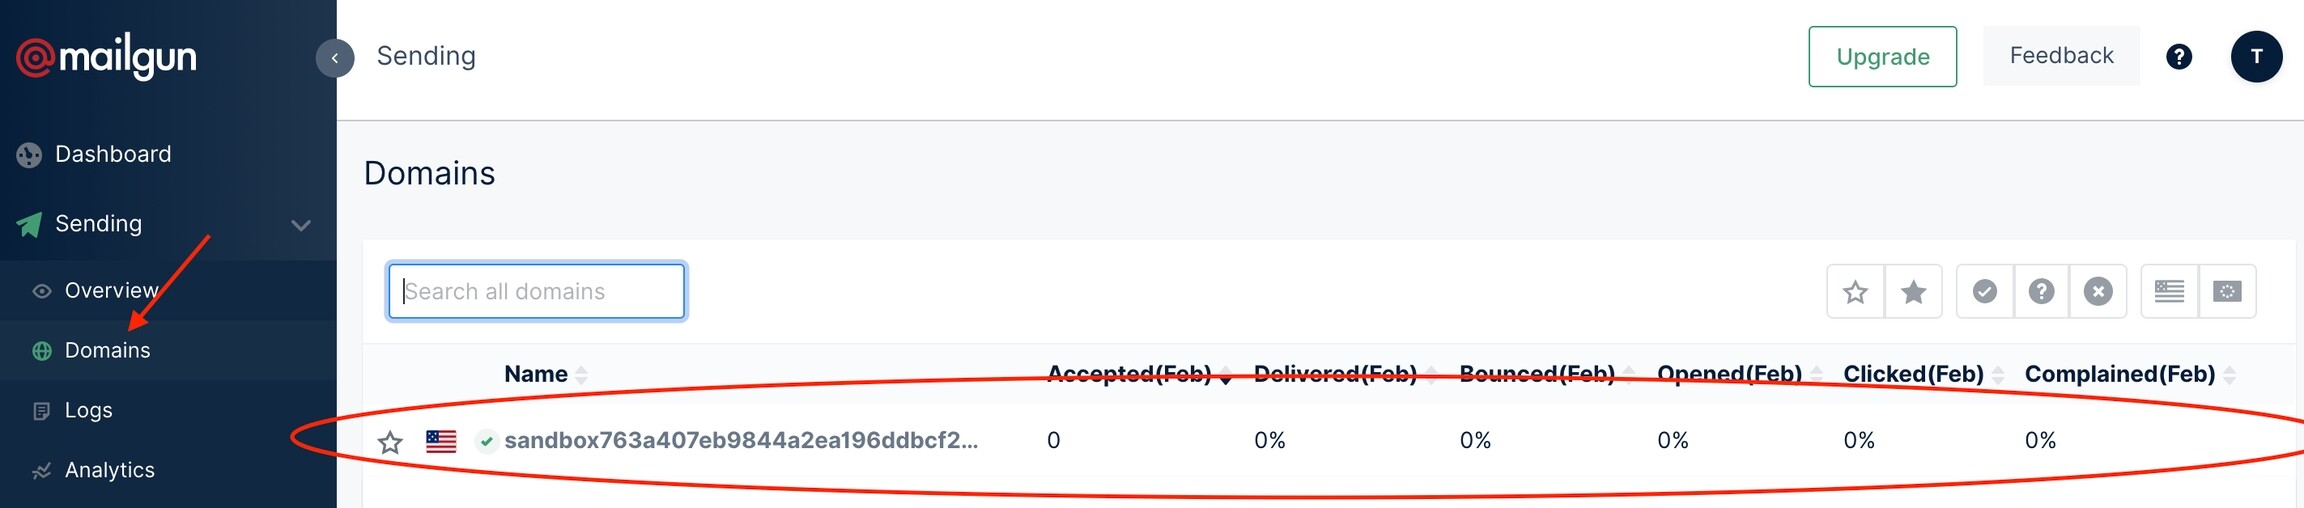
First, you need to grab your domain and API key from Mailgun.
- Log in to your Mailgun account.
- Go to Settings and select Domains.
- Copy the domain you want to use to send emails from Funnelish. (Tip: If you have multiple domains connected for different brands, use the one that matches the products in your funnel.)
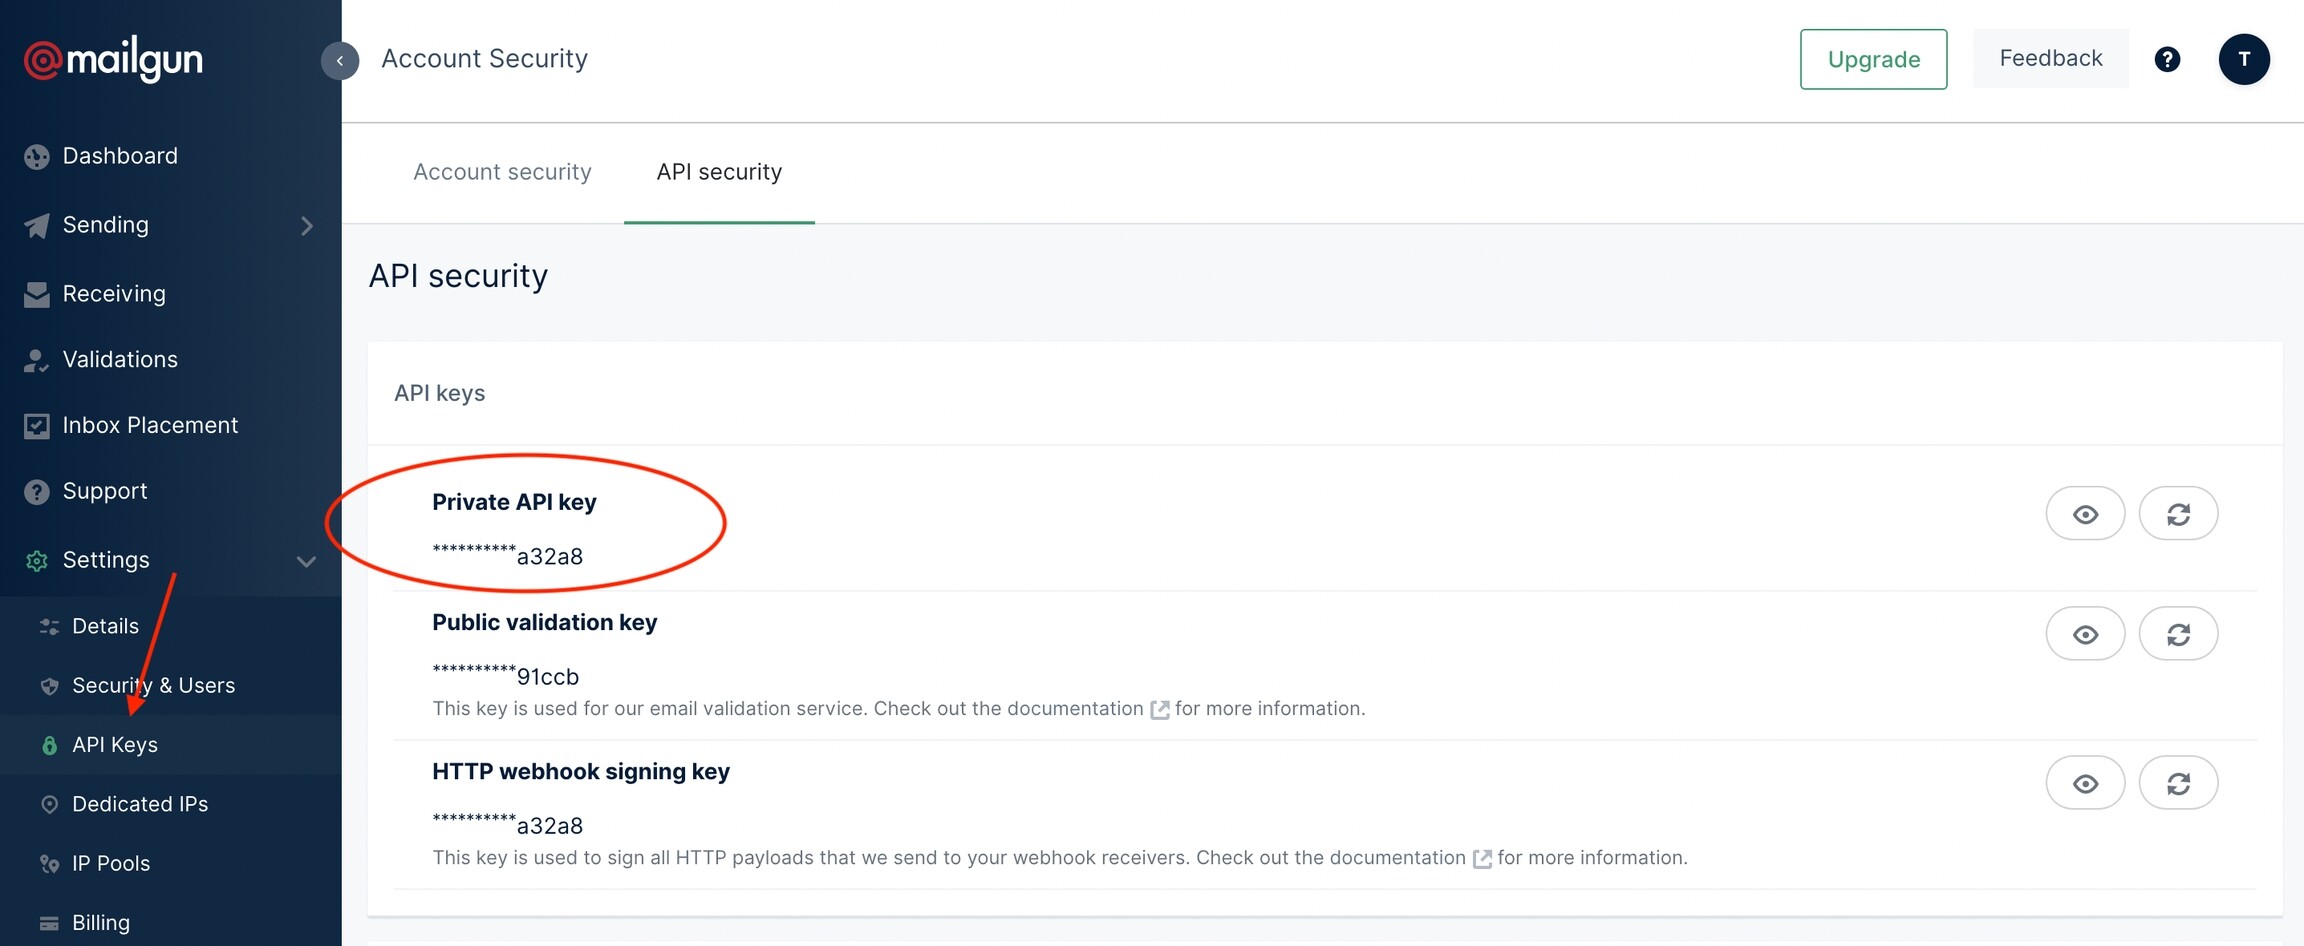
- From the left menu bar, navigate to Settings and click API Keys.
- Copy your Private API Key.
Step 2: Connect Mailgun to Funnelish
Now, let’s paste those credentials into your Funnelish workspace settings.
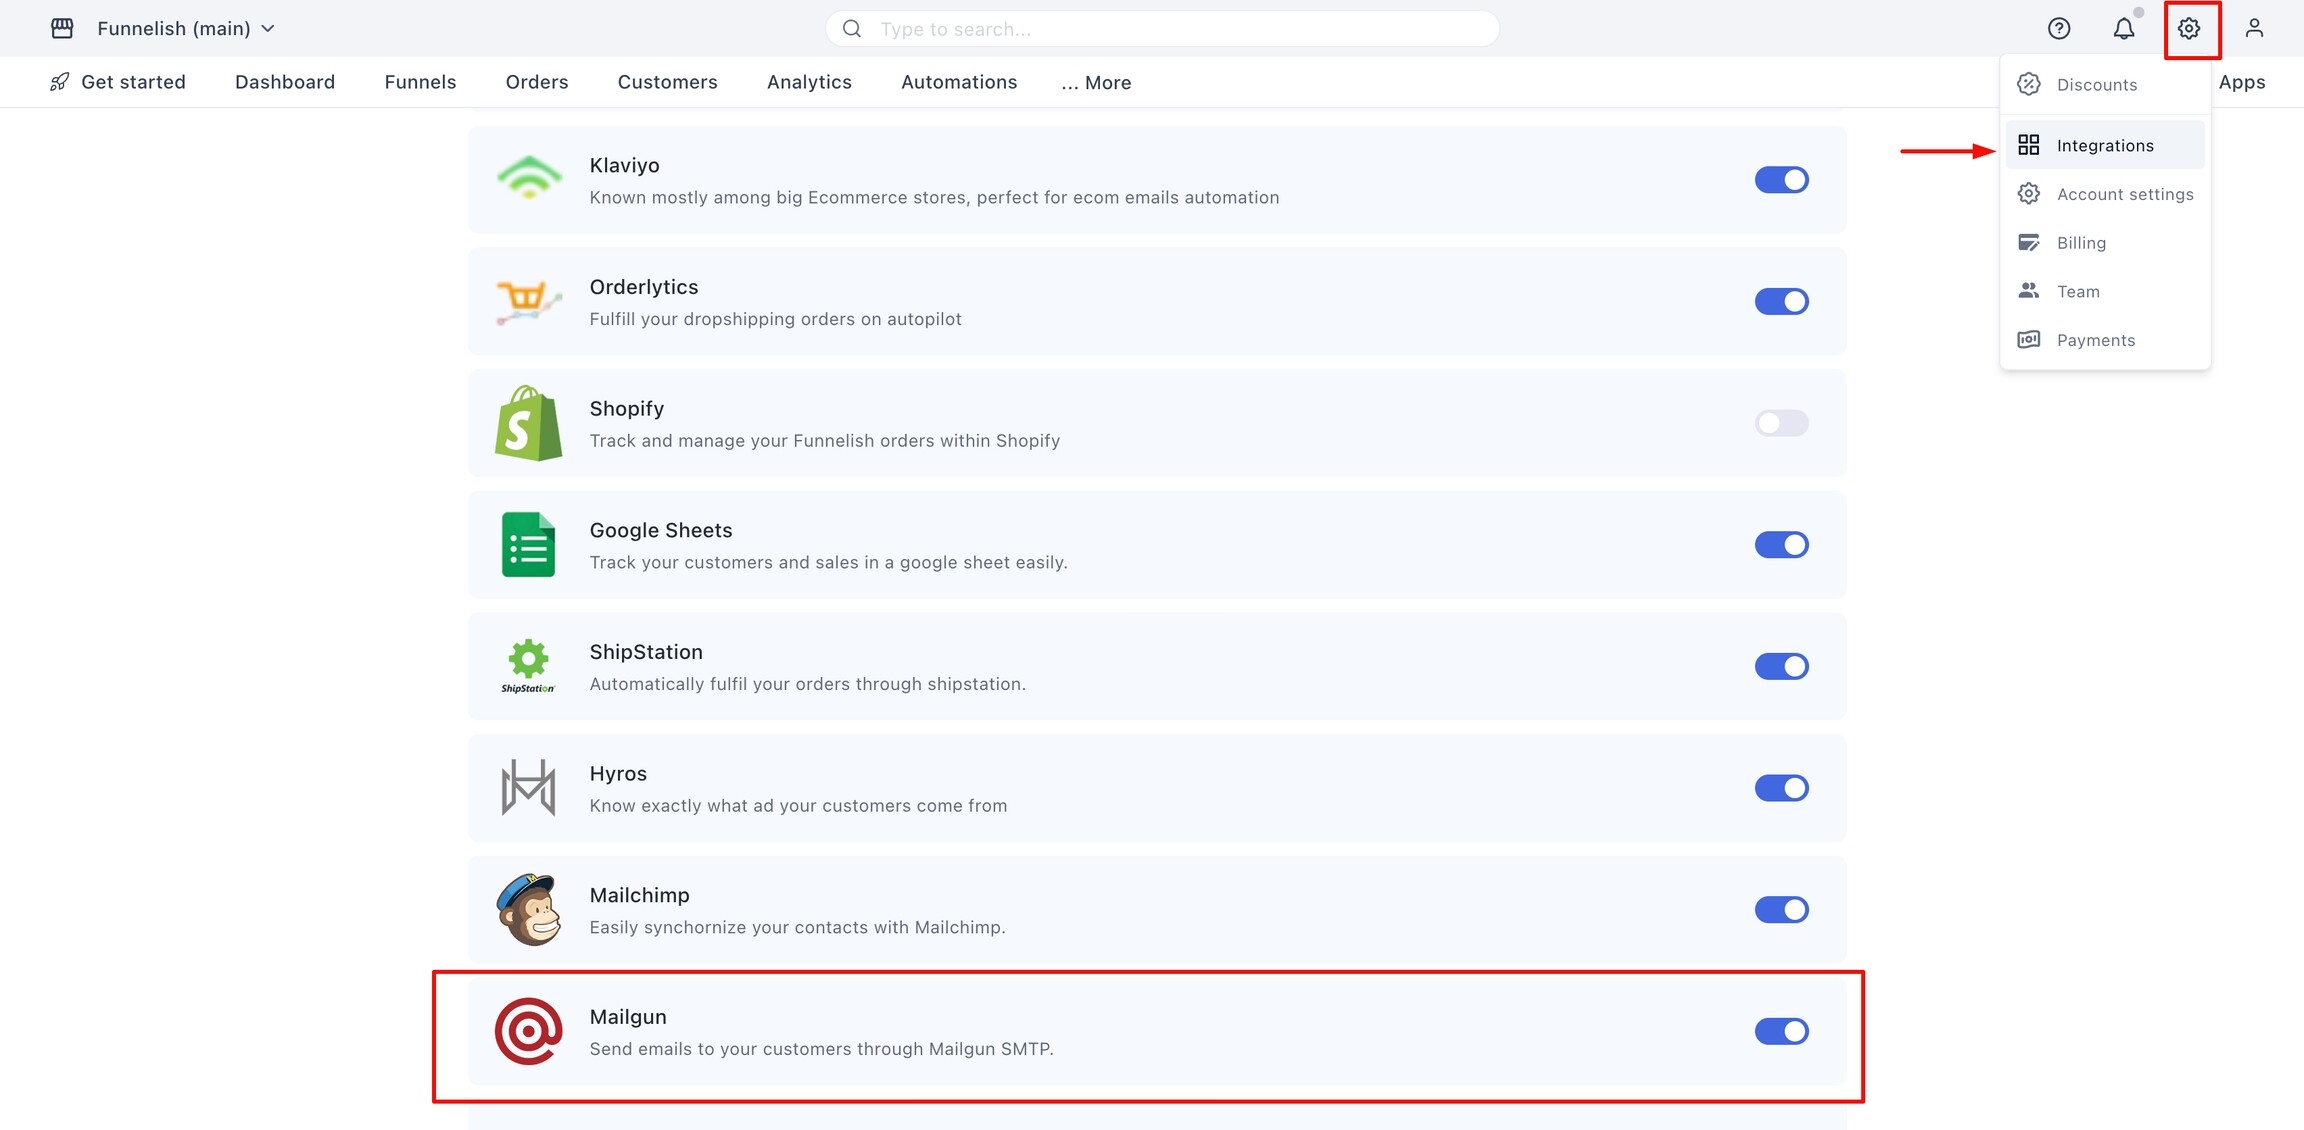
- Log in to your Funnelish account.
- Click the Settings icon at the bottom of the left menu.
- Select Integrations.
- Scroll down and click on Mailgun.
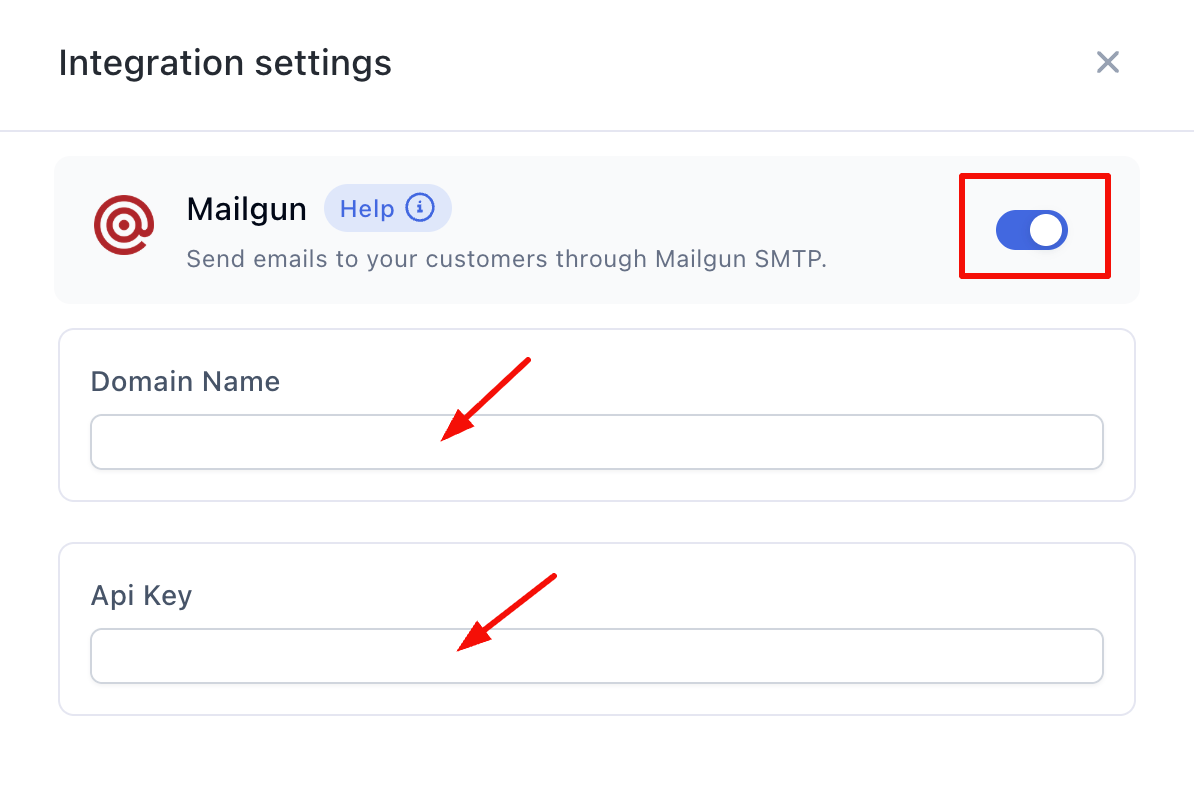
- Paste the domain name and Private API Key you copied from step one.
- Turn the toggle switch to the On position.
- Click Save changes.
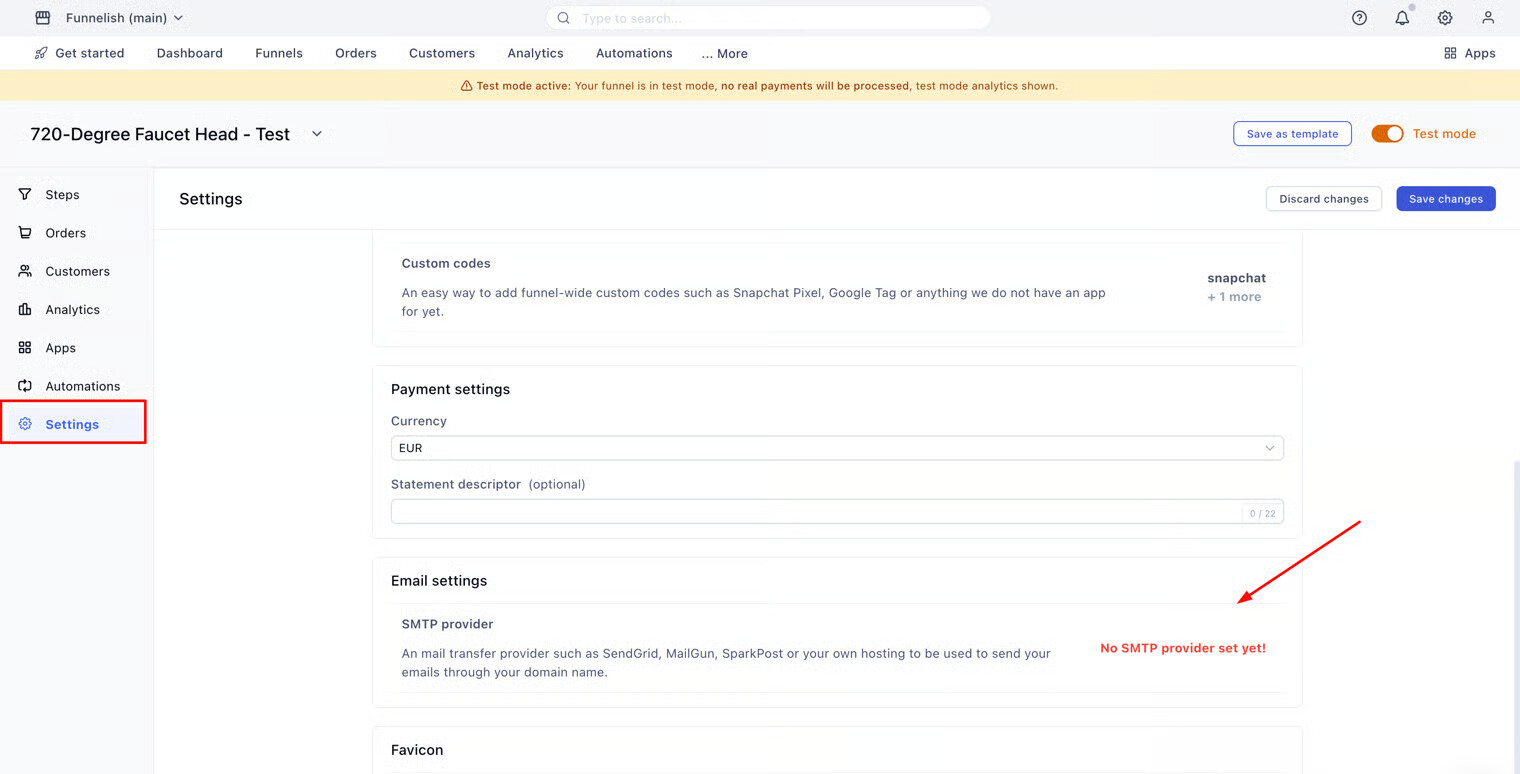
Step 3: Assign Mailgun to Your Funnel
Finally, you need to tell your specific funnel to use Mailgun as its email provider.
- Open your funnel and go to Funnel Settings in the left side panel.
- Scroll down to the Email settings heading.
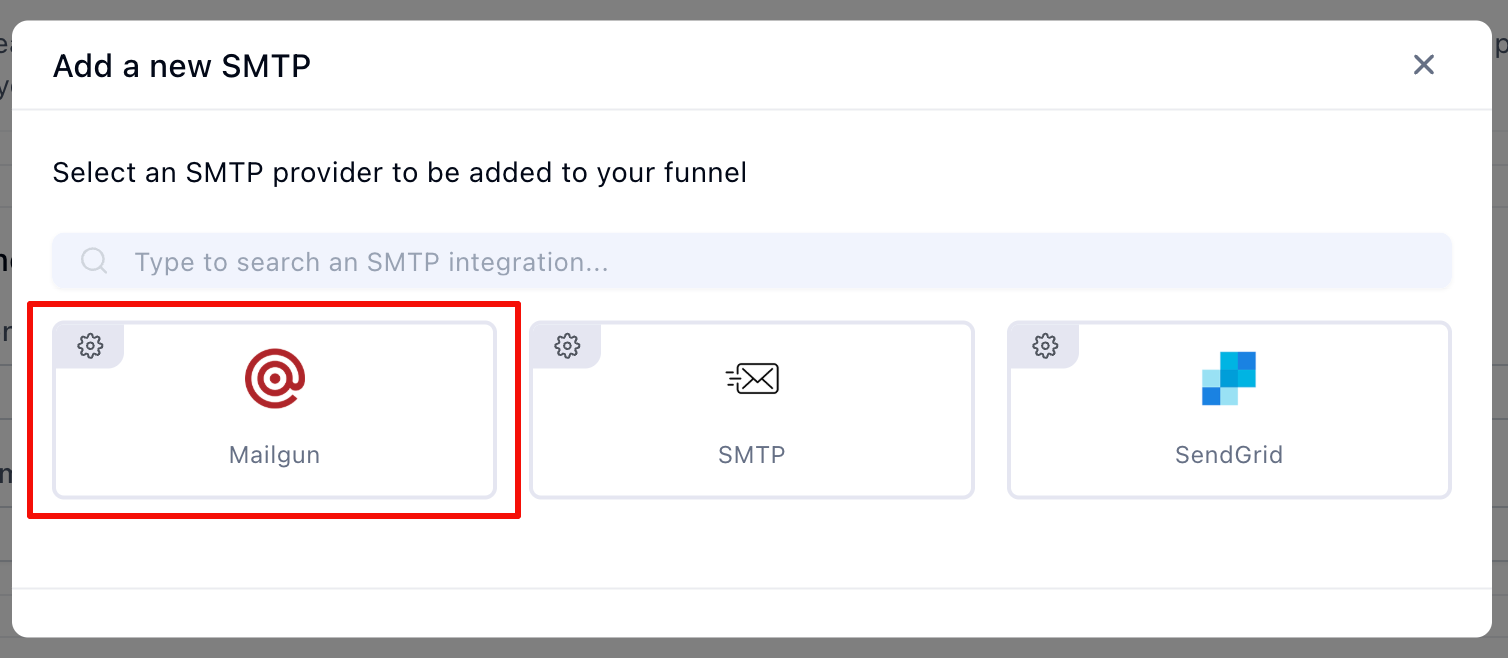
- Click the SMTP Provider tile.
- Click Mailgun in the pop-up window.
- Click Save and continue.

You are all set! Your funnel is now connected to Mailgun.
Check out our Sending Emails From Funnelish article to start building and sending emails!