Your pages can now react to each customer automatically, with no code required. Show, hide, or restyle any block based on what’s in the order or where the visitor came from.
No rules to wire up, no “activate” trigger to manage. You define a condition once, and the state switches itself on the moment that condition is true and off again when it stops being true.
What is a conditional state?
A conditional state is a custom state you create yourself, with its own conditions attached.
Here’s the key difference between states:
Hover and Selected react to what the visitor clicks or touches.
A conditional state reacts to data: the product selected at checkout, the product purchased in a previous step, the order total, a UTM tag, a URL parameter, or customer metadata.
![]() When the condition is met, the block instantly adopts whatever styling you set for that state.
When the condition is met, the block instantly adopts whatever styling you set for that state.
![]() When the condition is no longer met, the block reverts to its default look/state.
When the condition is no longer met, the block reverts to its default look/state.
And because a conditional state is just a state, every style property stays editable inside it. Visibility, spacing, borders, background, colors, alignment — anything you can normally style, you can style conditionally.
How to set one up
- Select the block you want to make conditional: an element, a row, or a whole section.
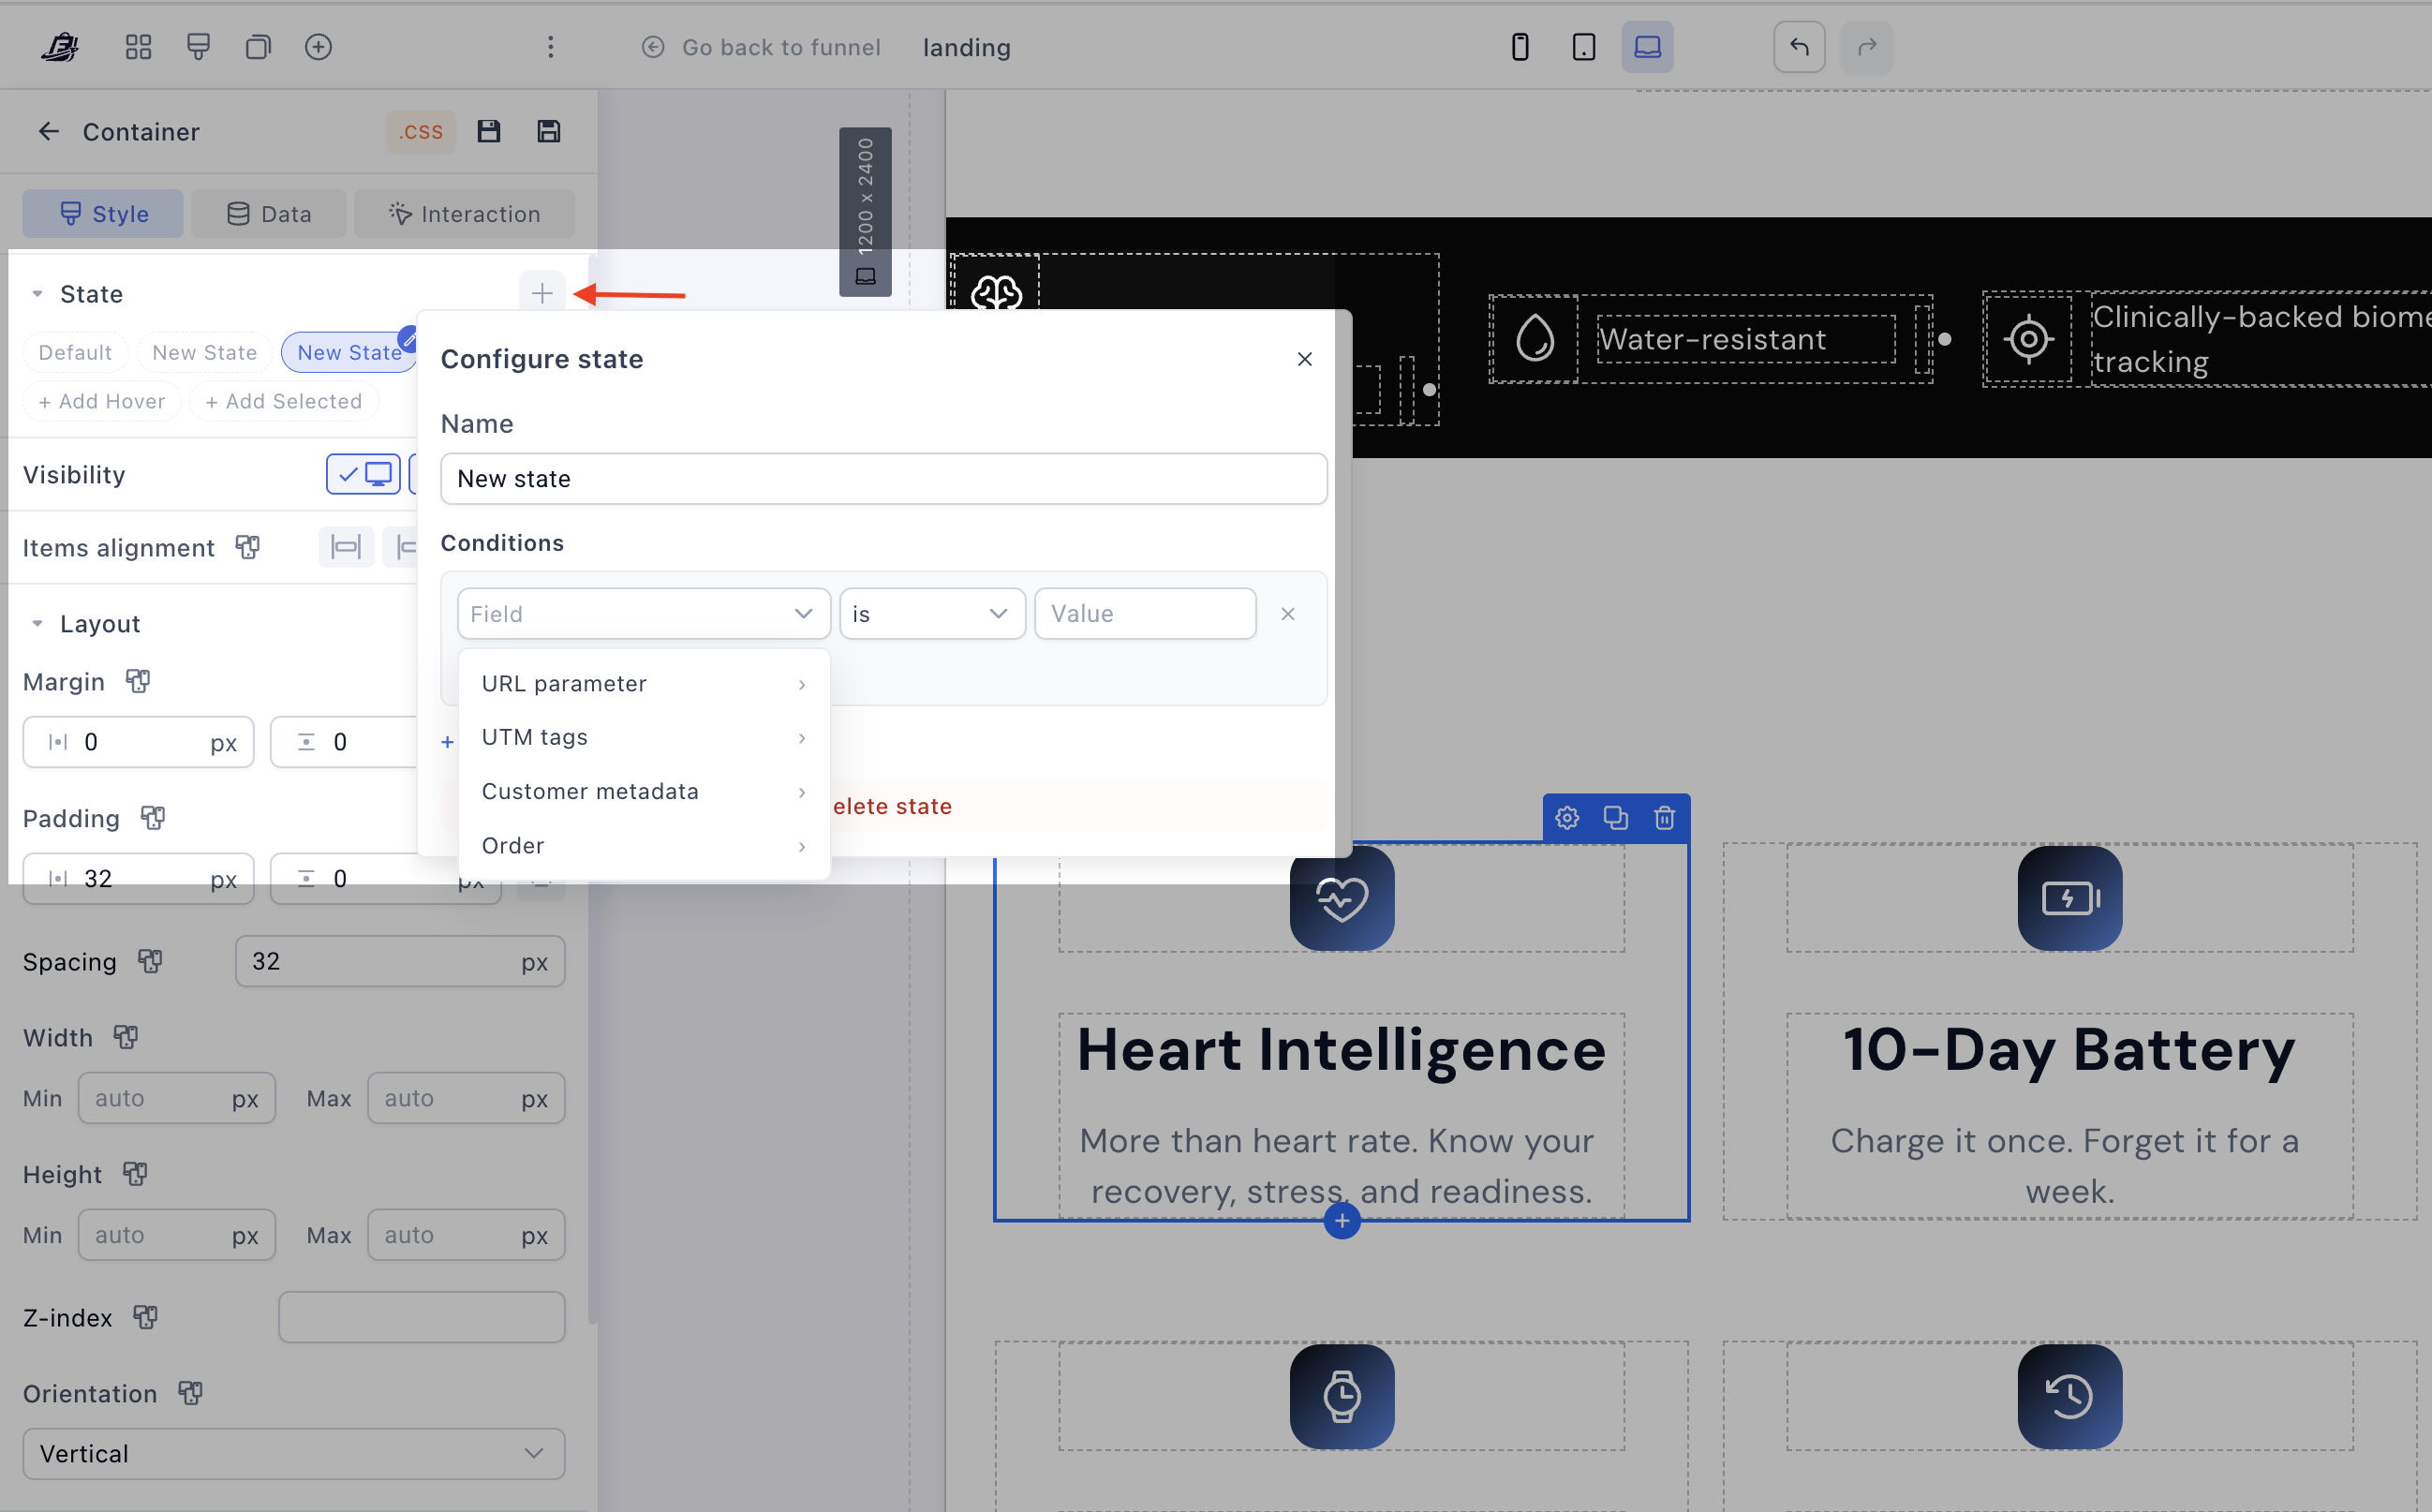
- Open the Style tab in the left panel and find the State area.
- You can adjust the Default state up to your preference.
- Click the + to add a new custom state, and give it a clear name.
- Under Conditions, pick what you want to check from the first dropdown. Your options are:
- URL parameter
- UTM tags
- Customer metadata
- Order → Selected product, Purchased product, or Order total
- Choose the operator (for example, includes) and the value (for example, your product, or an order amount).
- Need more logic? Use + Add condition to stack conditions, or + Add group to combine them into groups.
- With the custom state still selected, edit the style properties you want it to apply: toggle Visibility to show/hide, add a border to highlight, change a background color, and so on.
- Save. That’s it! The state will now activate on its own whenever the condition is true.
![]() A quick note on the two product conditions, since they’re easy to mix up:
A quick note on the two product conditions, since they’re easy to mix up:
- Selected product = what the visitor currently has selected on the page right now (great on the checkout page).
- Purchased product = what the visitor actually bought in a previous step (great on the upsell pages).
Use case examples for conditional blocks
- Show a dynamic order bump based on the product selected. Create an order bump container with a complementary offer, and give it a conditional state using Order → Selected product → includes [your product]. Switch its Visibility on inside the state, and the bump only appears once the shopper selects that main product — so you can pair each product with its own relevant add-on, and swap the bump automatically the instant they change their selection.
- Show or hide an upsell product container based on what was bought at checkout. On your upsell page, add a product or offer block and give it a conditional state using Order → Purchased product → includes [your product]. Now the offer only appears for customers who bought that product — and you can just as easily hide an add-on from anyone who already purchased it.
- Reward bigger orders with Order total. Add a “You’ve unlocked free shipping
 ” banner or a bonus-gift block, and condition it on Order → Order total crossing a threshold. It appears automatically once the cart is large enough and disappears if items are removed.
 - Match the page to the traffic source with UTM tags. Show a campaign-specific headline, testimonial, or discount callout only to visitors arriving from a particular ad or email. Condition the block on the relevant UTM tag so your landing page mirrors the message that brought them in.
- Personalize with URL parameters or customer metadata. Pass something like
?vip=truein your link and reveal a VIP-only offer block when that URL parameter is present. Or use Customer metadata to surface tailored content for returning customers or specific segments.
A few things to keep in mind
- Conditional states control how blocks look and whether they appear — styling and show/hide. They do not redirect visitors to a different page or funnel step (though this is coming soon
 ).
). - There’s no separate “activate state” needed. The state manages itself: on when the condition is true, off when it’s false.
Conditional Blocks put the power of dynamic page coding right into the visual editor, allowing you to build smarter, higher-converting funnels without writing a single line of code.
Head into your page builder today, click on any element, and test out a new State.
We can’t wait to see the creative ways you use this to personalize your customer journeys. Have a unique use case you’re proud of, or need help setting up a specific condition? Drop a comment below or share it with the community! ![]()
Got a question? If you run into any issues setting this up or need a hand, feel free to drop a reply below or start a new thread in our Ask the community section.
Want to see our latest updates? We’re always improving! To stay in the loop with our newest features, fixes, and releases, keep an eye on the Updates category.
Have a feature request? We love hearing your ideas on how we can make things better. If there’s something specific you’d like to see added, head over to our Feature requests category and let us know!