UPDATE FOR FUNNELISH V2: No Custom Code Needed!
With Funnelish v2, you can now easily build your own fully custom product lists natively without touching a single line of code!
So, you are no longer tied to the standard product list element. You can now use Data Binding to link literally any container, image, text, or button directly to a specific product to build the exact layout and design you want.
To see the full, step-by-step instructions: Check out our complete guide on Adding Products to your eCommerce Funnels to see exactly how to set this up natively in minutes.
Need help or looking for more guides?
Got a question? If you run into any issues setting this up, feel free to drop a reply below or start a new thread in the Ask the Community section.
Browse more tutorials: For more step-by-step guides and platform walkthroughs, check out our full Documentation category!
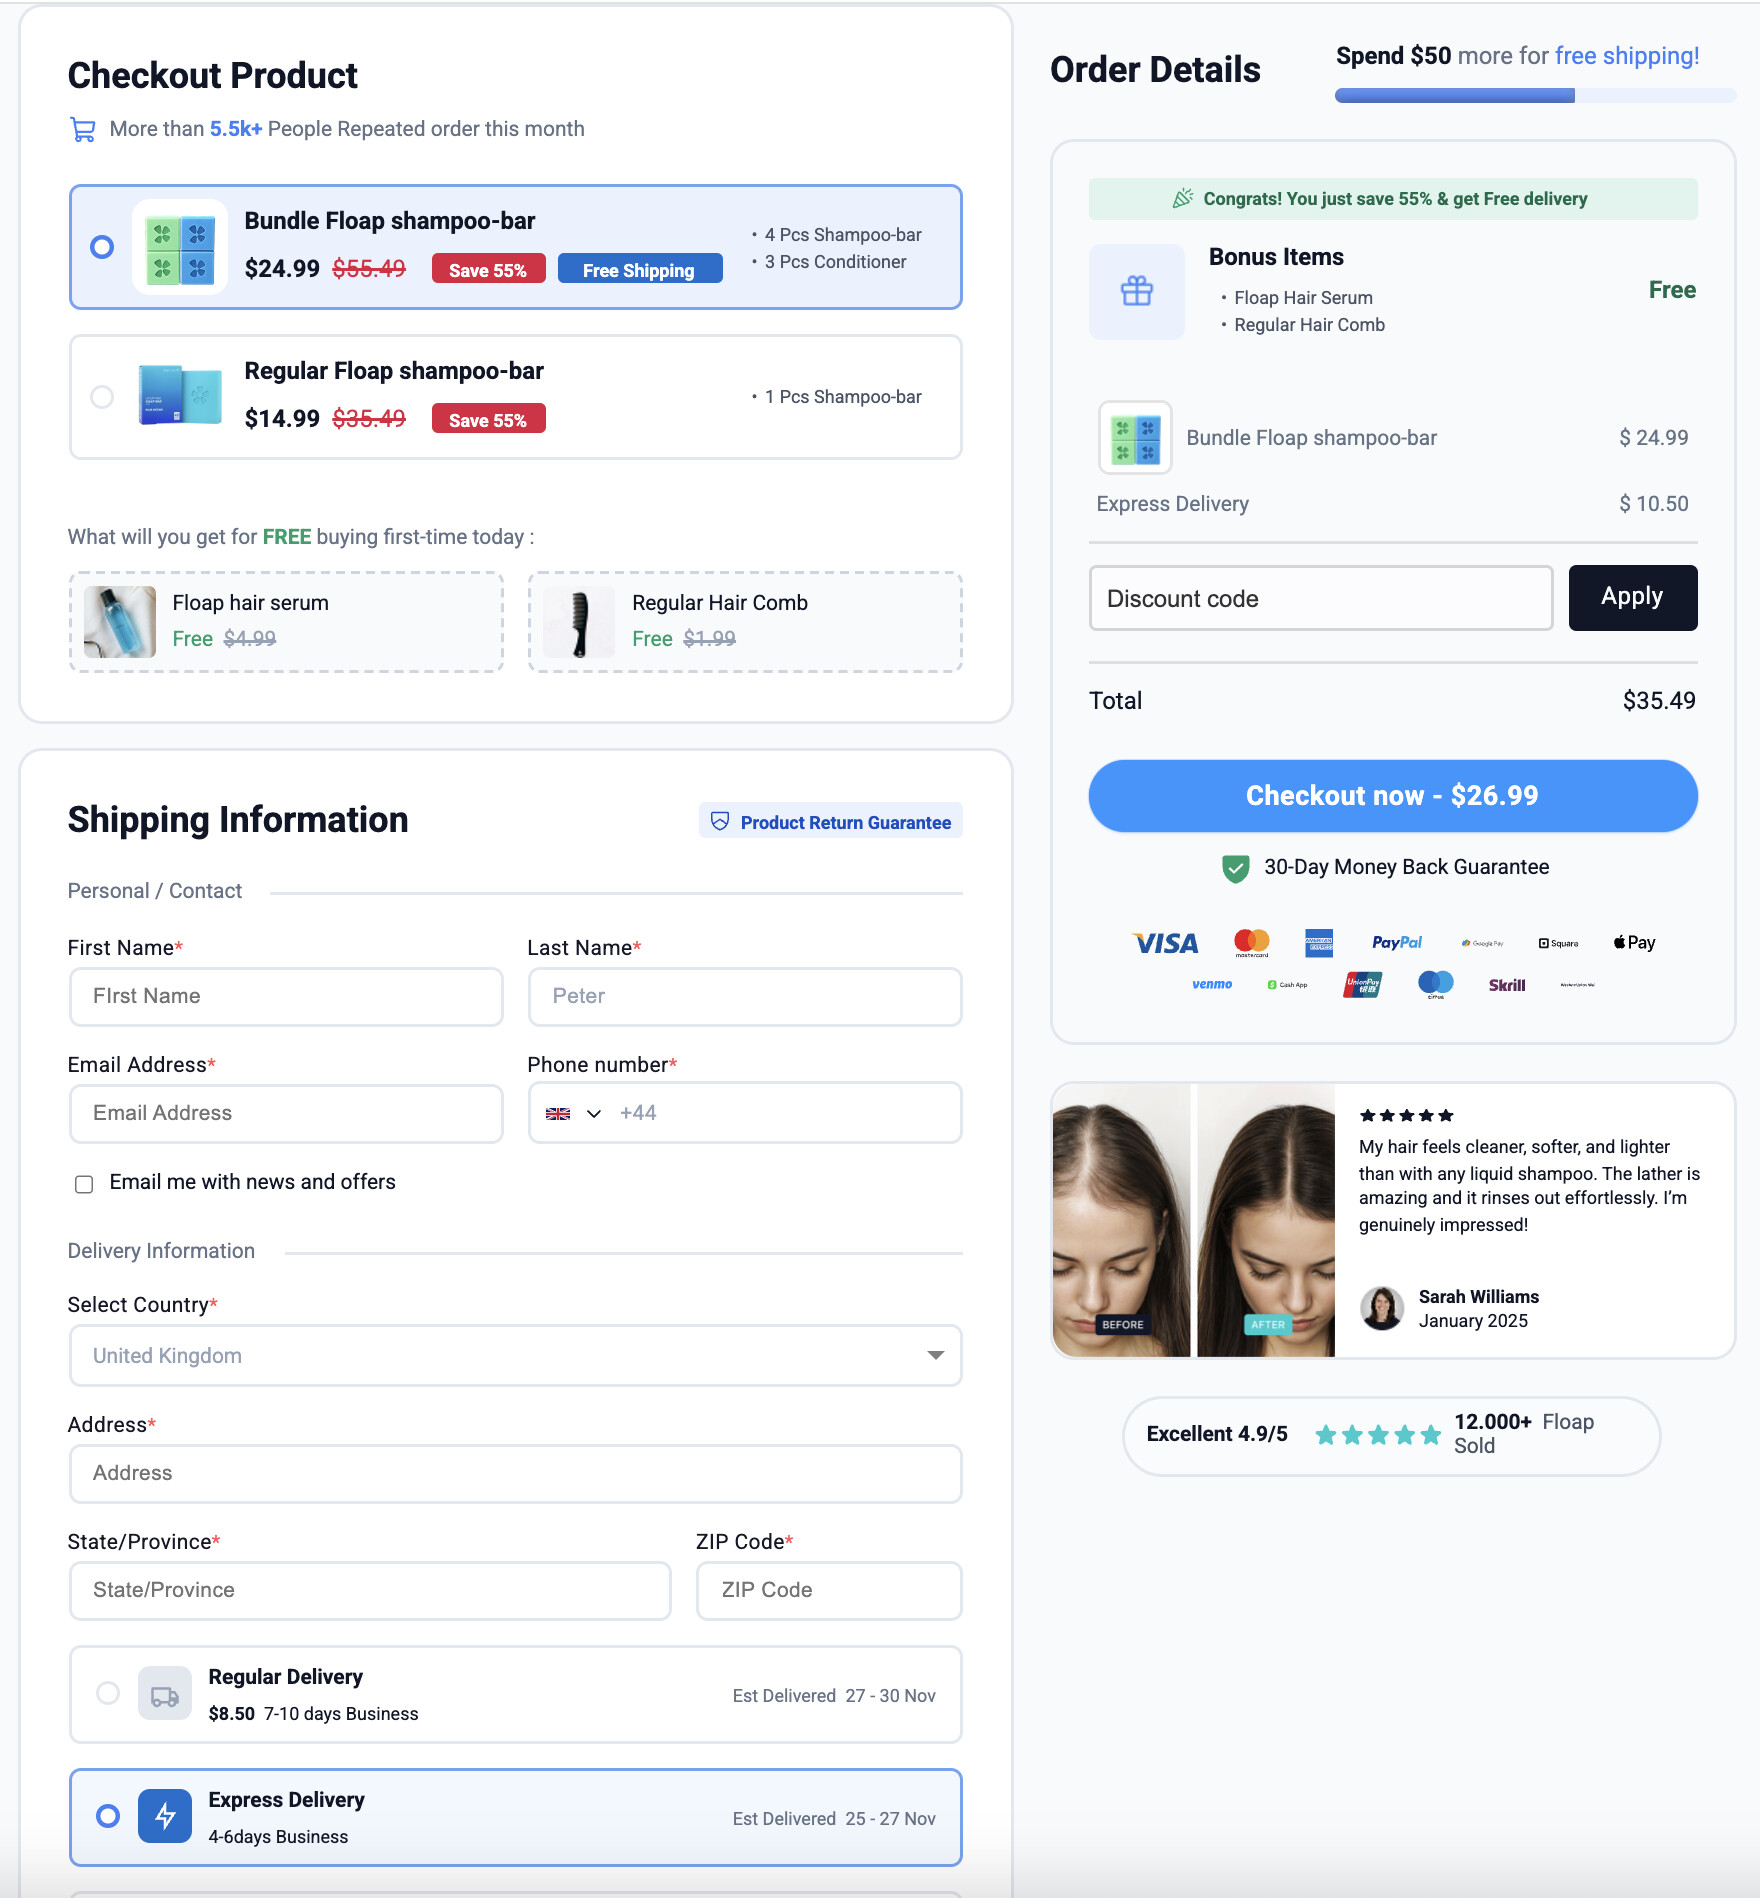
In this Tutorial, you can design any product list using available Builder elements and then sync them to your actual product list.
First design something like this:
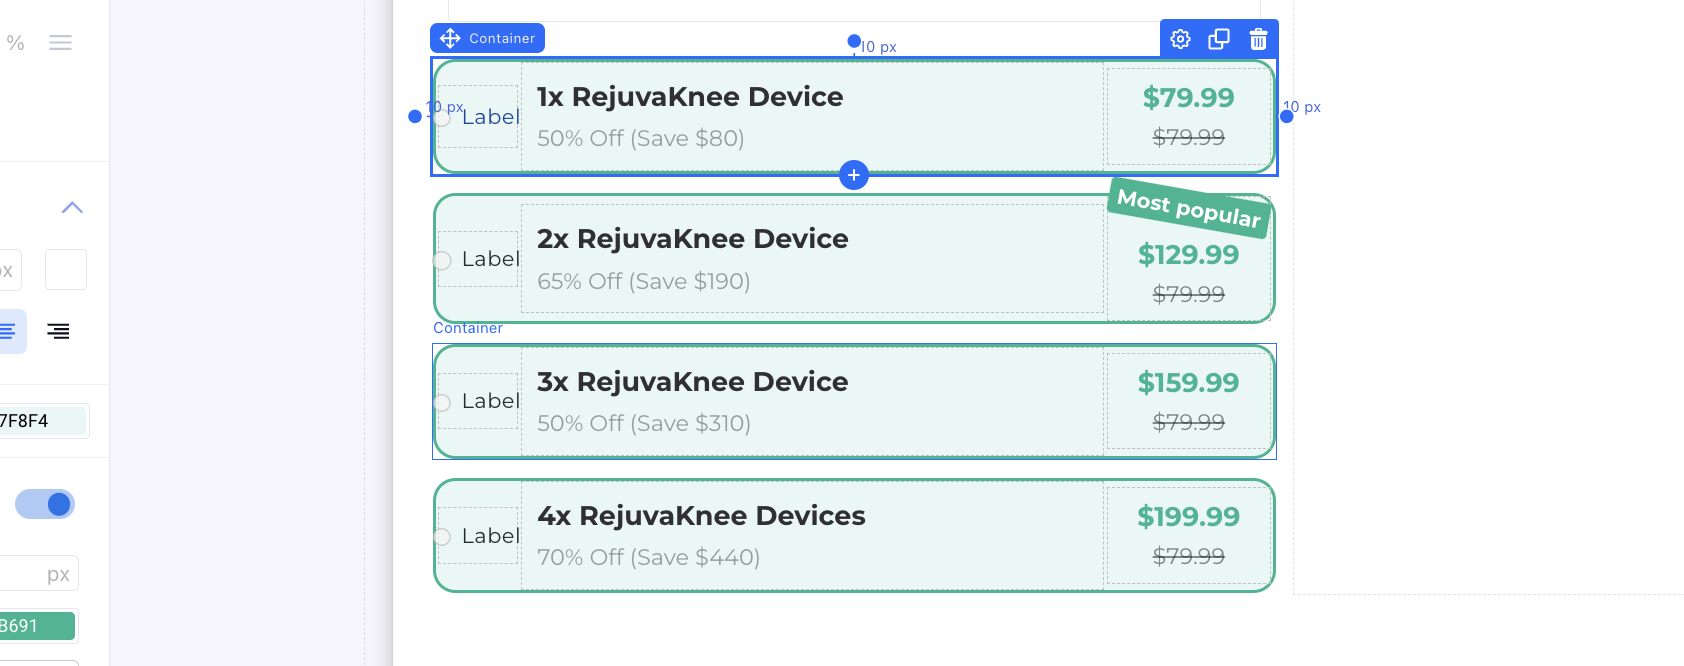
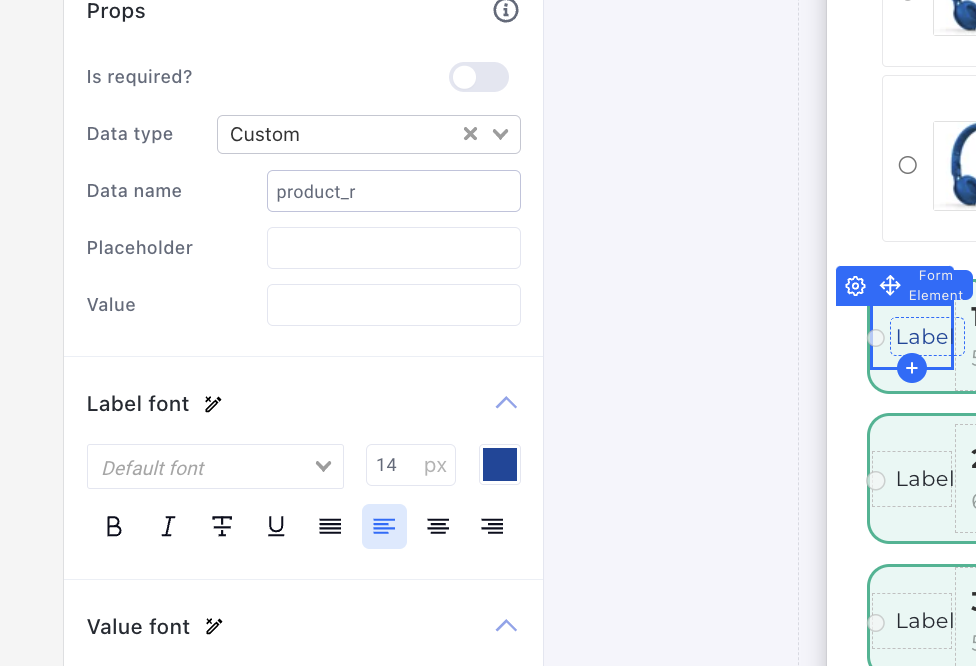
Set the radio buttons data name (if exist on your design) to product_r
Finnaly, Go to Custom Codes > Custom JS (Body) and add the following Custom JS code:
<script>
    document.querySelectorAll(".product_card input[name='custom_product_r']")[0].click();
    document.querySelectorAll(".product_card").forEach( (p,i) => {
       p.addEventListener('click' , () => {
            document.querySelectorAll(".product_card input[name='custom_product_r']")[i].click();
            document.querySelectorAll(".pl-radio")[i].click();
        })
    })
</script>
I hope this helps.