Want to send highly targeted, revenue-generating email campaigns based on exact buyer behavior?
By natively connecting Funnelish to Klaviyo, you can seamlessly add, remove, and tag contacts in your Klaviyo lists the moment they take action in your funnel. Whether you want to add a lead to a welcome series or remove a buyer from an abandoned cart flow after they purchase, this integration makes e-commerce segmentation a breeze.
Setting this up takes just a few minutes. You’ll first generate an API key in Klaviyo to connect the platforms, and then build a simple automation in Funnelish to sync your data.
Step 1: Create a Private API Key in Klaviyo
First, you need to grab a secure API key from Klaviyo so Funnelish has permission to update your lists.
Tip: We recommend opening Funnelish in one browser tab and Klaviyo in another so you can easily copy and paste between them.
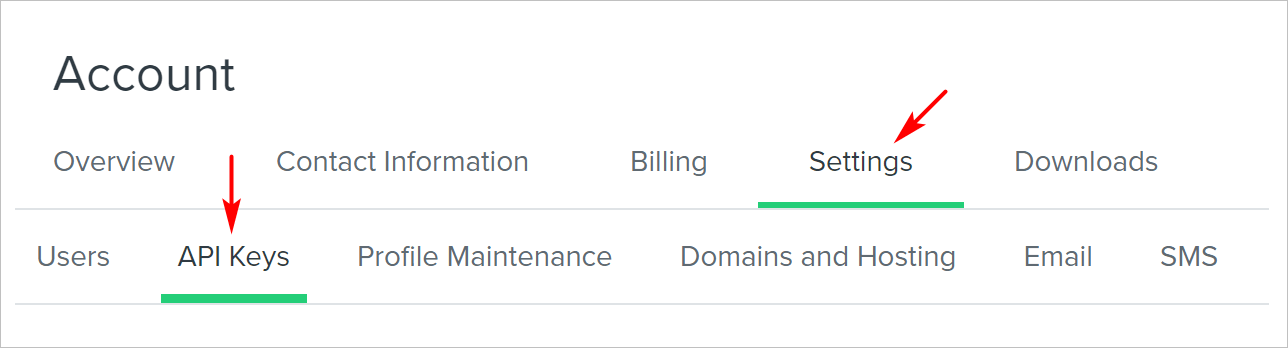
- Log in to your Klaviyo account.
- Click on your Account icon in the bottom left (or top right, depending on your Klaviyo layout) and select Settings.
- Click the API Keys tab.
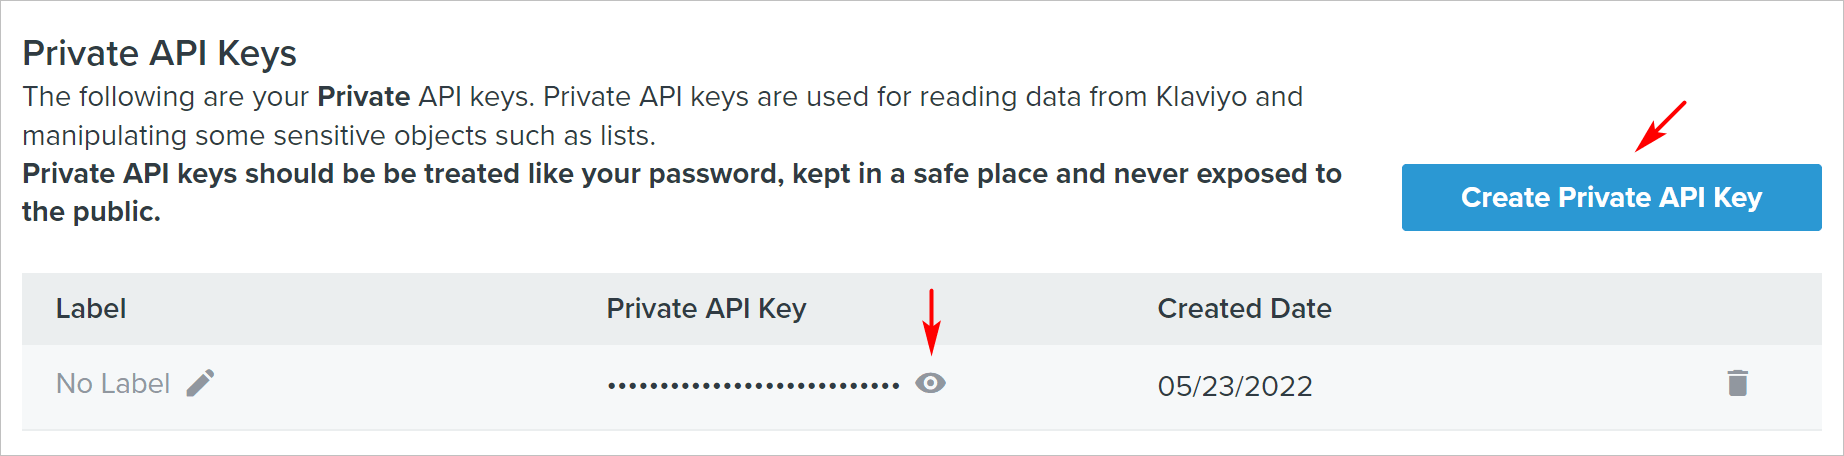
- Click the Create Private API key button. (Note: You can use an existing private key if you prefer, but creating a dedicated one for Funnelish is best practice).
- Name the key something recognizable (like “Funnelish”) and make sure to grant Full Access to the key so it can read and write profiles and lists.

- Click the copy icon next to your newly generated key.
Step 2: Connect the Integration in Funnelish
Now, let’s paste that key into Funnelish to link your accounts.
- Go to your Funnelish dashboard.
- Click the Settings icon in the top right corner.
- Select Integrations from the drop-down menu.
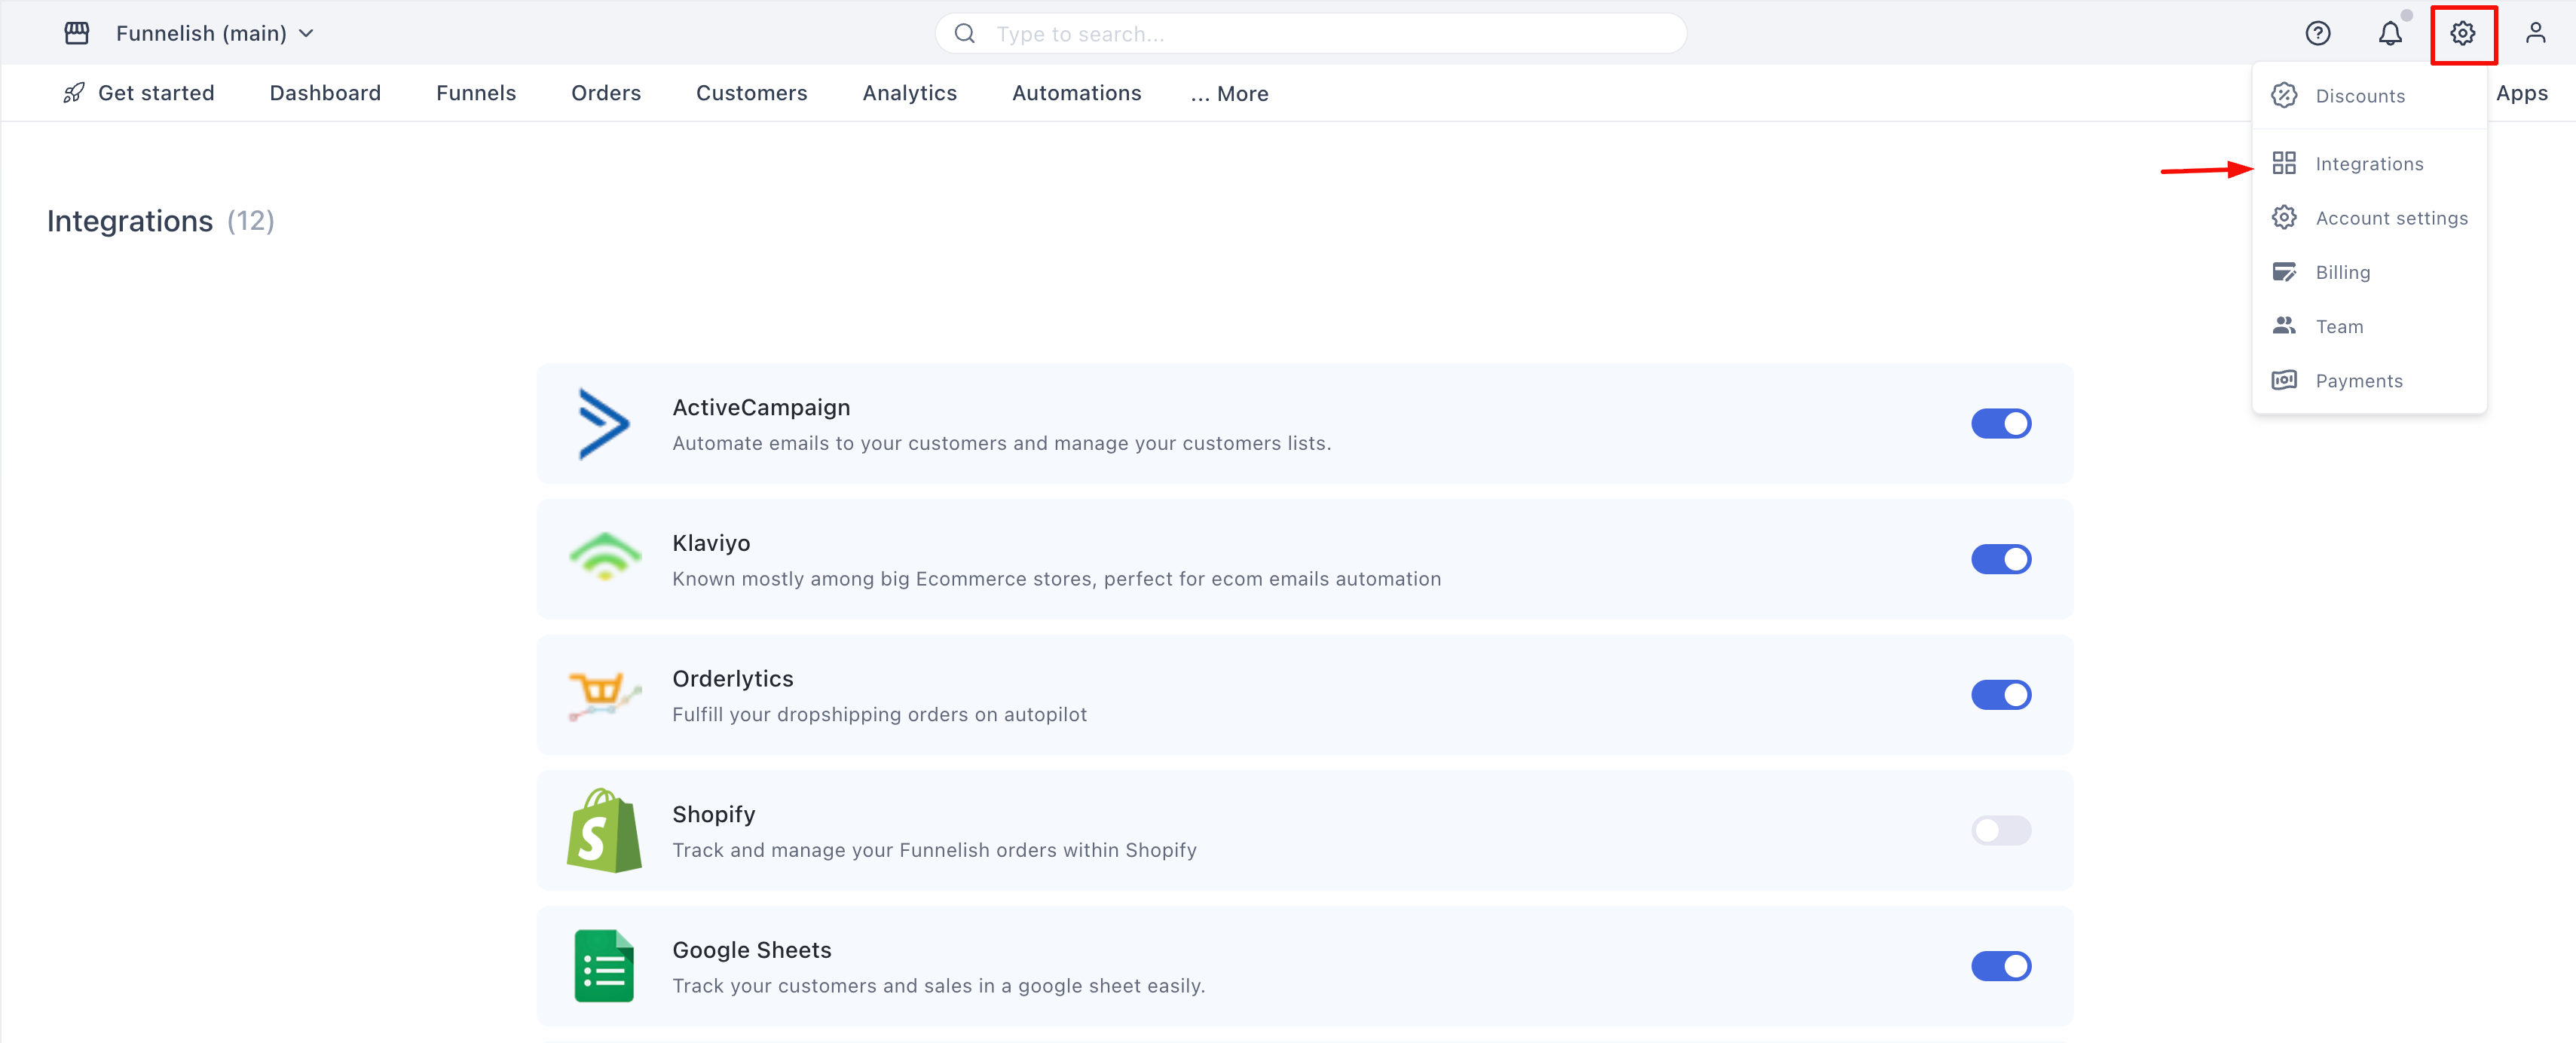
- Scroll through the app list and click Klaviyo.
- On the side panel, click the toggle switch to turn the integration On.
- Paste your Klaviyo API key into the empty field.
- Click Save changes.
Your accounts are successfully linked!
Step 3: Automate Your Klaviyo Lists
With your accounts connected, you need to tell Funnelish which funnel actions should trigger a contact update in Klaviyo.
Create the Trigger
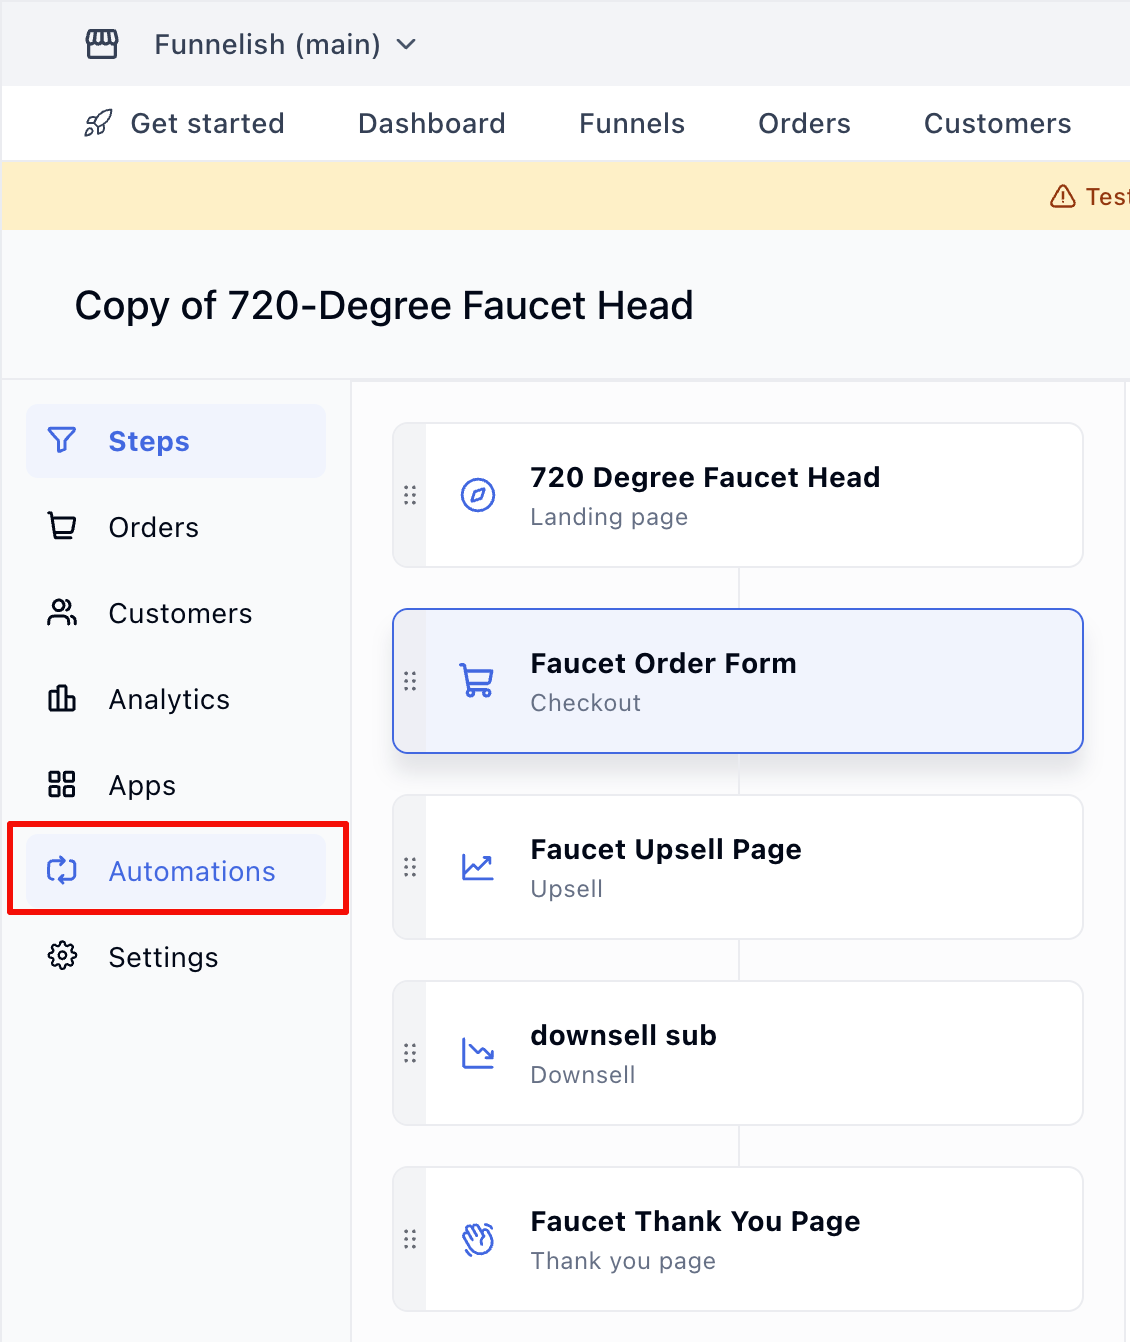
- Open the specific funnel you want to automate.
- Click on Automations in the left-side panel.
- Click Create a new automation, select Start from scratch, and hit Create.
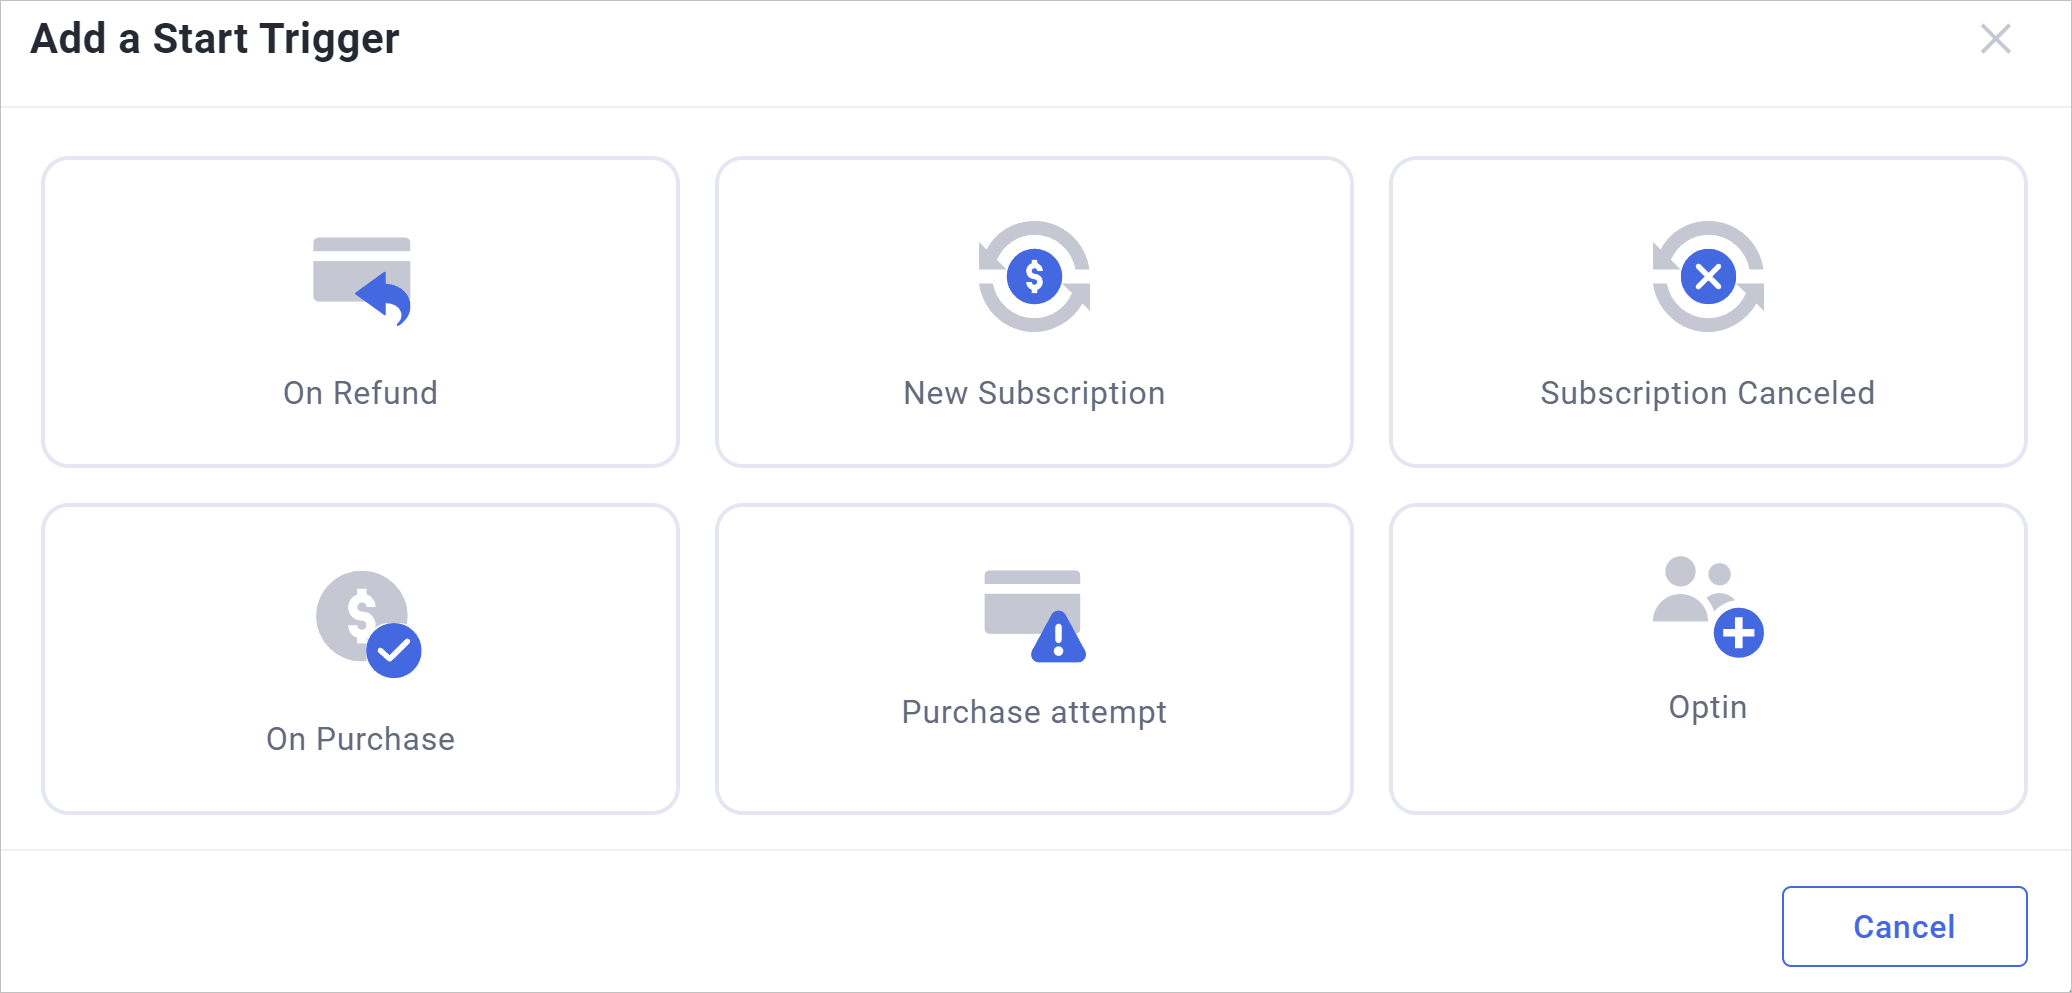
- On the automation canvas, click Add new trigger.
- Choose the event that will start the automation (for example, choose On Purchase to track buyers, or On Optin to track leads). Click Create.
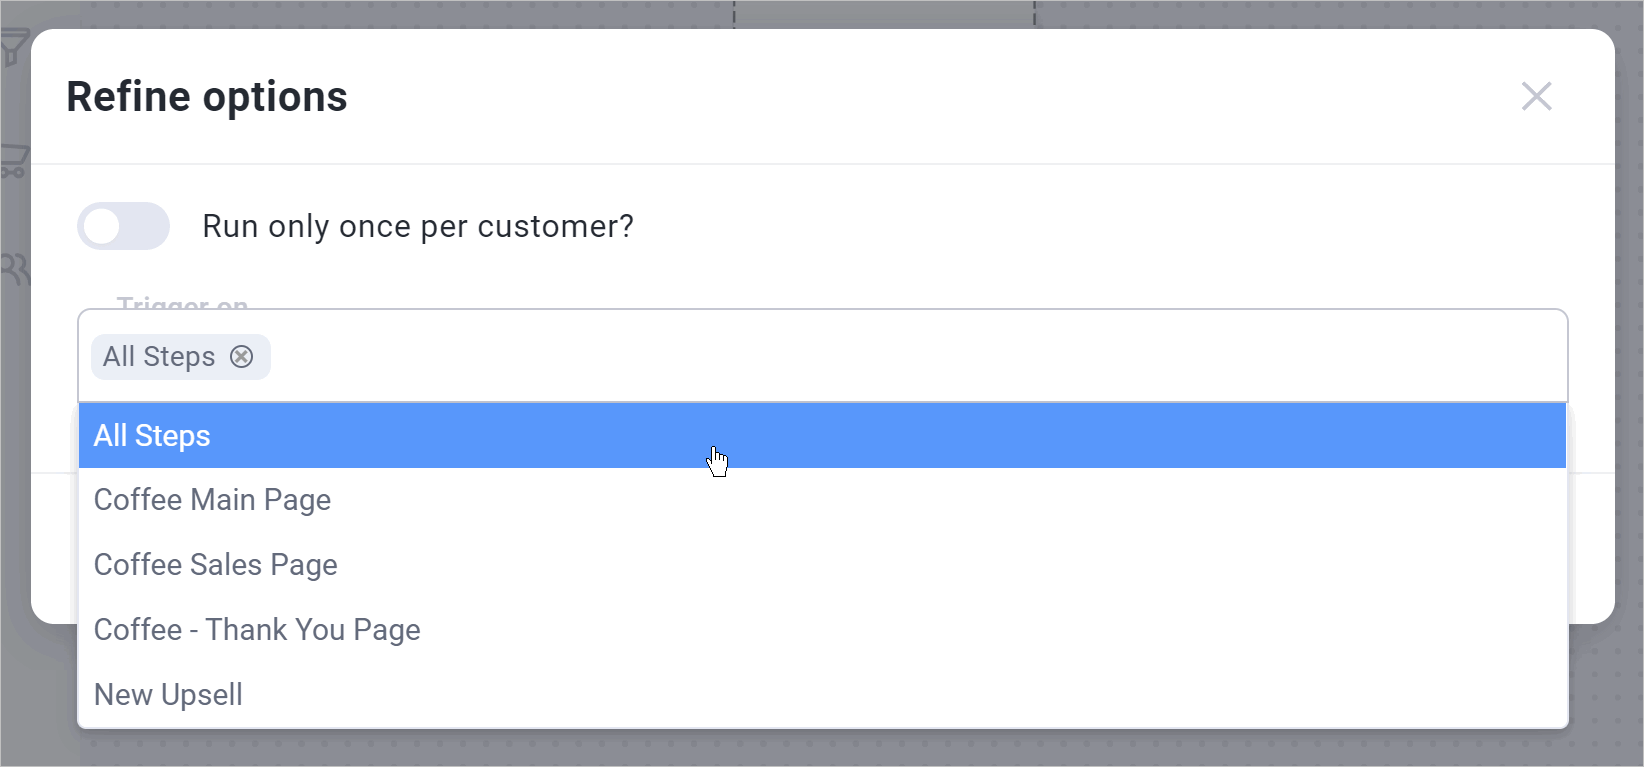
- Under the Trigger on field, select the specific funnel step(s) where this action occurs. (You can select a specific step, multiple steps, or “All steps”). Click Create.
Configure the Klaviyo Action
Now, tell Funnelish exactly what to do with the contact in Klaviyo when that trigger fires.
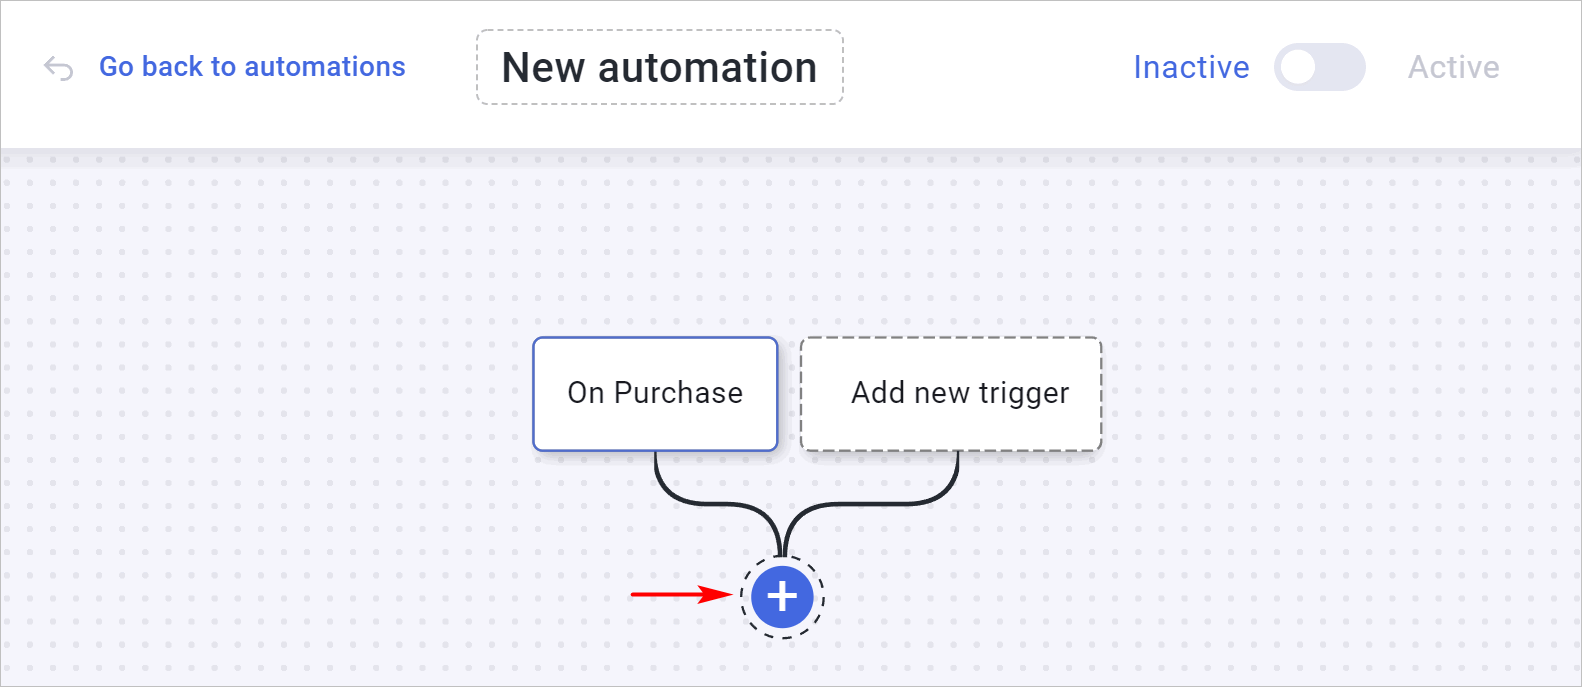
- Back on the canvas, click the plus (+) button below your trigger.
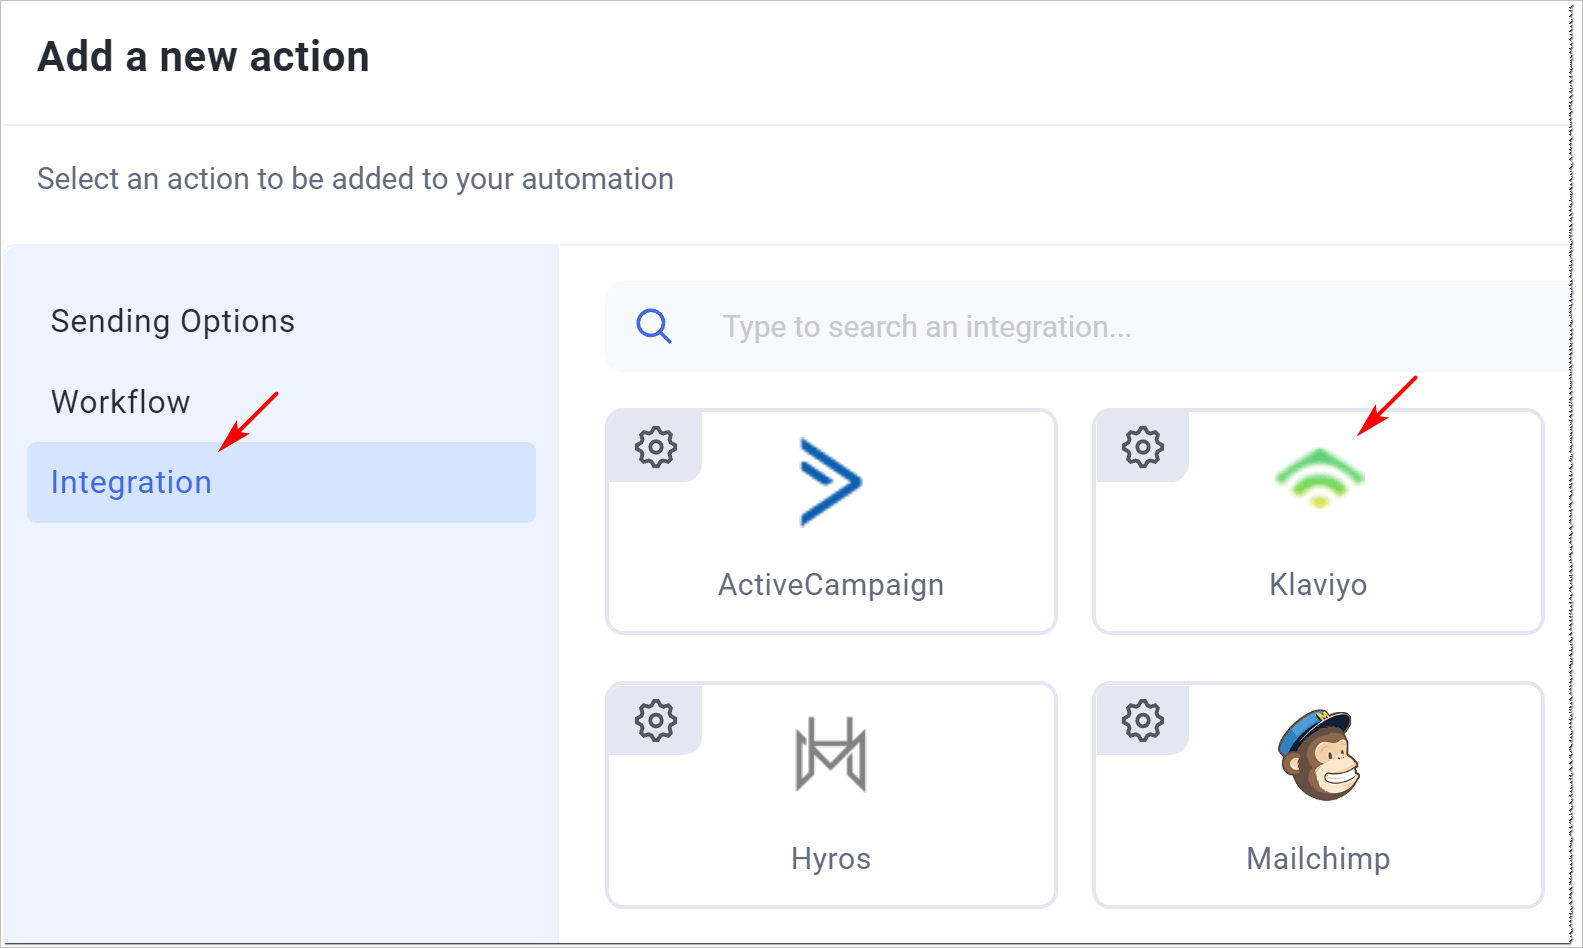
- Go to Integration > Klaviyo.
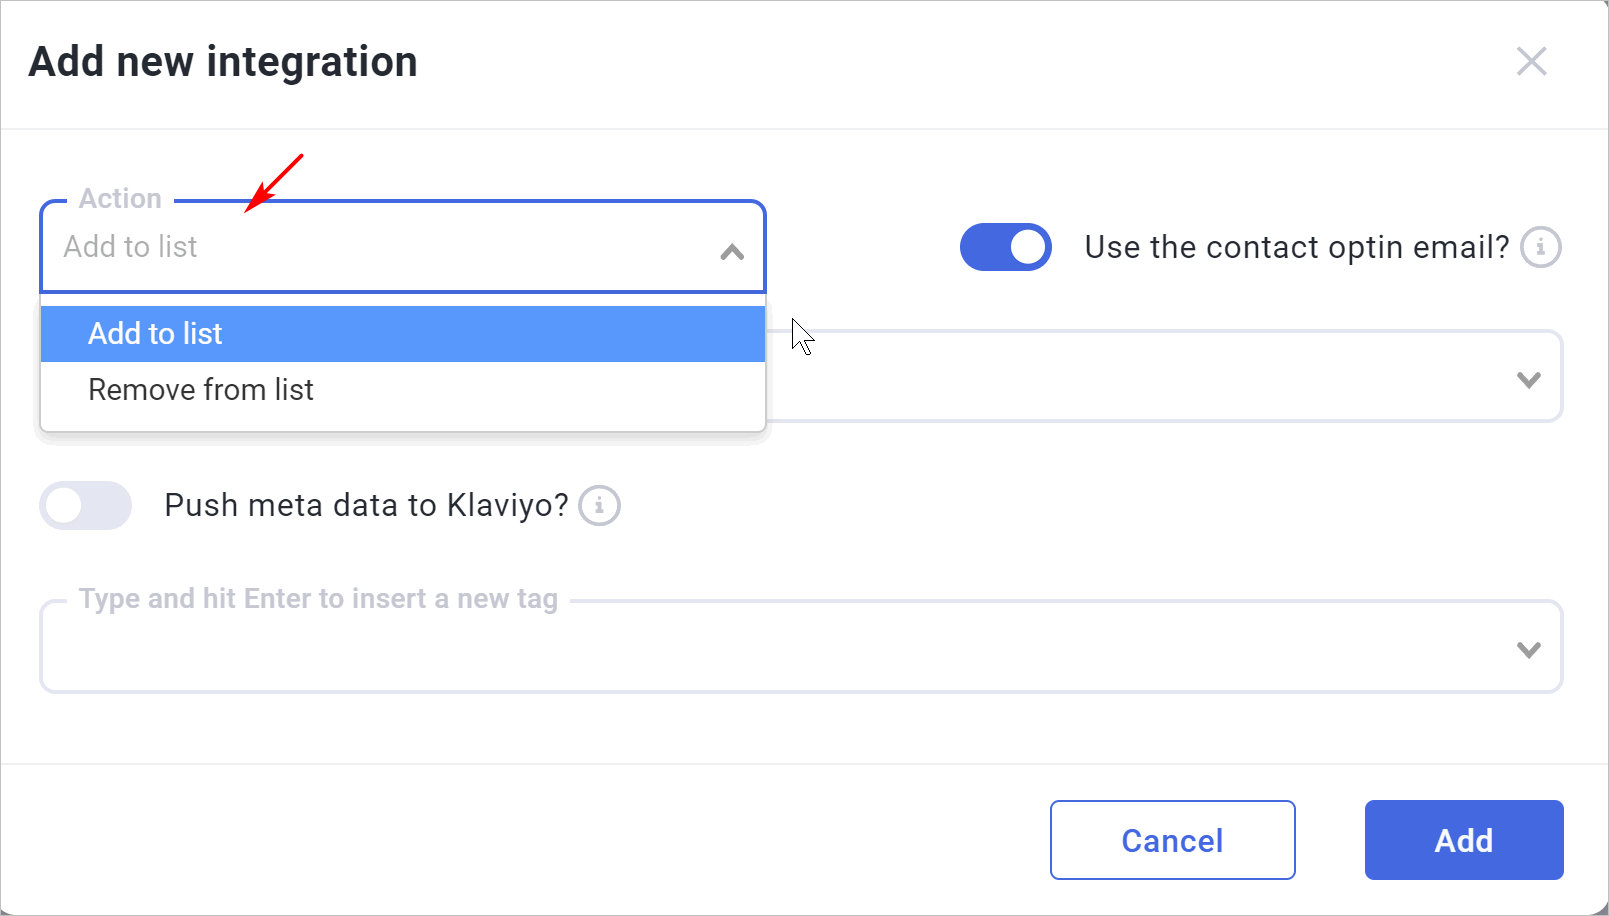
- Click the Action drop-down field and choose what you want to happen: Add to list or Remove from list.
Use Case: You can use “Remove from list” to instantly pull a customer out of your abandoned cart sequence the moment they complete their purchase!
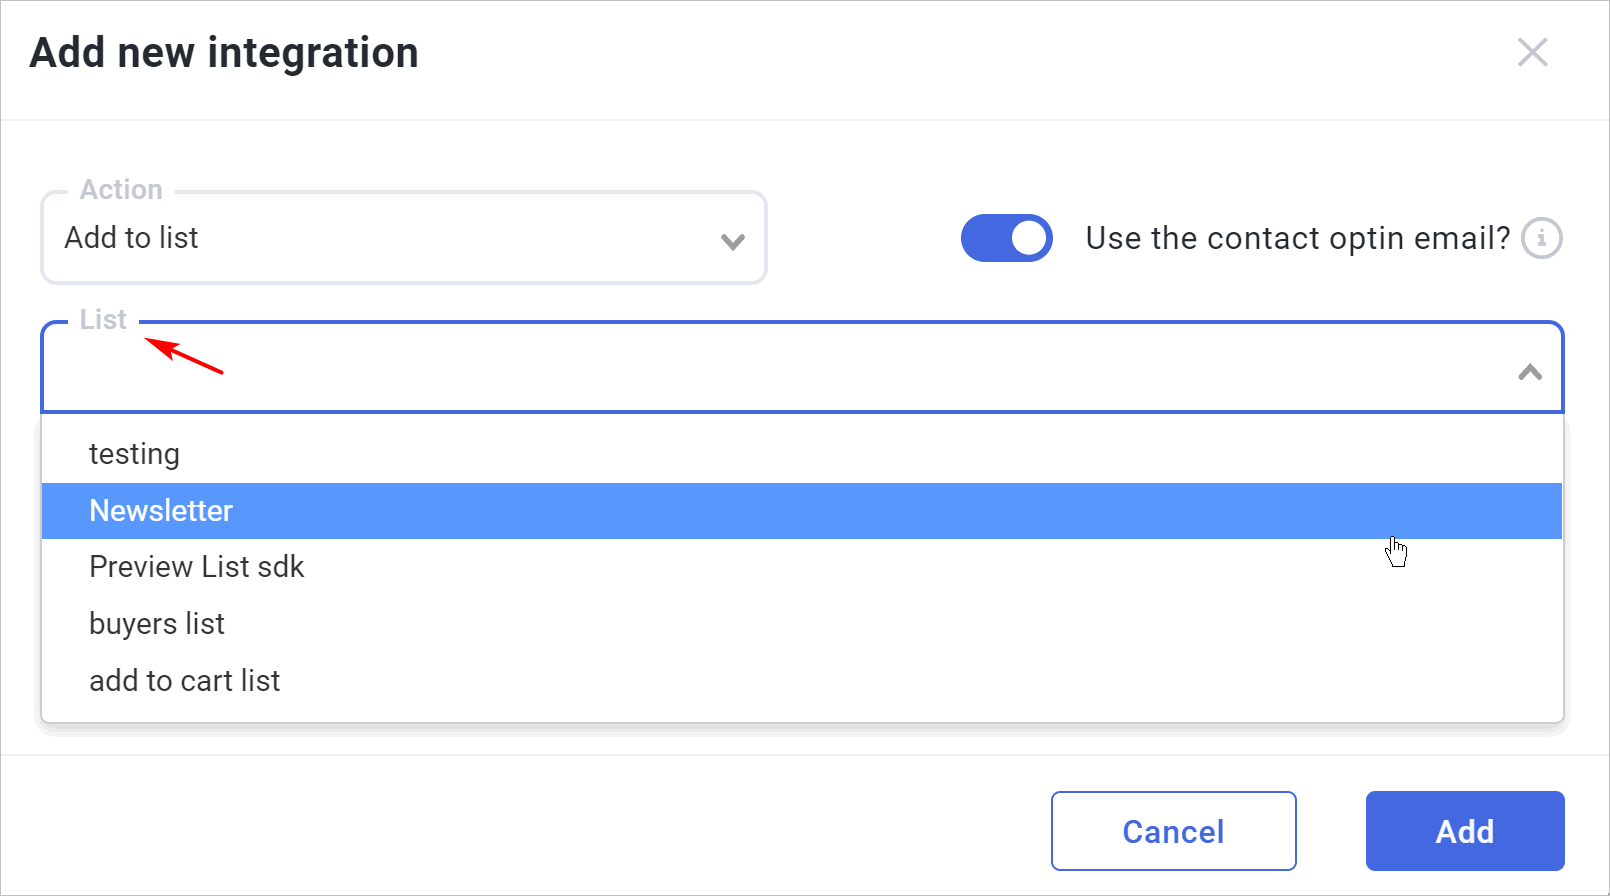
- Click the List field and select the desired Klaviyo list from your account.
- (Optional) Click the Tag field to assign a specific tag to the contact.
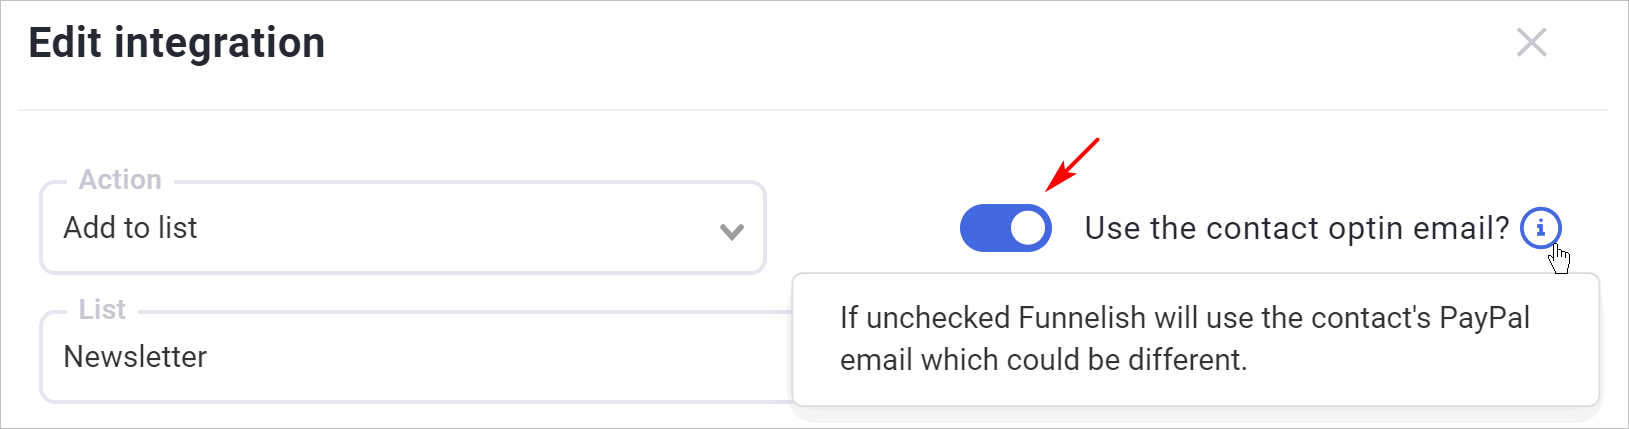
- (Optional) Trigger from Opt-in Email: If you have an opt-in page and want to use that initial email address as their subscriber email in Klaviyo (rather than the email they use at checkout via PayPal/Apple Pay), switch this toggle to the On position.
- Click Add to save the action.
Finally, make sure to switch the Active toggle in the top right corner of the main automation canvas to turn your sequence on! You are now fully integrated and ready to automate your Klaviyo marketing.