Hey everyone! Let’s talk about one of the highest-leverage elements in your sales funnel: The One-Time Offer (OTO).
If you aren’t using OTOs, you are leaving a massive amount of revenue on the table. A well-placed upsell capitalizes on a customer’s peak purchasing intent, they already have their credit card out, they already trust you enough to buy, and they are in the “buying zone.” By making the next offer a seamless, one-click addition, you can drastically increase your Average Order Value (AOV) without spending an extra dime on ad acquisition.
However, the incorrect setup is where a lot of conversions can fall through the cracks. If your buttons aren’t set up perfectly based on your product types, the customer experience breaks.
Here is exactly how to set up your OTO buttons so your funnel runs like a well-oiled machine!
 Step-by-Step OTO Button Configuration
How you set up your “Add to my order” button depends entirely on the complexity of the offer on your page. Follow the steps below based on your specific product structure:
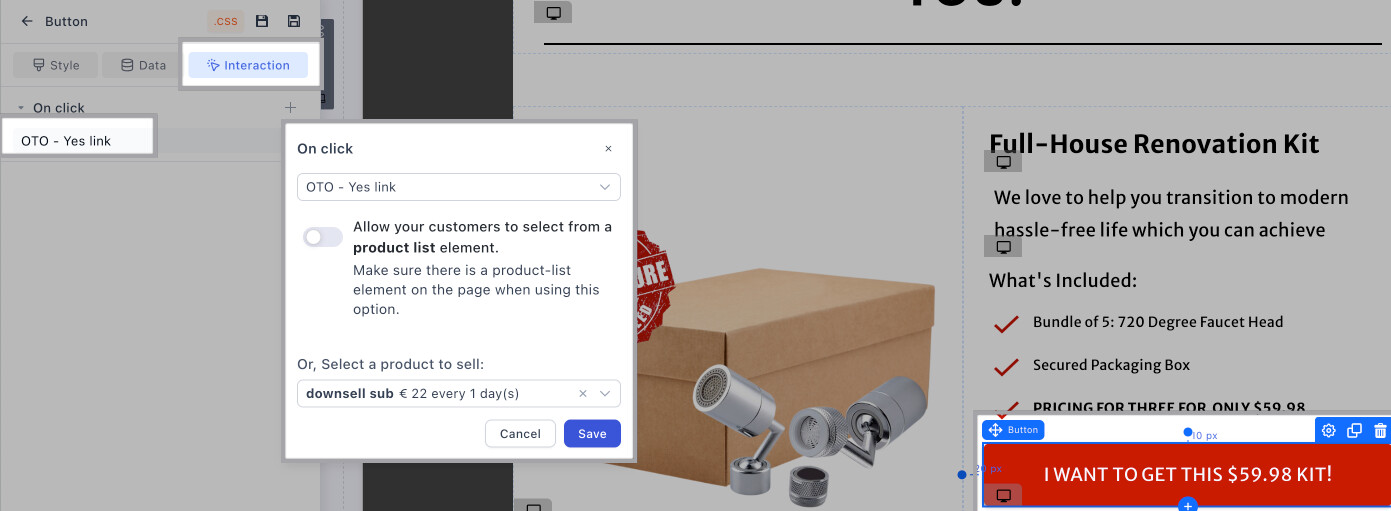
1. Single Product (No Variants)
If your upsell page only offers one straightforward product (e.g., an eBook, a specific course, or a single bottle of supplements), keep it frictionless.
- Click on your “Add to my order” button.
- Set the button action to “OTO-YES LINK”.
- Assign that exact product so the system knows exactly what to charge them for with that single click.
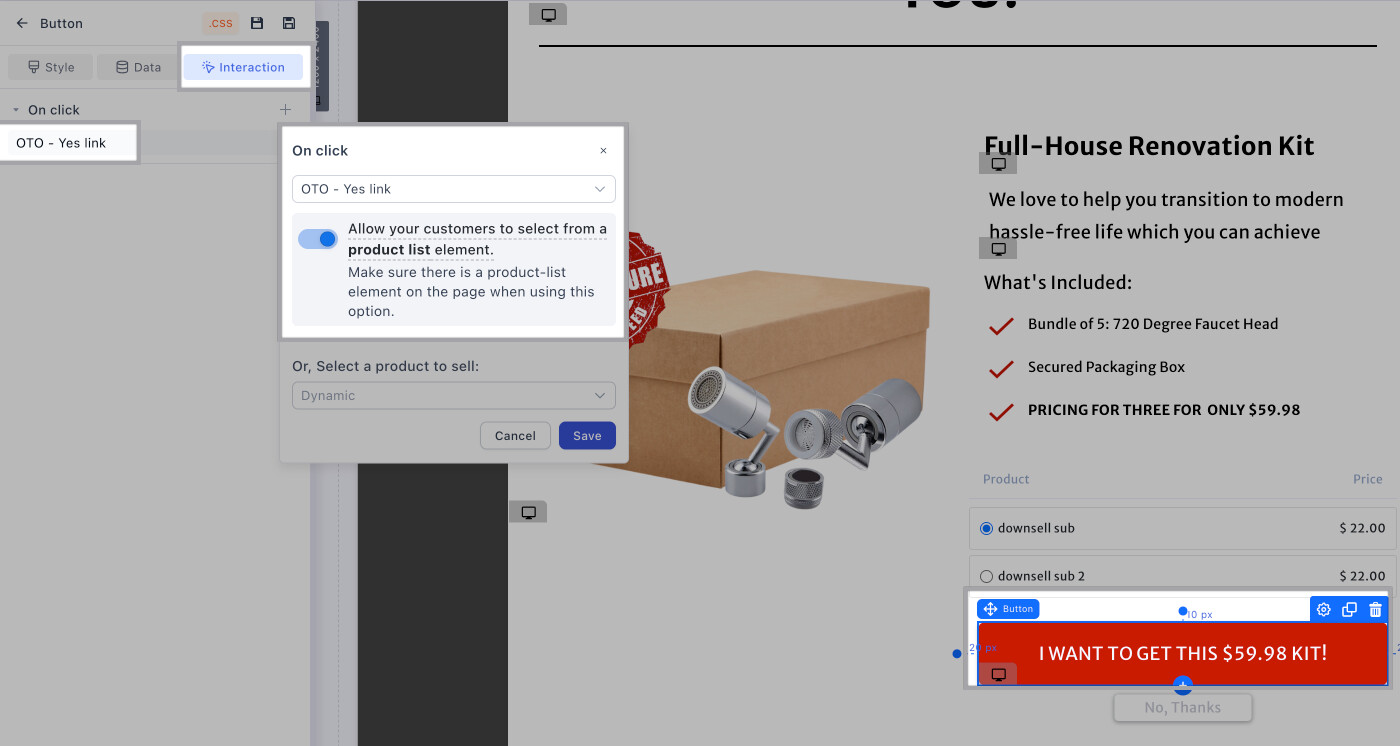
2. Multiple Products or 1 Product with Variants
If your upsell includes choices—like different sizes, colors, or tiered packages (e.g., 1 bottle vs. 3 bottles)—a one-click button won’t work on its own because the system needs to know which option they want.
- First, add a Product List element to your page, placing it directly above your buy button so the customer clearly sees their options.
- Click your “Add to my order” button.
- Set the button action to “ALLOW YOUR CUSTOMERS TO SELECT FROM A PRODUCT LIST ELEMENT”. This tells the system to read their selection before processing the charge.
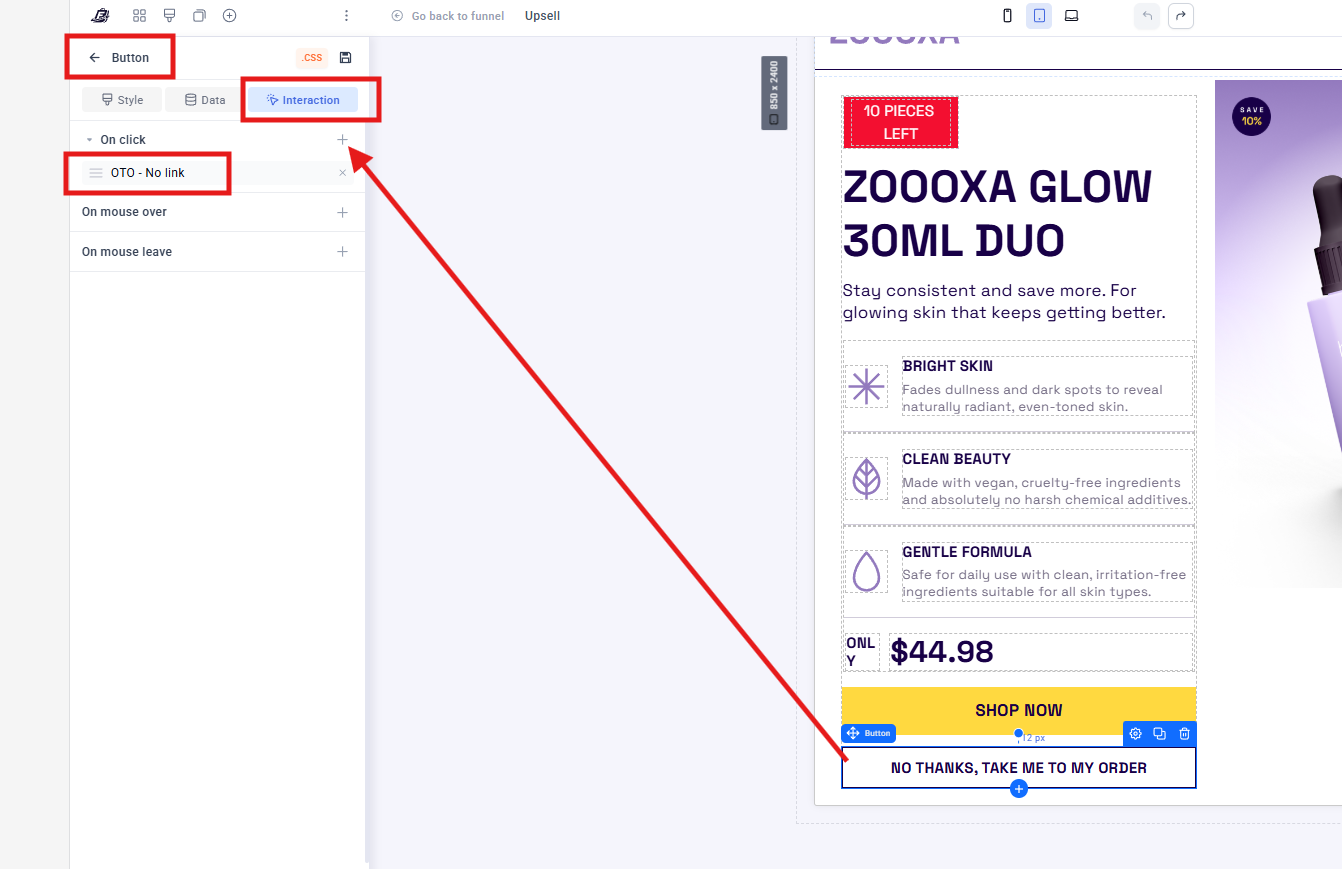
3. The “No Thanks” Button
Never trap your customers on a page. Always provide a clear way to decline the offer and move forward to your thank-you page (or your downsell page!).
- Select the text or button you are using for the decline option.
- Set the action to “OTO - No Link”.
 Pro-Tip: Don’t hide your “No thanks” button to force conversions. Frustrated buyers often initiate chargebacks. Instead, make your OTO copy so compelling that they simply don’t want to click the decline button!
Drop a comment below if you have any questions about setting this up, and let’s get those AOV numbers up! ![]()