Seamlessly sync new orders from your ecommerce funnels directly to your ShipStation account!
The Funnelish ShipStation integration puts your fulfillment on absolute autopilot. It natively supports product variants and features advanced Order Bundling to completely eliminate the headache of upsells and downsells being processed as separate shipments for the same customer.
To get your automatic fulfillment up and running, you need to complete two main phases: connecting your accounts and creating your product automations.
Watch this quick video walkthrough to see the integration in action:

 Step 1: Connect Funnelish to ShipStation
First, we need to securely link your Funnelish workspace to your ShipStation account using API keys.
Part A: Get Your ShipStation API Keys
-
Open a new browser tab and log in to your ShipStation account.
-
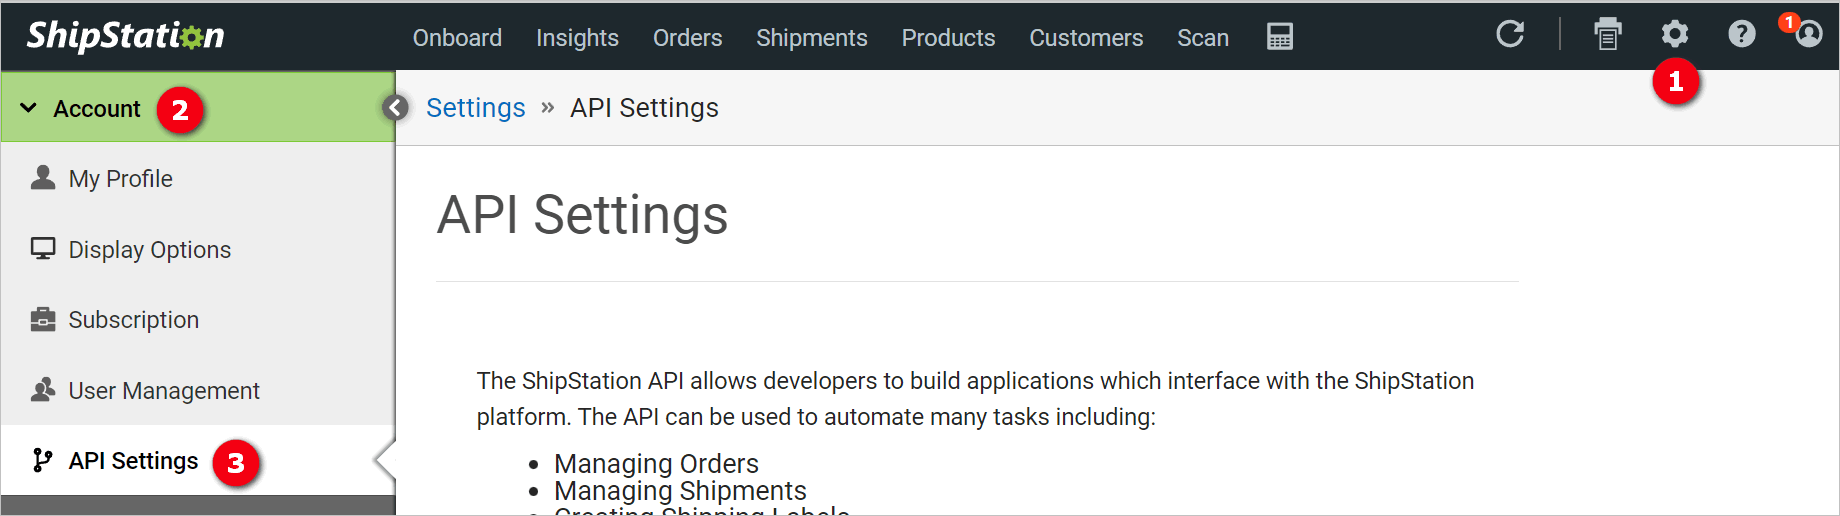
Click the Gear icon (Settings) in the top right corner.
-
On the left sidebar, click the Account menu tab, then select API Settings.
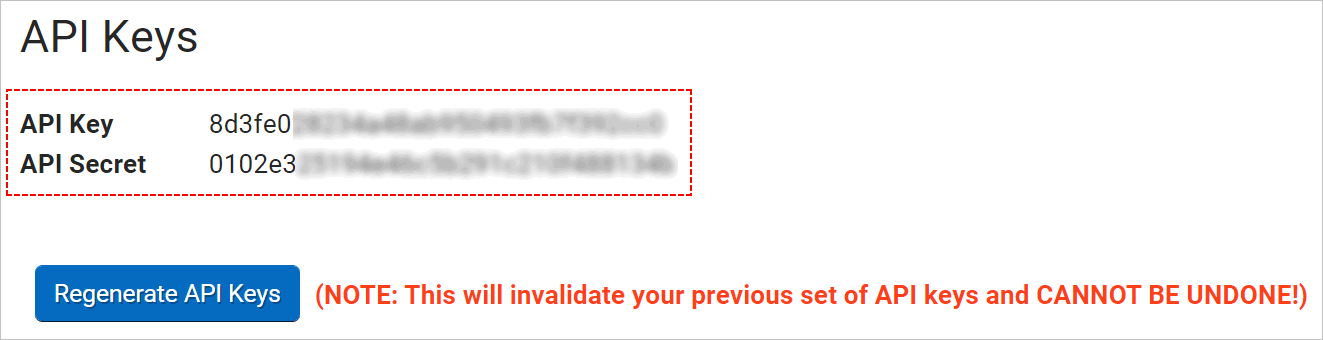
- Look at your API Keys.
- If your account does not have any keys yet, click the Generate API Keys button.
- If your account already has API keys, use the existing ones!
Warning: Regenerating new API keys in ShipStation is not recommended. Doing so will instantly invalidate your older keys and break any existing integrations you have set up on other platforms!
Part B: Connect Inside Funnelish
-
Open a new browser tab and log in to your Funnelish account.
-
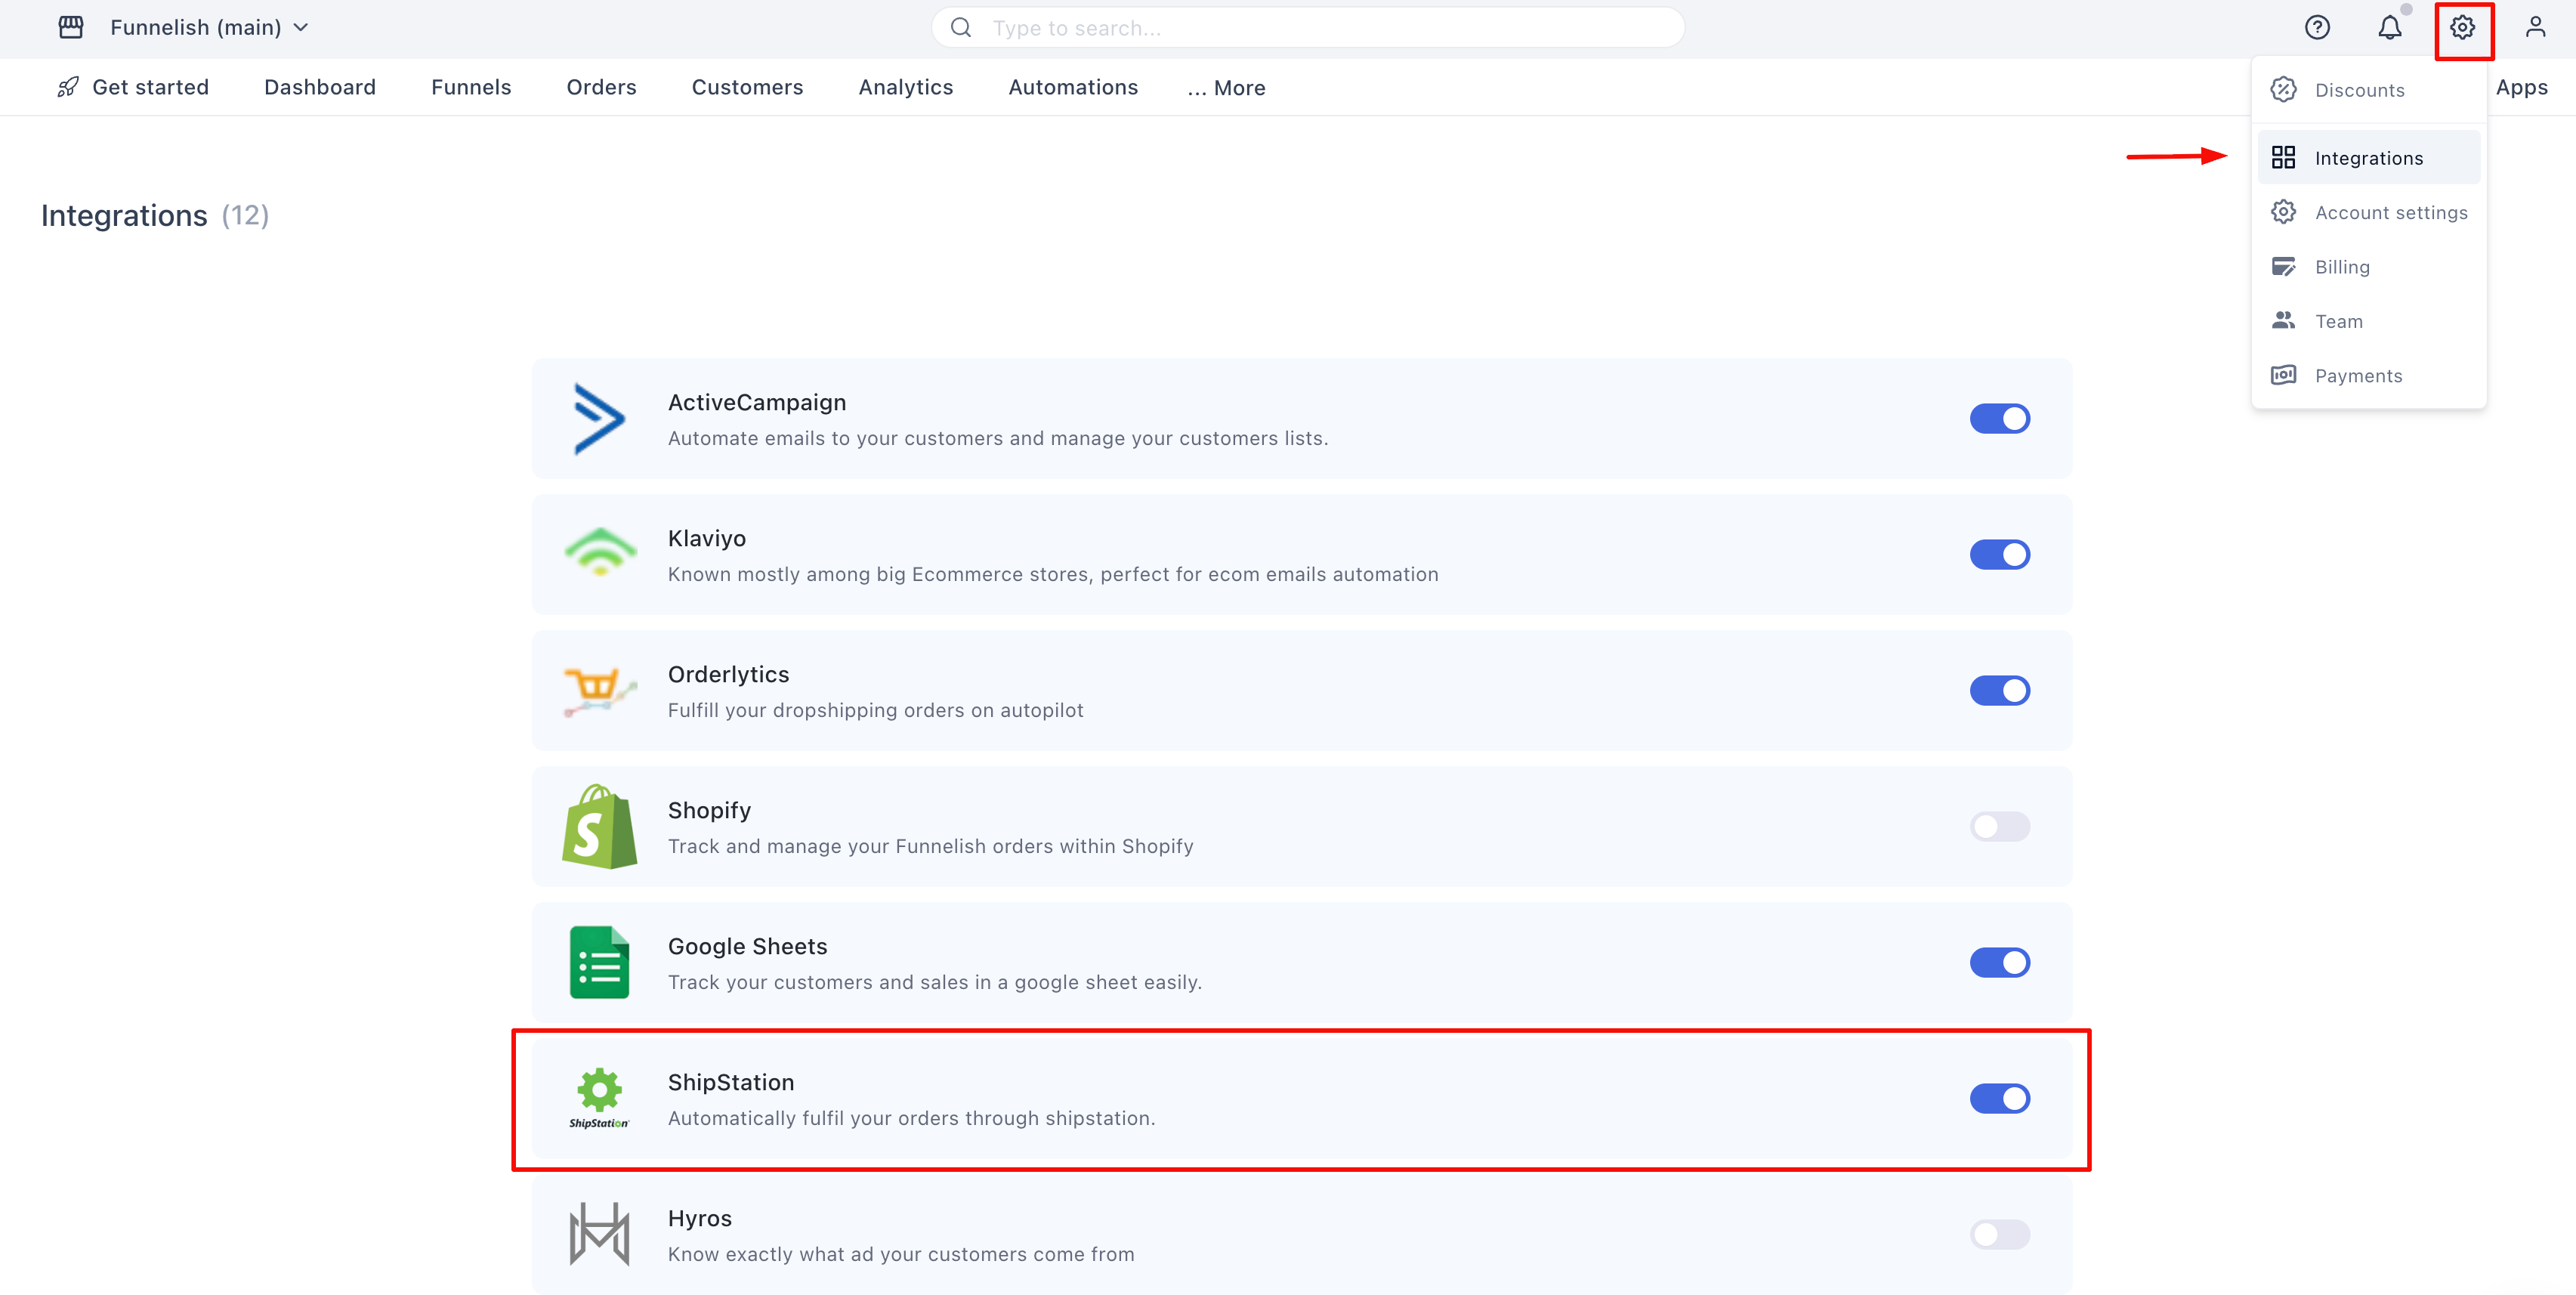
Click the Settings gear icon at the top right, then select Integrations.
-
Click on ShipStation to open the setup side panel.
-
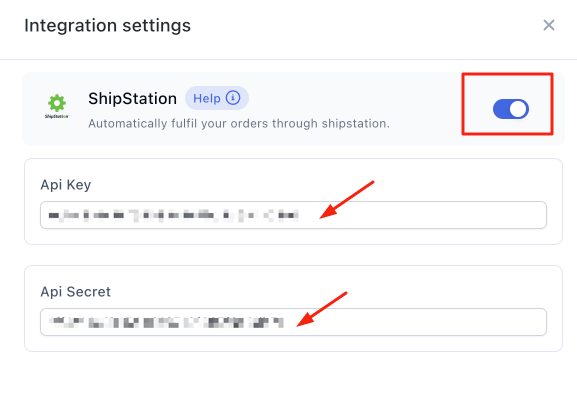
Switch the connection toggle at the top of the panel to the ON position.
-
Copy the API Key from your ShipStation dashboard and paste it into the Funnelish field.
-
Copy the API Secret from ShipStation and paste it into the Funnelish field.
-
Click Save changes. Your accounts are now linked!
Pro-Tip: Always ensure the toggle switch at the top of the Funnelish panel remains in the “On” position, otherwise the API connection will be paused.
 Step 2: Set Up Product Automations
Now that ShipStation is connected, you need to map your funnel products so ShipStation knows exactly what to ship when a customer completes a purchase.
-
Log in to your Funnelish account and open your funnel.
-
Click the specific Step that holds your product (e.g., your Checkout or Upsell step).
-
Click on the product you want to automate to open its settings panel.
-
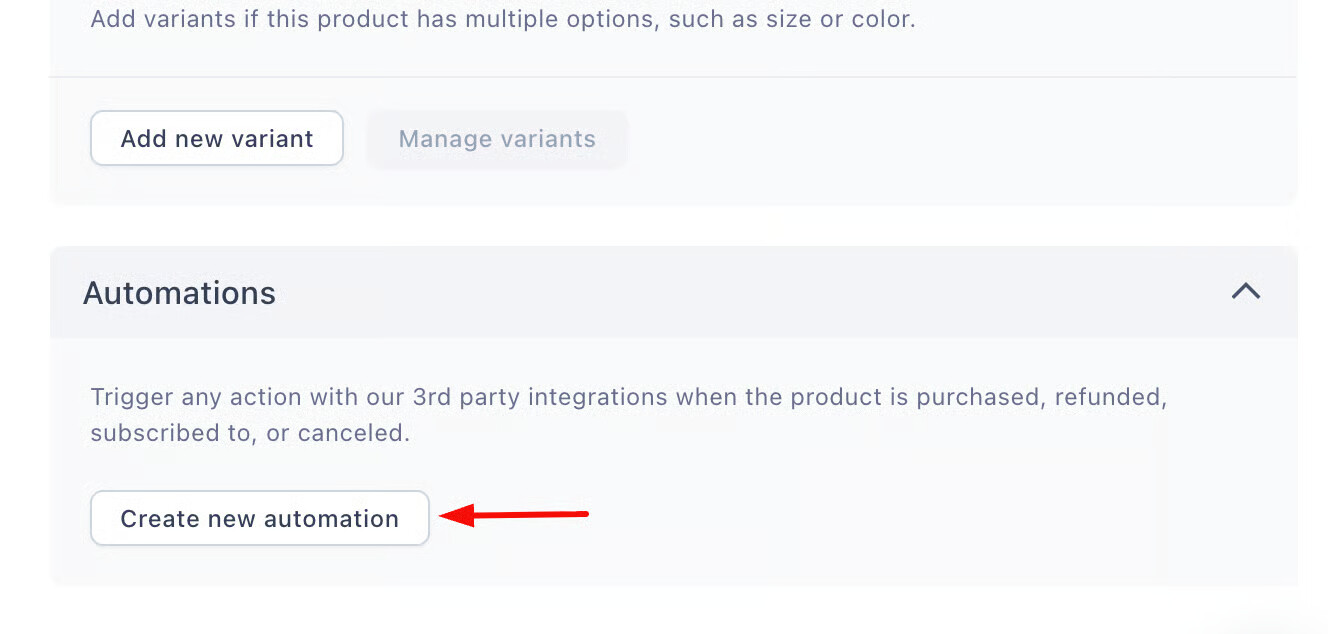
Scroll to the bottom of the panel and click the Create new automation button.
Configuring the Workflow
-
In the automation window, select the On Purchase trigger and click Continue.
-
Select ShipStation as your integration.
-
Click the Action field and select Create an order.
-
Click the Store field and select your specific ShipStation store name.
-
Click the Product field and map it to the exact product you are fulfilling.
Note on Triggers: While Funnelish supports triggers like refunds and subscription cancellations for other apps, ShipStation automations should always use the “On Purchase” trigger, since the primary goal is to generate a new fulfillment order when a sale occurs.
 Advanced Settings (Highly Recommended)
Before you save your automation, you have access to two powerful optional settings that can drastically improve your workflow.
1. Order Bundling (Crucial for Upsells)
If you are offering post-purchase upsells or order bumps, Order Bundling is an absolute must-have. > ![]() Why use bundling? Without bundling, if a customer buys your main product and then accepts an upsell, ShipStation will generate two separate shipping labels for the same customer.
Why use bundling? Without bundling, if a customer buys your main product and then accepts an upsell, ShipStation will generate two separate shipping labels for the same customer.
Enabling bundling adds a short waiting period that allows Funnelish to merge the initial product and all accepted upsells into one clean, single order before sending it to ShipStation.
-
Switch the Enable bundling toggle to the ON position.
-
Enter a time limit in the Wait at least field. We highly recommend setting this between 5 to 7 minutes. This is the perfect amount of time to let the customer finish browsing your post-purchase funnel.
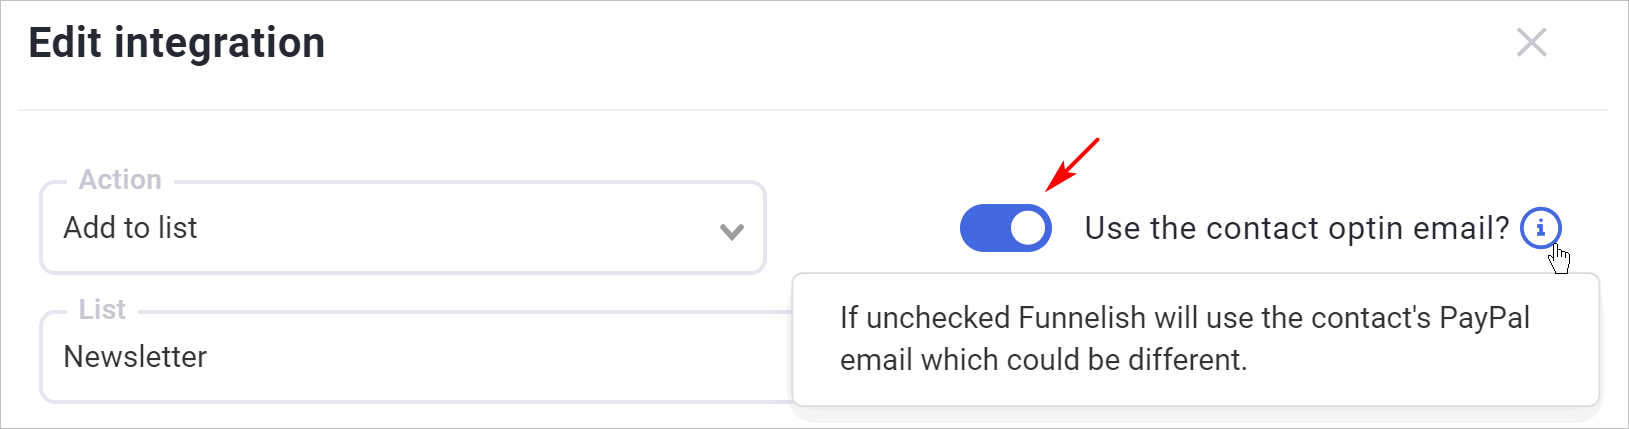
2. Customer Optin Email
By default, Funnelish sends the email address the customer used on the payment gateway (like their PayPal email) to ShipStation.
However, if you captured their email earlier in the funnel on a dedicated Optin Page, you might prefer to use that address for shipping notifications instead.
- To use their initial lead email instead of their payment email, switch the Use customer optin email toggle to the ON position. (If the two emails are identical, no change is made).
Click Save changes and you are completely done! Repeat Step 2 for any other products in your funnel that require physical fulfillment.
 Resources & Next Steps
Ready to master your fulfillment operations? Use these helpful resources to scale your shipping workflow:
ShipStation Resources:
- ShipStation Help Center: The official hub for all ShipStation workflow questions, including setting up shipping rules and label formats.
- Understanding ShipStation Stores: Learn how to configure your store settings inside ShipStation once Funnelish sends the orders over.
Helpful Links from Funnelish:
- Funnelish Blog: Read up on advanced e-commerce strategies, CRO tips, and dropshipping advice.
- Funnelish Community: Connect with other sellers, share your funnel setups, and get direct answers from our expert team.
- Adding Products to Your Funnel: Need a refresher on setting up your initial logical offers? Review our core product setup guide.