If you’ve ever wondered why some checkouts feel smooth and easy… while others feel overwhelming and get abandoned halfway through, the structure is usually the reason.
One of the most effective ways to improve that experience is by switching to a 2 step checkout funnel.
But here’s the important part:
2 step checkouts aren’t always the right choice for every offer.
So in this guide, let’s break down when a 2 step checkout actually makes sense, when it doesn’t, and how to set one up properly in Funnelish.
What Is a 2 Step Checkout (Really)?
A 2 step checkout simply splits the process into two parts:
-
Step 1: Customer information (name, email, shipping, etc.)
-
Step 2: Payment details, price info.
That might sound like a small change, but psychologically it does two big things:
-
It reduces the initial friction
-
It creates a sense of progress (“I’ve already started, I might as well finish”)
When You Should Use a 2 Step Checkout
Let’s start with where this really shines.
You care about recovering abandoned checkouts
This is probably the biggest advantage.
Because you collect contact details in step 1, you can follow up with people who almost** bought**:
-
Email reminders
-
SMS flows
-
“Hey, your payment didn’t go through” messages
And these aren’t cold leads - they’re high-intent users who already tried to buy.
Read more on how to recover abandoned carts with Funnelish SMS
You’re selling anything above “impulse buy”
If your product:
-
Costs more than a few dollars
-
Requires a bit of consideration
-
Has multiple elements (bundles, options, etc.)
A 2 step checkout helps slow things down just enough to guide the user without overwhelming them, whilst also collecting for you the most valuable information at step 1 (email & phone number).
You’re using order bumps or add-ons
Trying to cram everything into a single-step checkout can get messy fast.
With 2 steps, you can:
-
Keep step 1 clean and focused
-
Use step 2 to present order bumps clearly
-
Avoid visual overload
You want better data (not just more sales)
Even when someone doesn’t complete the purchase, you still walk away with:
-
Email
-
Name
-
Sometimes shipping info
That’s valuable data you can actually use.
When a 2 Step Checkout Might NOT Be the Best Choice
This is where most people get it wrong.
Low-ticket, impulse products
If you’re selling something like:
-
£5–£15 products
-
Simple, no-brainer offers
Adding an extra step can actually hurt conversions.
In those cases, a 1-step checkout is often faster and more effective.
Very warm traffic
If your audience:
-
Already knows you
-
Already trusts you
-
Already wants the product
Then friction is your enemy.
The faster they can pay, the better.
How to Customize Your 2 Step Checkout in Funnelish
Once you’ve decided a 2 step checkout makes sense, setting it up is straightforward.
Add the 2 Step Checkout Element
- Open your page in the Funnelish editor
- Drag and drop the 2 Step Checkout element
Funnelish 2 Step Checkout Element Already Comes Optimized (Out of the Box)
As soon as you add the element, Funnelish gives you a pre-built structure based on best practices.
![]() You don’t start from scratch.
You don’t start from scratch.
Step 1 already includes:
-
Name
-
Email
-
Shipping details
Step 2 already includes:
-
Product list
-
Payment form
-
Order summary
-
Order bump
These are the essential building blocks of a high-converting checkout, especially if you’re aiming for higher AOV and a smooth buying experience.
Customize the Experience (Without Breaking What Works)
Inside the element, you’ll see a “+” button.
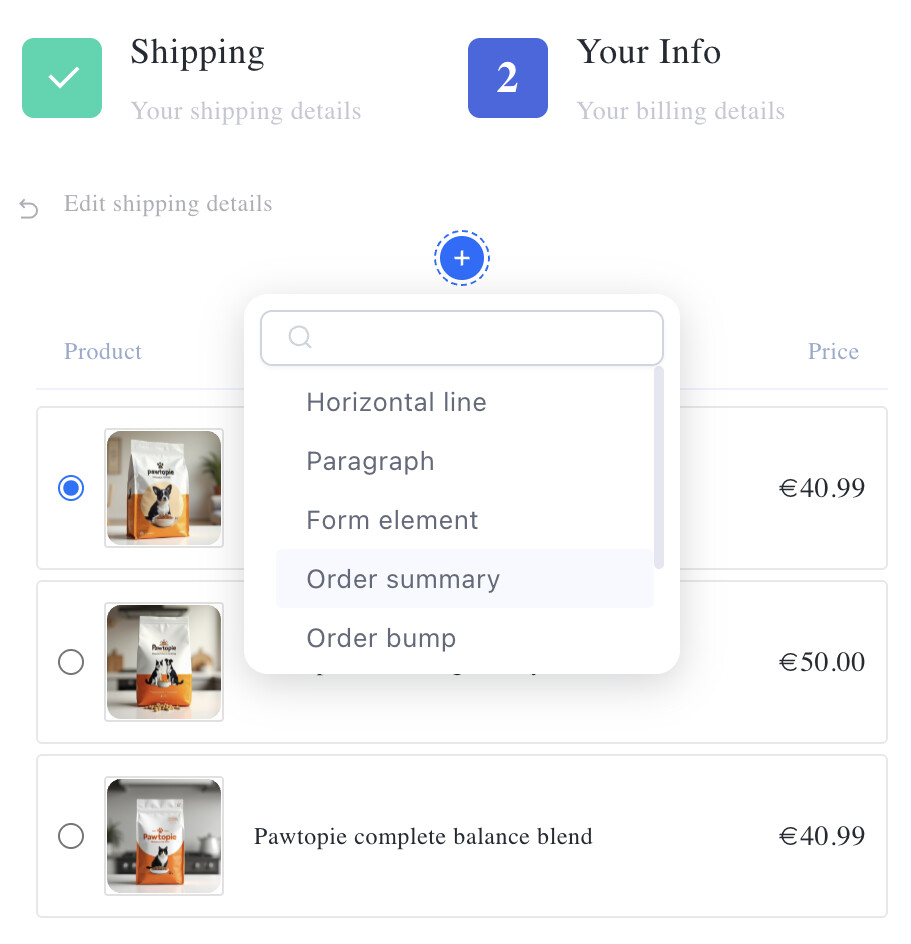
This is where you can enhance the checkout - not reinvent it.
You can add:
-
Text (benefits, guarantees, instructions)
-
Extra form elements (if needed)
-
Additional order bumps
-
Product lists (for bundles or variations)
-
Dividers and layout elements
The key here is balance.
![]() The default structure is already optimized, so your job is to support it, not overload it.
The default structure is already optimized, so your job is to support it, not overload it.
A Simple Rule to Follow
If you’re unsure whether to add something, ask:
“Does this help the customer make a decision — or does it slow them down?”
-
Helps → keep it
-
Distracts → remove it
A 2 step checkout funnel isn’t automatically better
Used in the right context, it can:
-
Increase conversions
-
Recover lost revenue
-
Capture valuable customer data
Used in the wrong context, it can add unnecessary friction.
The key is simple:
![]() Match your checkout structure to your offer and your audience.
Match your checkout structure to your offer and your audience.
And once you’ve done that, Funnelish gives you everything you need to build and customize it, without complexity, and without code.