Want to track your funnel leads, sales, and UTM data in a spreadsheet without paying for expensive third-party tools like Zapier?
Our native Google Sheets integration lets you send real-time event data straight from your funnel into any spreadsheet. You have full control over what data gets sent, allowing you to map specific funnel fields directly to your custom columns.
Watch the quick overview here:

Setting this up is a quick, two-part process:
- Connect your Google account to Funnelish.
- Create an automation to tell Funnelish exactly what data to send.
Step 1: Link Your Google Account
First, you need to grant Funnelish secure access to your Google Workspace so it has permission to update your sheets. Once connected, Funnelish will automatically push a new row of data to your spreadsheet the moment a customer takes action.
Step-by-step video guide:

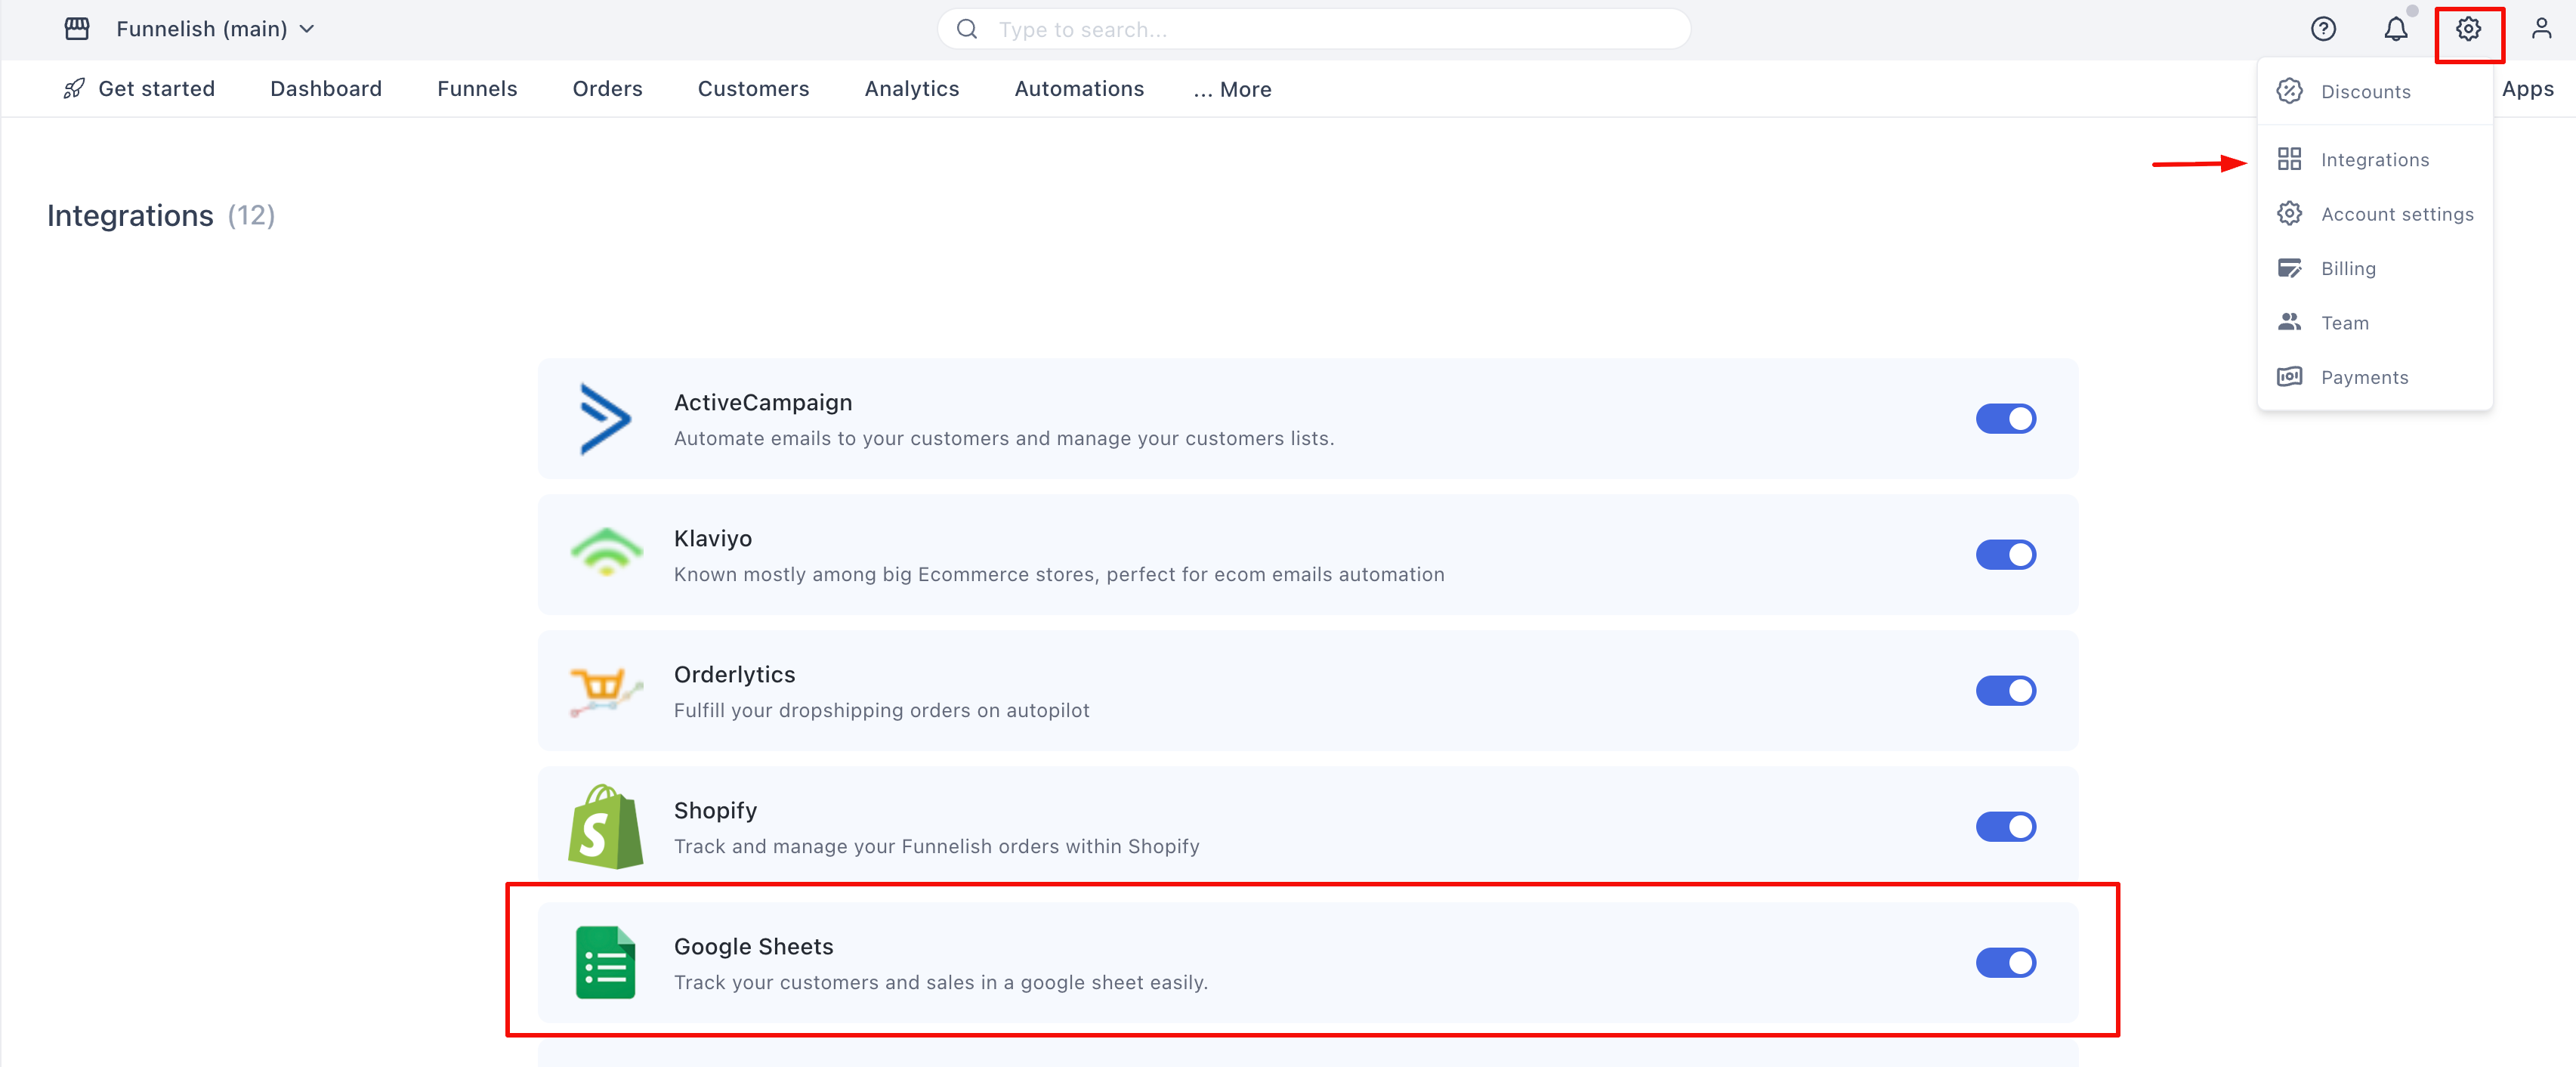
Connect the Integration
- Log in to your Funnelish dashboard.
- Click the Settings icon in the top right corner.
- Select Integrations from the menu.
- Click Google Sheets to open the setup panel.
Authorize Your Account
- Inside the side panel, click the toggle switch to turn the integration On.
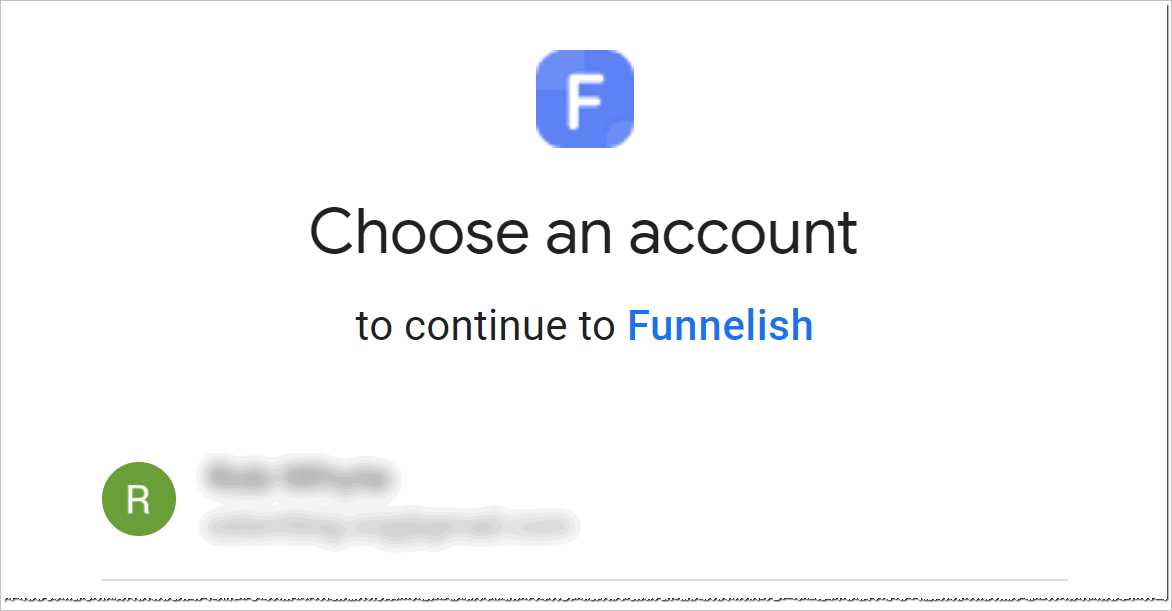
- Click the Sign in with Google button.

- A secure Google window will pop up. Choose the Google account that hosts your destination spreadsheet.
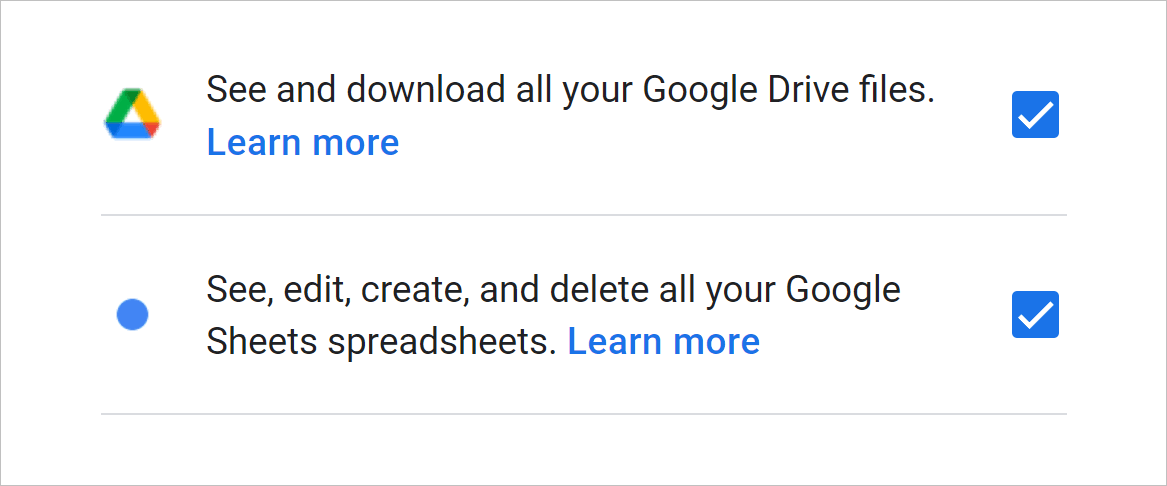
- Read through the permissions, check the necessary boxes, and click Continue to grant access.
- You’ll be redirected back to Funnelish. Click Save changes.
You’re officially connected! Let’s move on to the fun part.
Step 2: Set Up Your Product Automation
Now that your Google account is linked, you need to tell Funnelish when to send the data (the trigger) and where to put it (the destination sheet).
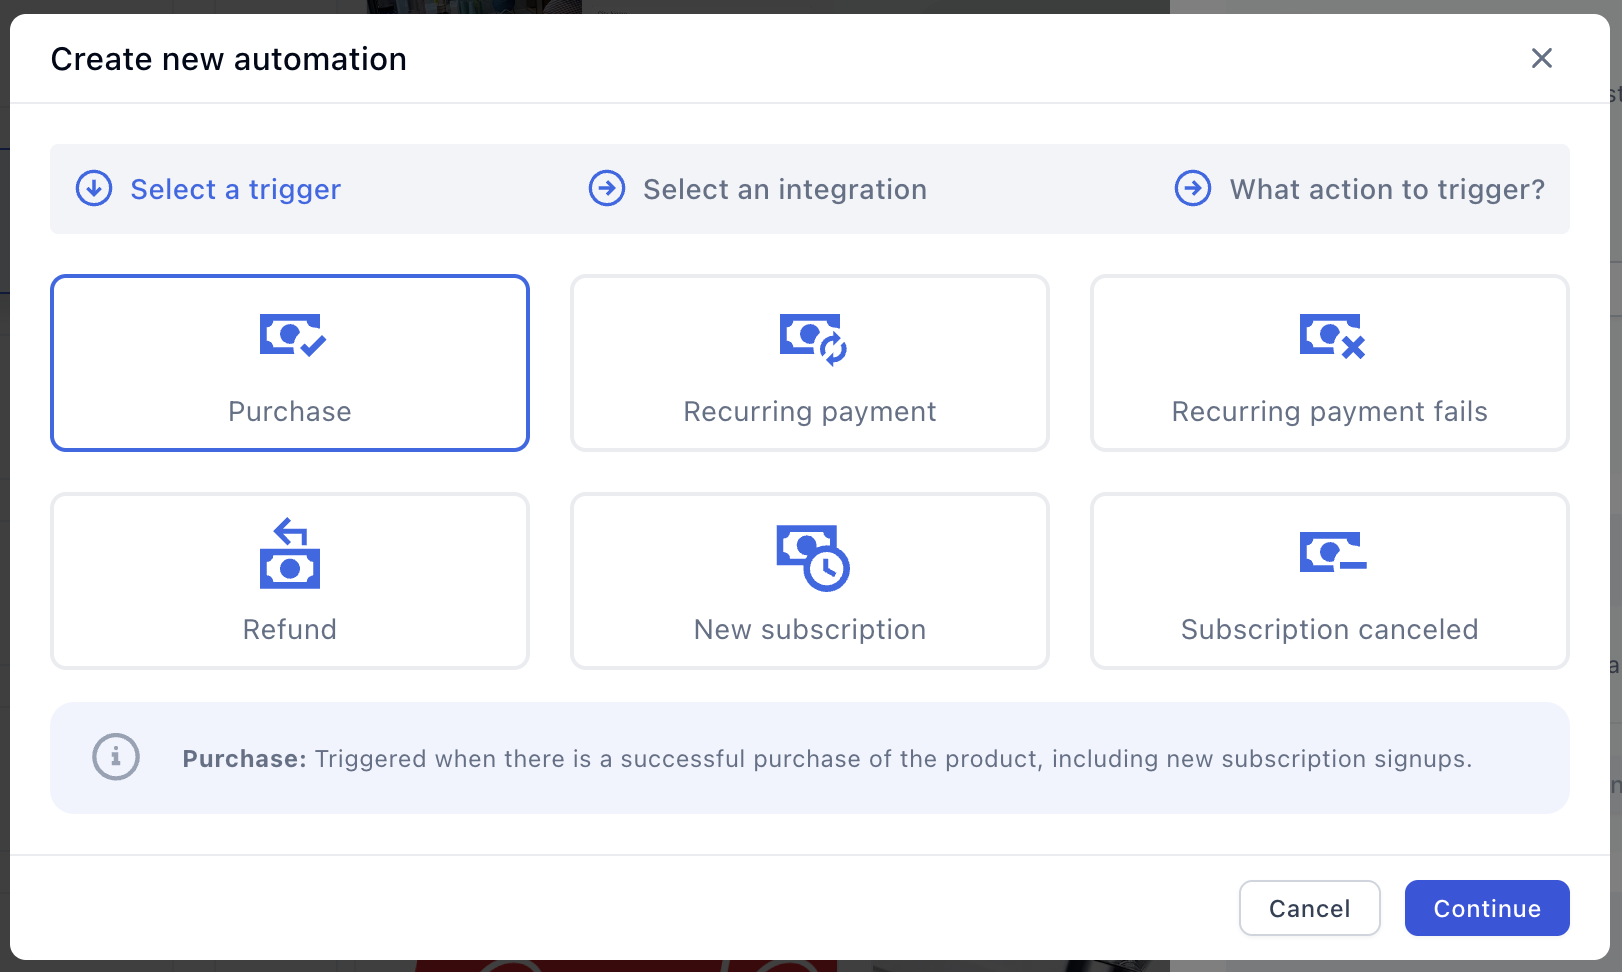
Create the Trigger
- Open up the funnel you want to track.
- Navigate to the funnel step containing your product(s).
- Click on the product you want to track. The product settings panel will open.
- Scroll to the very bottom and click the Create new automation button.
Tip: You can add this Google Sheets action to an existing automation, but for this guide, we are building a fresh one.

- Select the event that should trigger the data transfer. To track new orders, select On purchase.
- Click Save changes.
Choose Your Destination Sheet
Now, let’s point Funnelish to the right file.
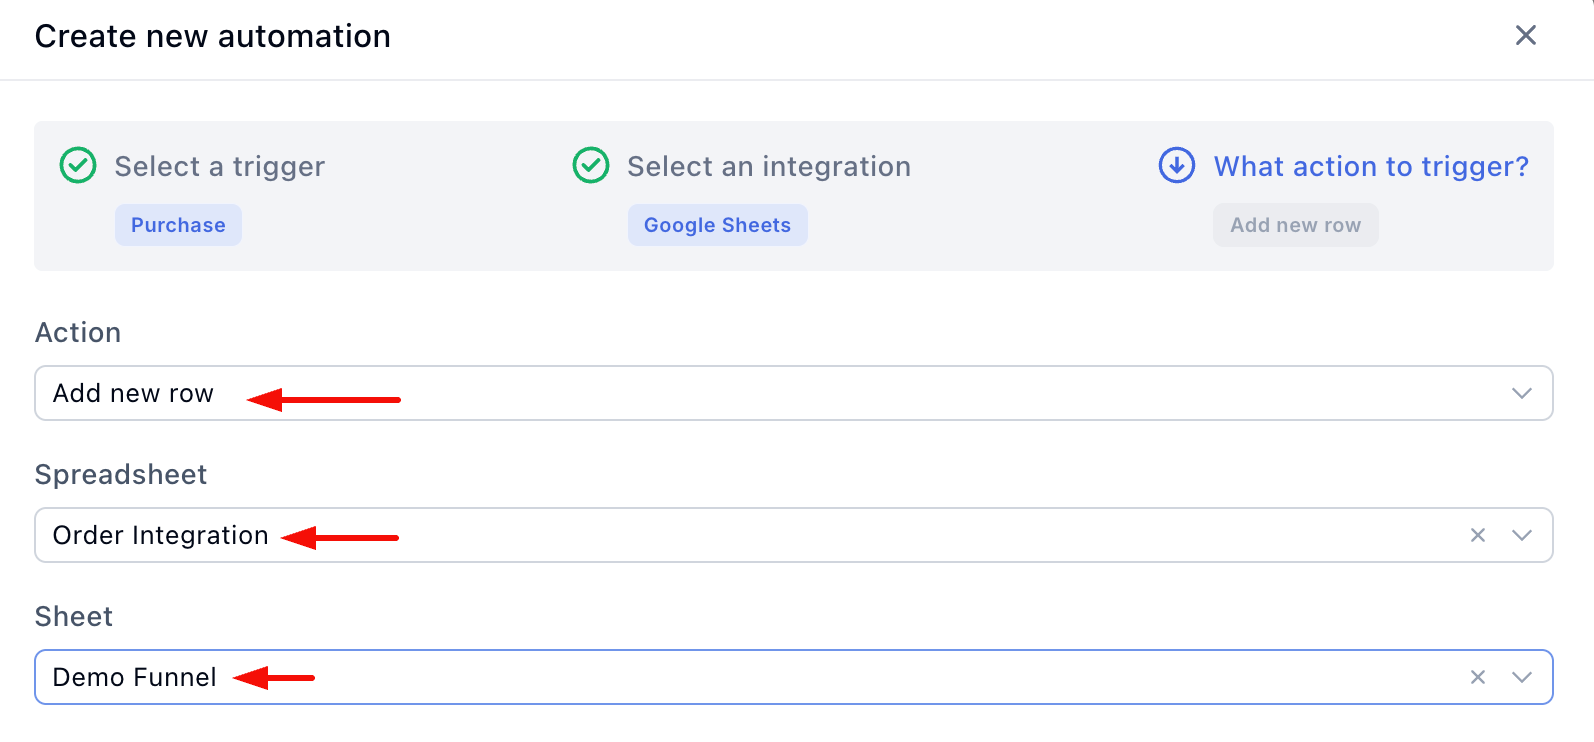
- From the integrations list, click Google Sheets.
- In the Action field, select Add new row.
- In the Spreadsheet field, select the name of your Google Sheet file.
- In the Sheet field, select the specific tab/sheet inside that file where the data should go.
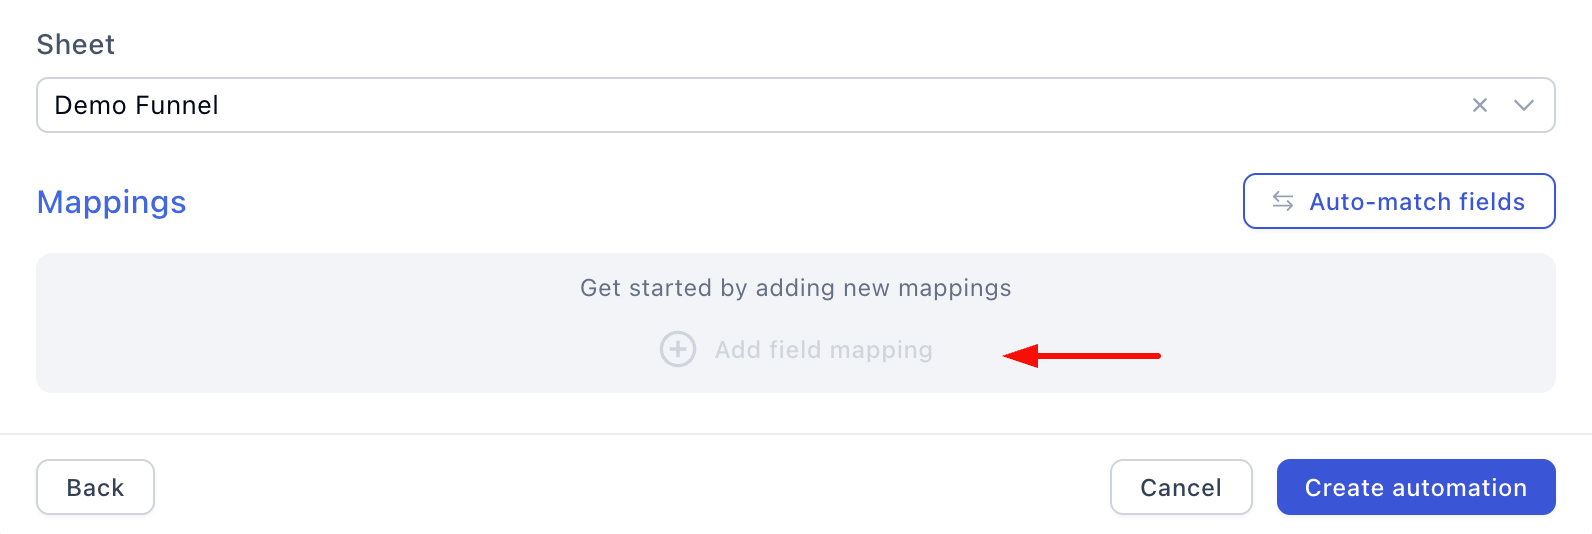
Step 3: Map Your Data Columns
The final step is mapping. This is where you create a bridge between the data collected in Funnelish (like a customer’s email) and the specific columns inside your Google Sheet.
- Click the Add field mapping link.
- Click the empty box on the left. A drop-down menu will appear showing all the available Funnelish data points.
Pro Tip: To make this process seamless, ensure the column headers in your Google Sheet closely match the labels used in Funnelish (e.g., name your column “Full Name” to match the Funnelish field).
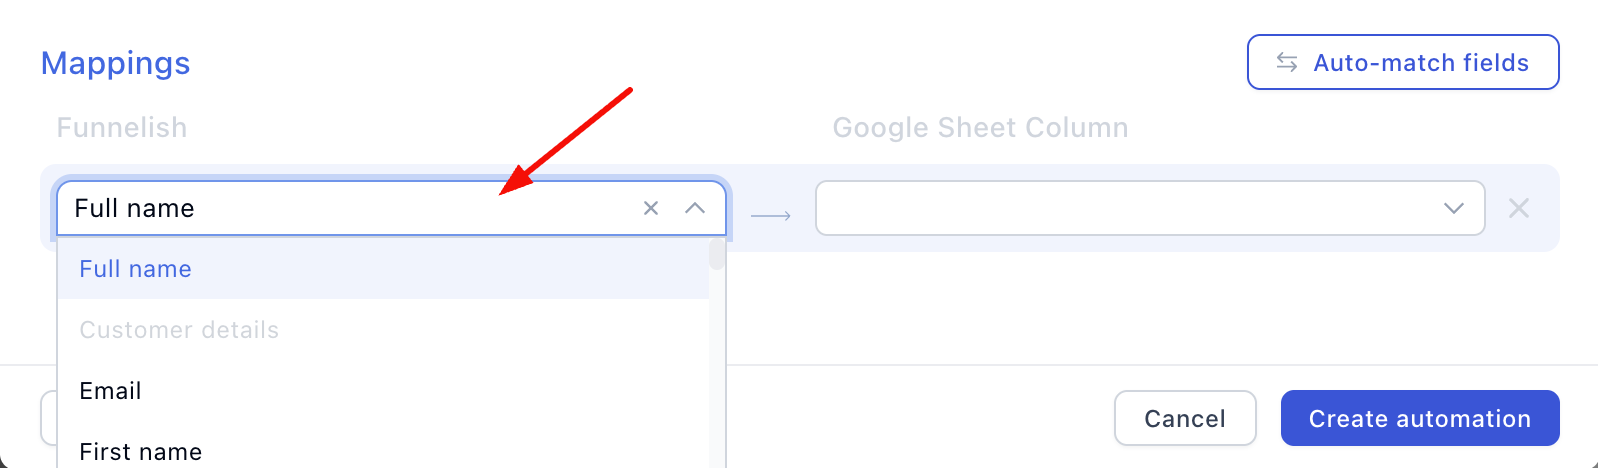
- Select a Funnelish label (e.g., Full Name).
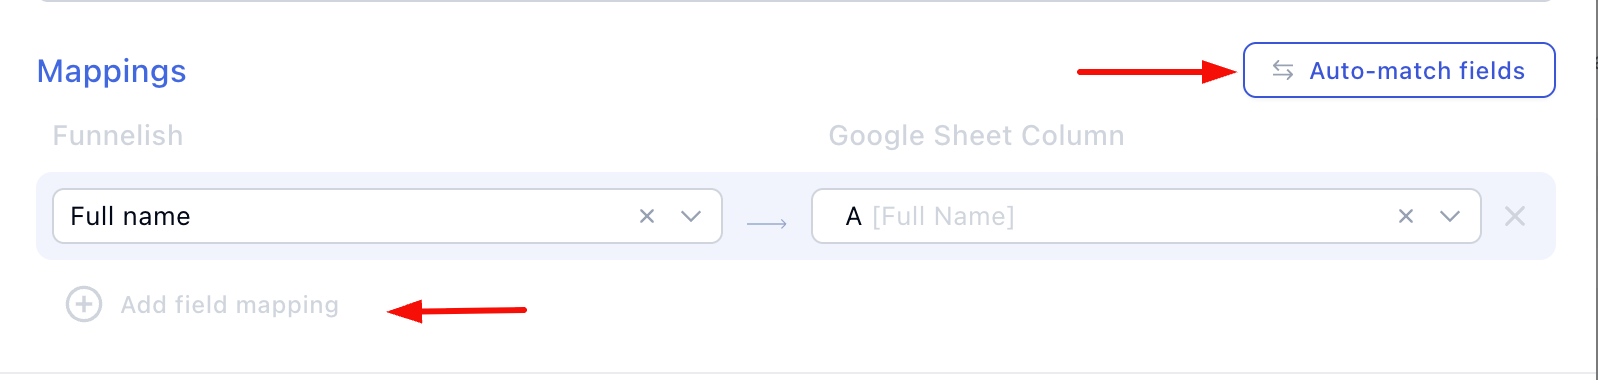
- Click the empty box on the right.
- Choose the corresponding column from your Google Sheet (e.g., Full Name).
Auto-Match & Review
- To speed things up, click the Auto-match fields button. Funnelish will intelligently attempt to pair up your remaining fields automatically!
- If you prefer to do it manually, just click Add field mapping to pair up the rest of your data points one by one.
- Review your final list line by line. If a mapping looks incorrect, simply click the box to change it.
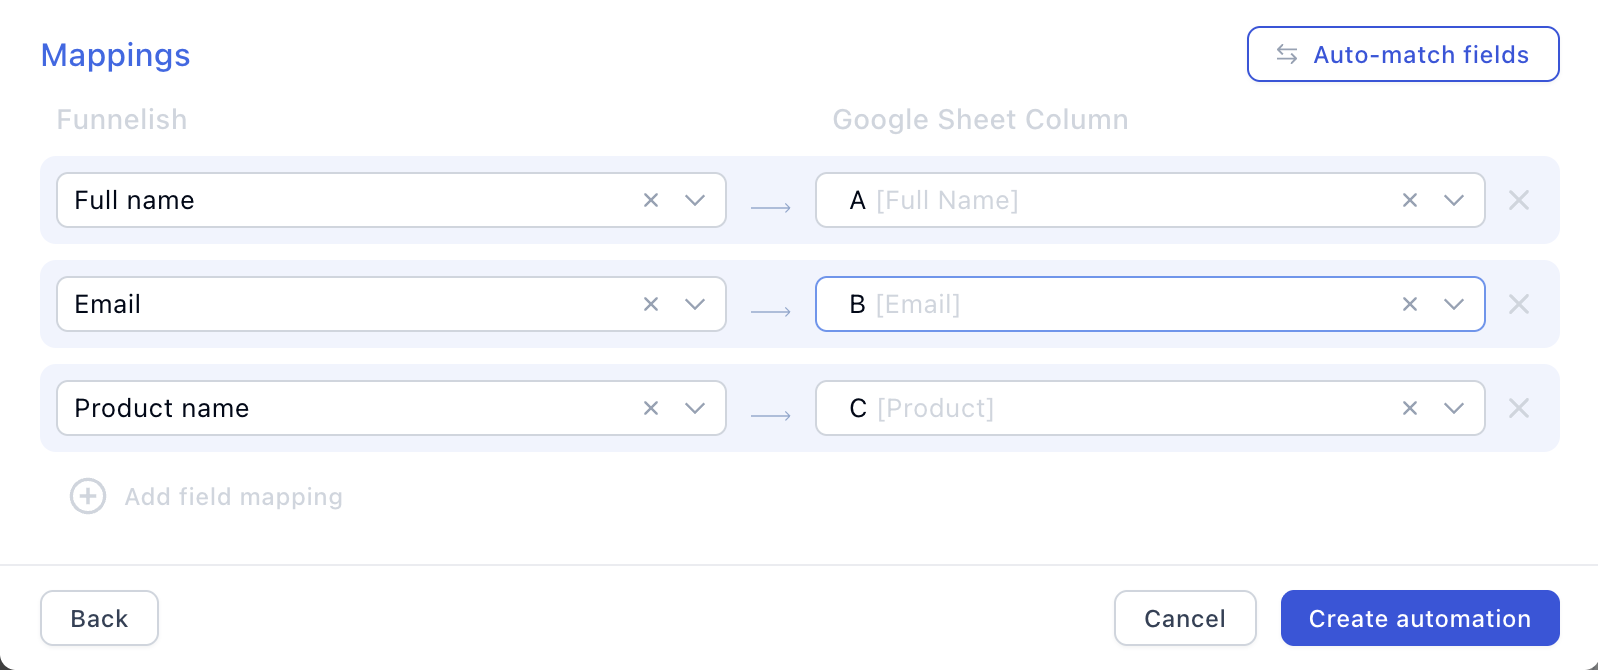
- Click Save changes on the mapping page.
- Click Save changes one last time on the main automation panel.
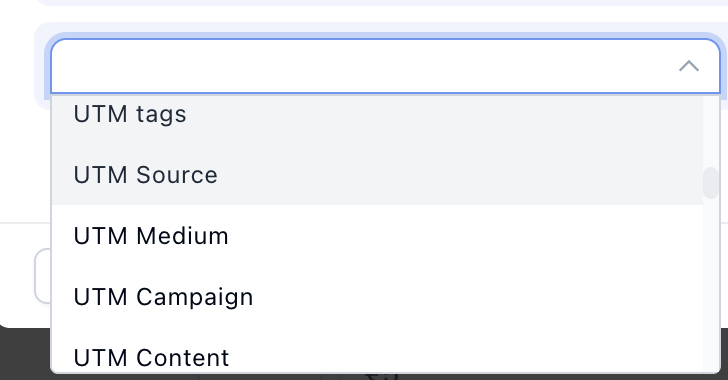
Bonus: Track Your Ad ROI (UTMs & Metadata)
Want to know exactly which ads are driving your sales? You can map your ad data right into your spreadsheet.
Scroll to the bottom of the left-side drop-down menu to find five UTM tags (UTM Source, Medium, Campaign, Content, and Term) and four metadata options (fbp, referrer, session_id, and user_agent). Just map these to your columns the same way you did for customer data!
Rest Easy: Funnelish will only append (add) new rows to your sheet. It will never overwrite, edit, or delete your existing data.