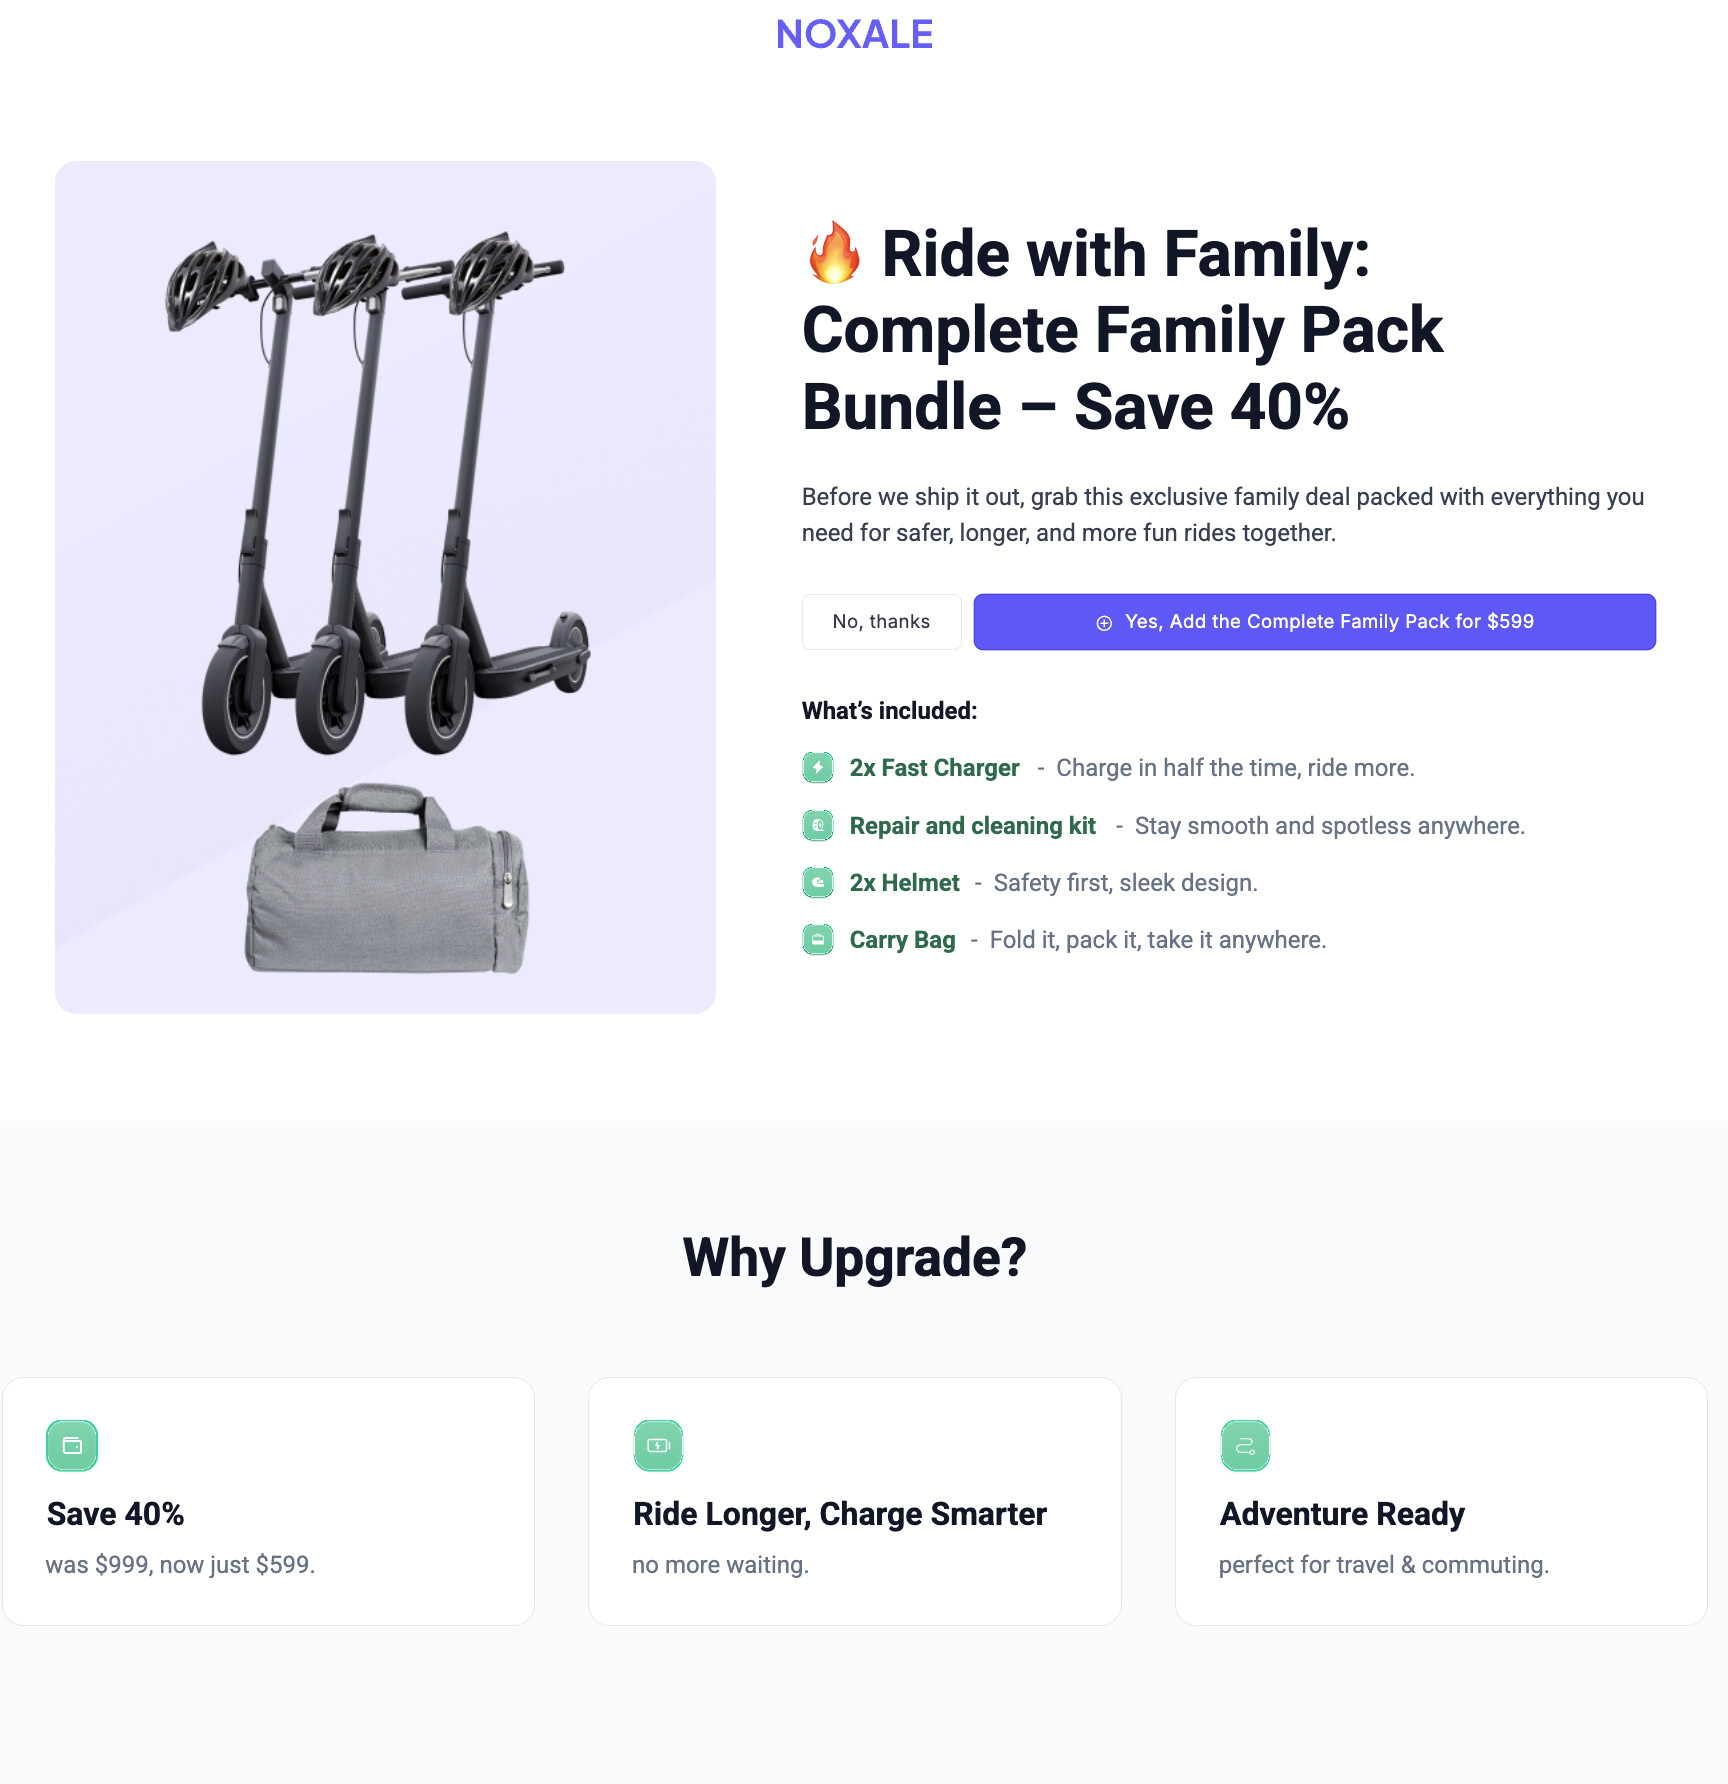
You’ve successfully guided a customer through your checkout. They bought your main product, and immediately after, they are hit with a One-Click Upsell (One-Time-Offer)—for example, an offer to buy three more units at a 30% discount.
Because their credit card is already vaulted**, they don’t need to re-enter their details.** One click, and the revenue is added to their order.
But what happens when they click the “No thanks” link?
Most eCommerce brands just send them straight to the Thank You page. They take the “No” and walk away. But in direct-response marketing, a “No” to your upsell just means “Not at that price” or “Not that quantity.”
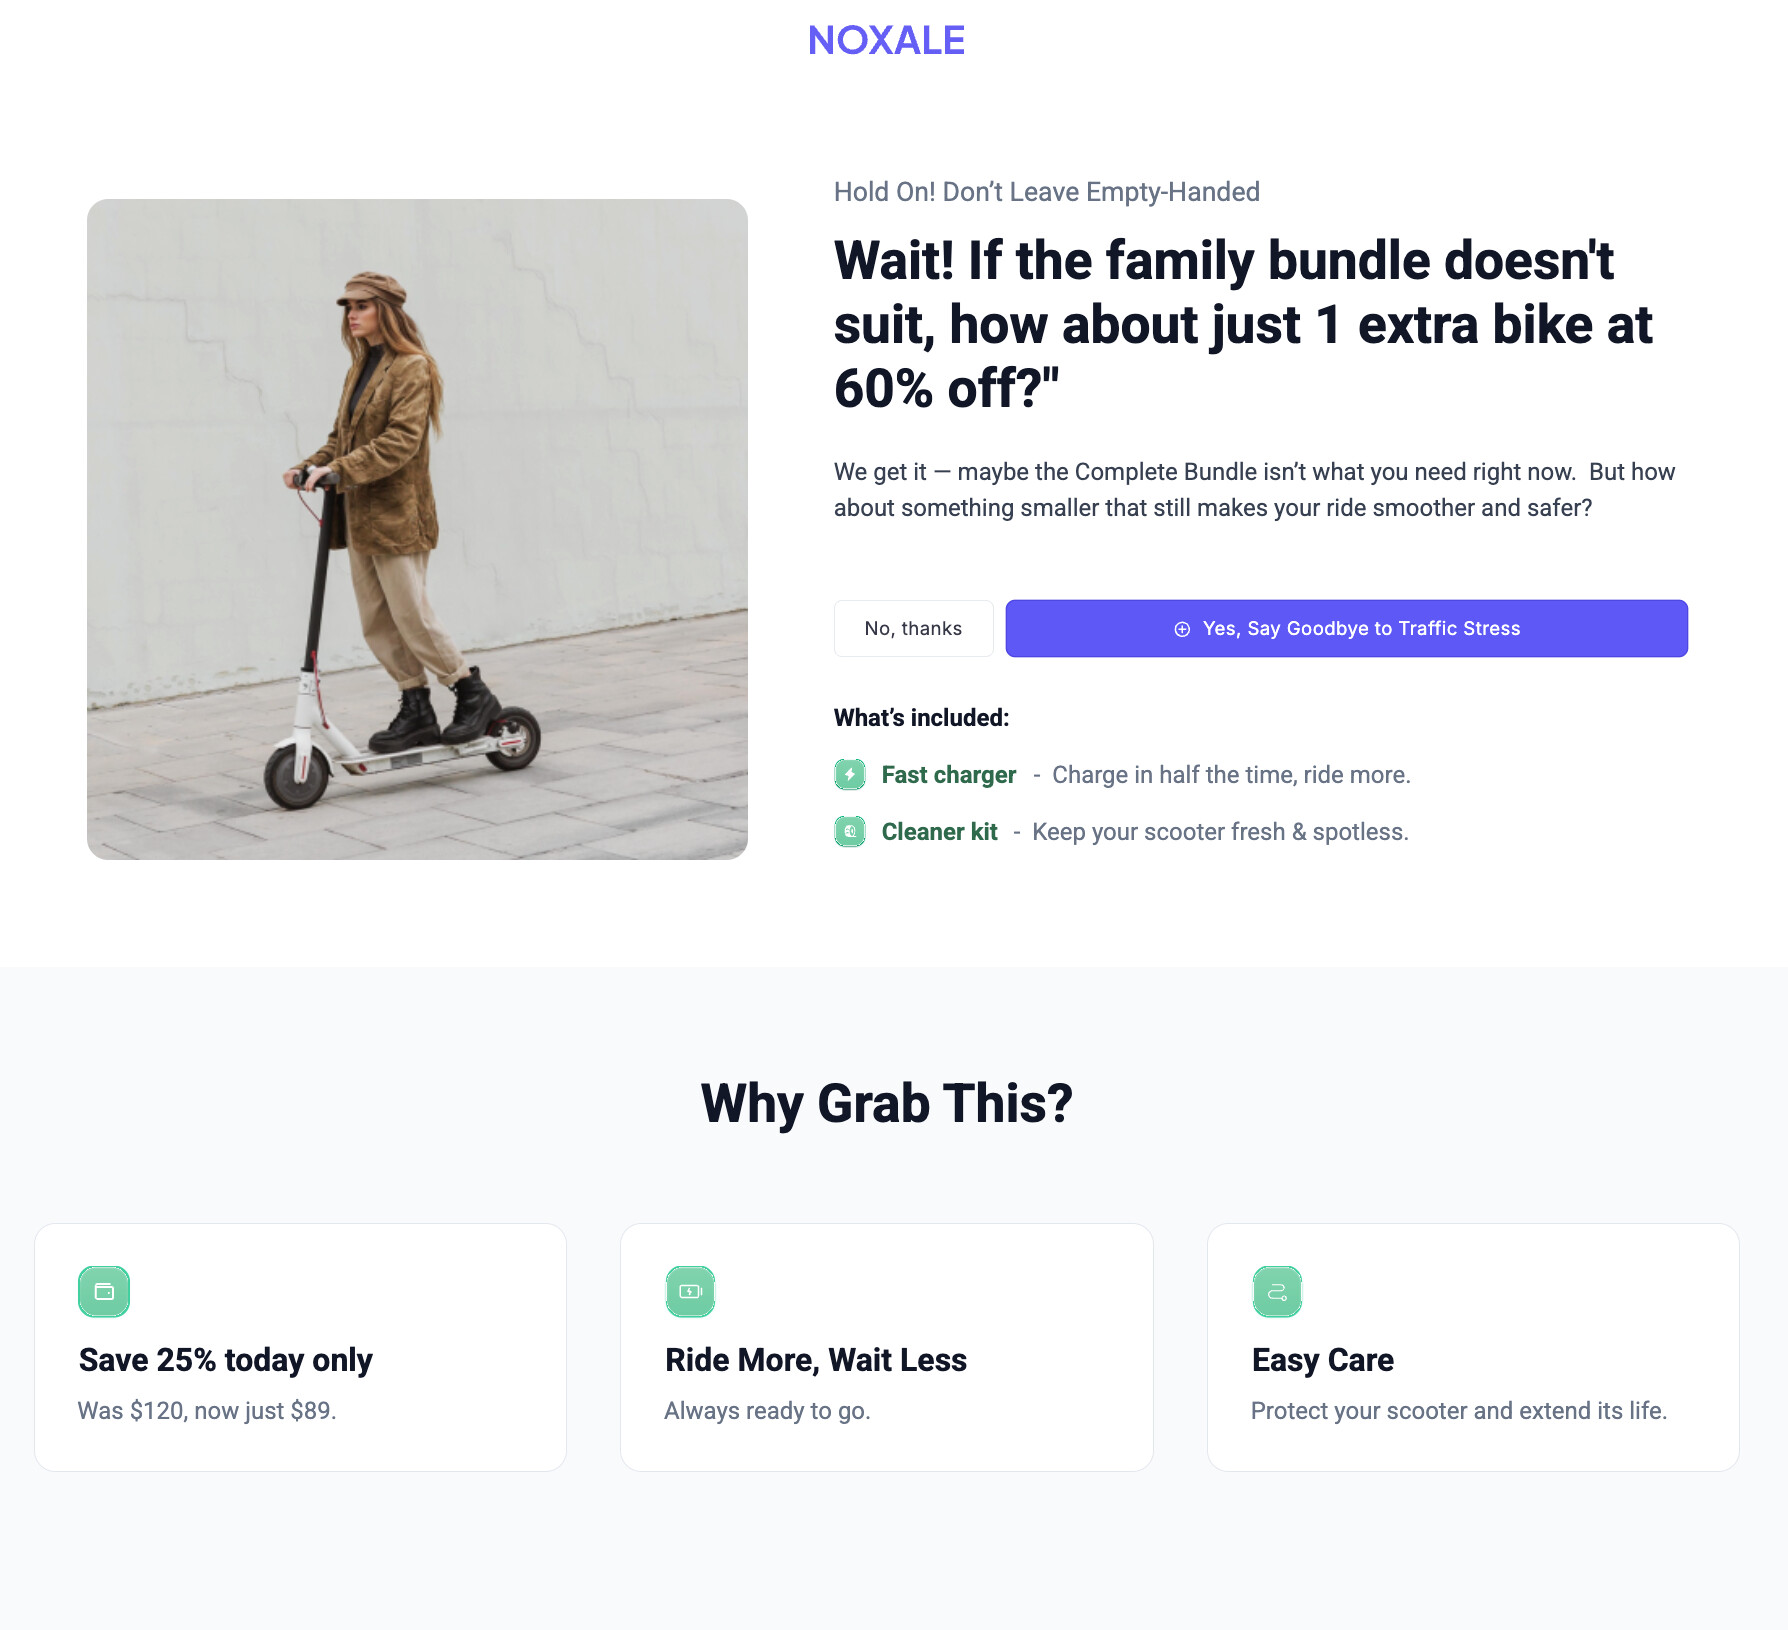
This is where the Downsell comes in to save the margins.
Read more: Understanding Funnel Steps
The Psychology of the Downsell
A downsell is a secondary offer presented only if the customer rejects the initial upsell.
Let’s look at a real example:
Upsell offer example:
If your upsell was a massive, high-ticket bundle (e.g., 3 extra bottles of supplements for $99), the downsell should lower the barrier to entry. In most cases, the highest-converting downsell is actually the exact same product presented in a more accessible way:
-
A Steeper Discount: “Wait! If 3 bottles is too many, how about just 1 extra bottle at 40% off?”
-
A Payment Plan: Splitting the cost of the main upsell into 2 or 3 smaller payments.
-
A “Digital” Alternative: If they rejected a physical coaching book, downsell them the eBook version for $9.
You are catching the revenue that was about to slip through the cracks.
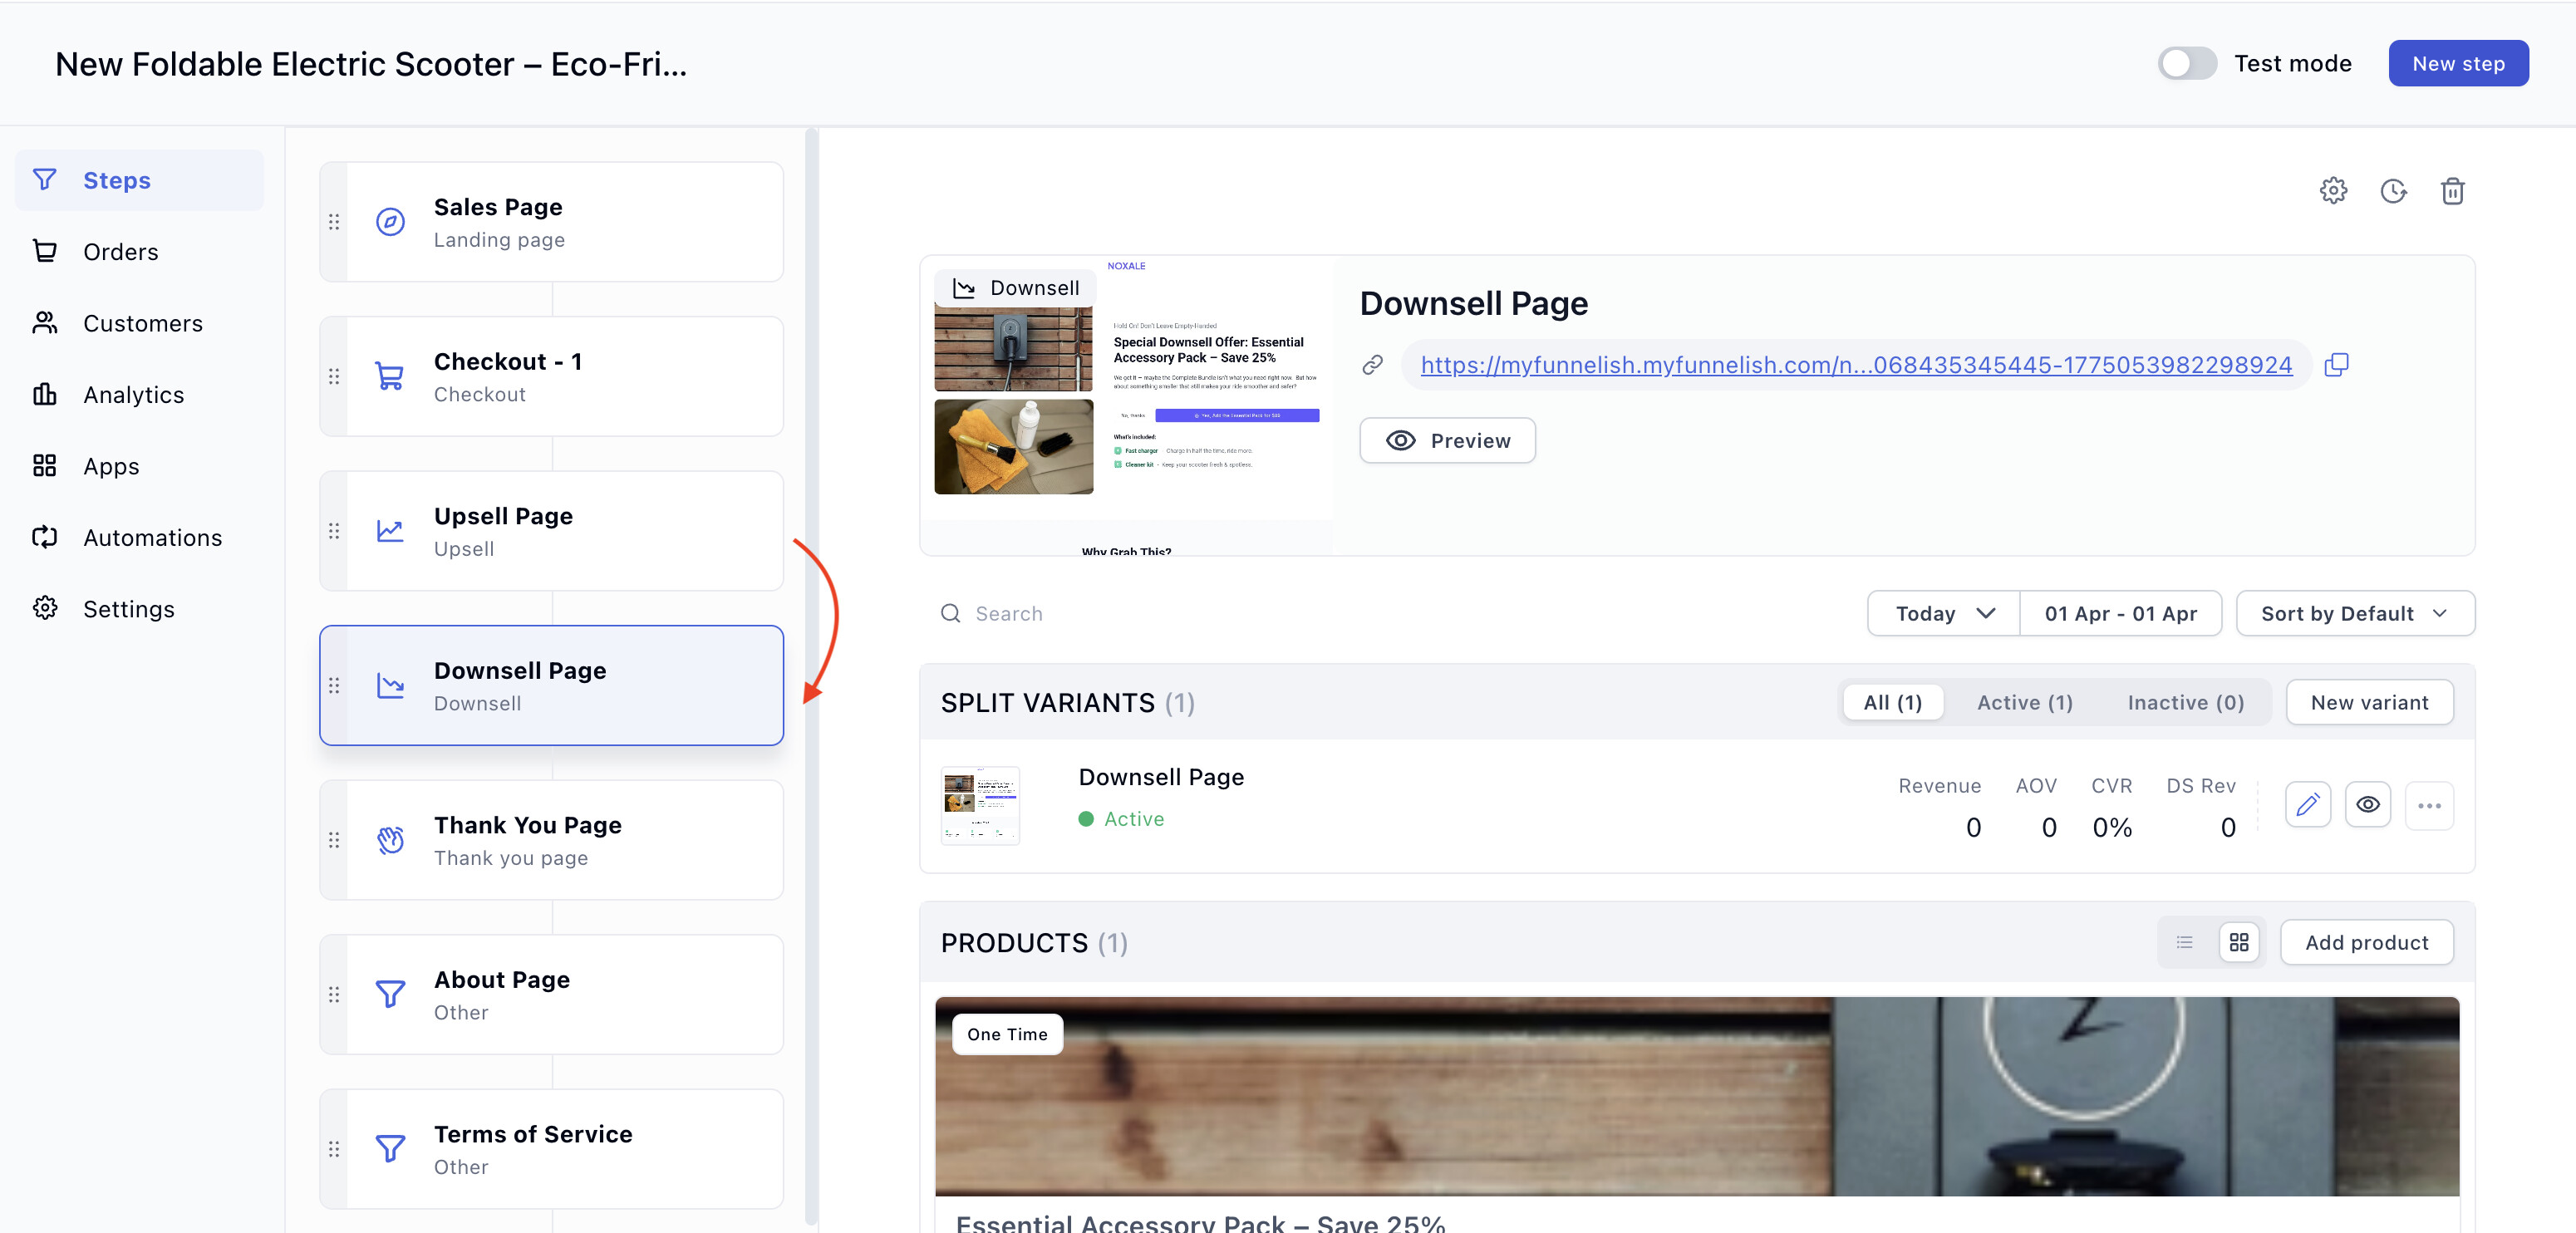
 How to Build This Flow in Funnelish
Setting up this exact “Upsell ![]() Downsell” logic in Funnelish takes about two minutes. You don’t need to mess with complex logic maps or coding; the platform inherently knows how to route the customer based on their clicks.
Downsell” logic in Funnelish takes about two minutes. You don’t need to mess with complex logic maps or coding; the platform inherently knows how to route the customer based on their clicks.
Here is the exact setup:
Step 1: Create the Downsell Step
-
In your funnel canvas, click Add New Step.
-
When choosing the step type, specifically select Downsell.
-
Place this step immediately after your Upsell step. (Funnelish automatically knows to only trigger this page if the previous Upsell was rejected).
Step 2: Add Your Yes/No Buttons
-
Open the page builder for your new Downsell step.
-
You need two distinct call-to-action elements on this page: A “Yes” button (to accept the downsell) and a “No” link/button (to reject it and move to the Thank You page).
Design Tip: Make the “Yes” button massive and highly visible. Make the “No” button a simple, less prominent text link below it (e.g., “No thanks, I will pay full price later”).
Step 3: Set the OTO Interactions
-
Click on your “Yes” button. Go to the left-hand settings panel, find Interactions, and set the click action to OTO YES Link (or Accept OTO).
-
Select the product to sell from that dropdown.
If your upsell/downsell page contains a product list, then enable the toggle to allow customers to select from a product list element.
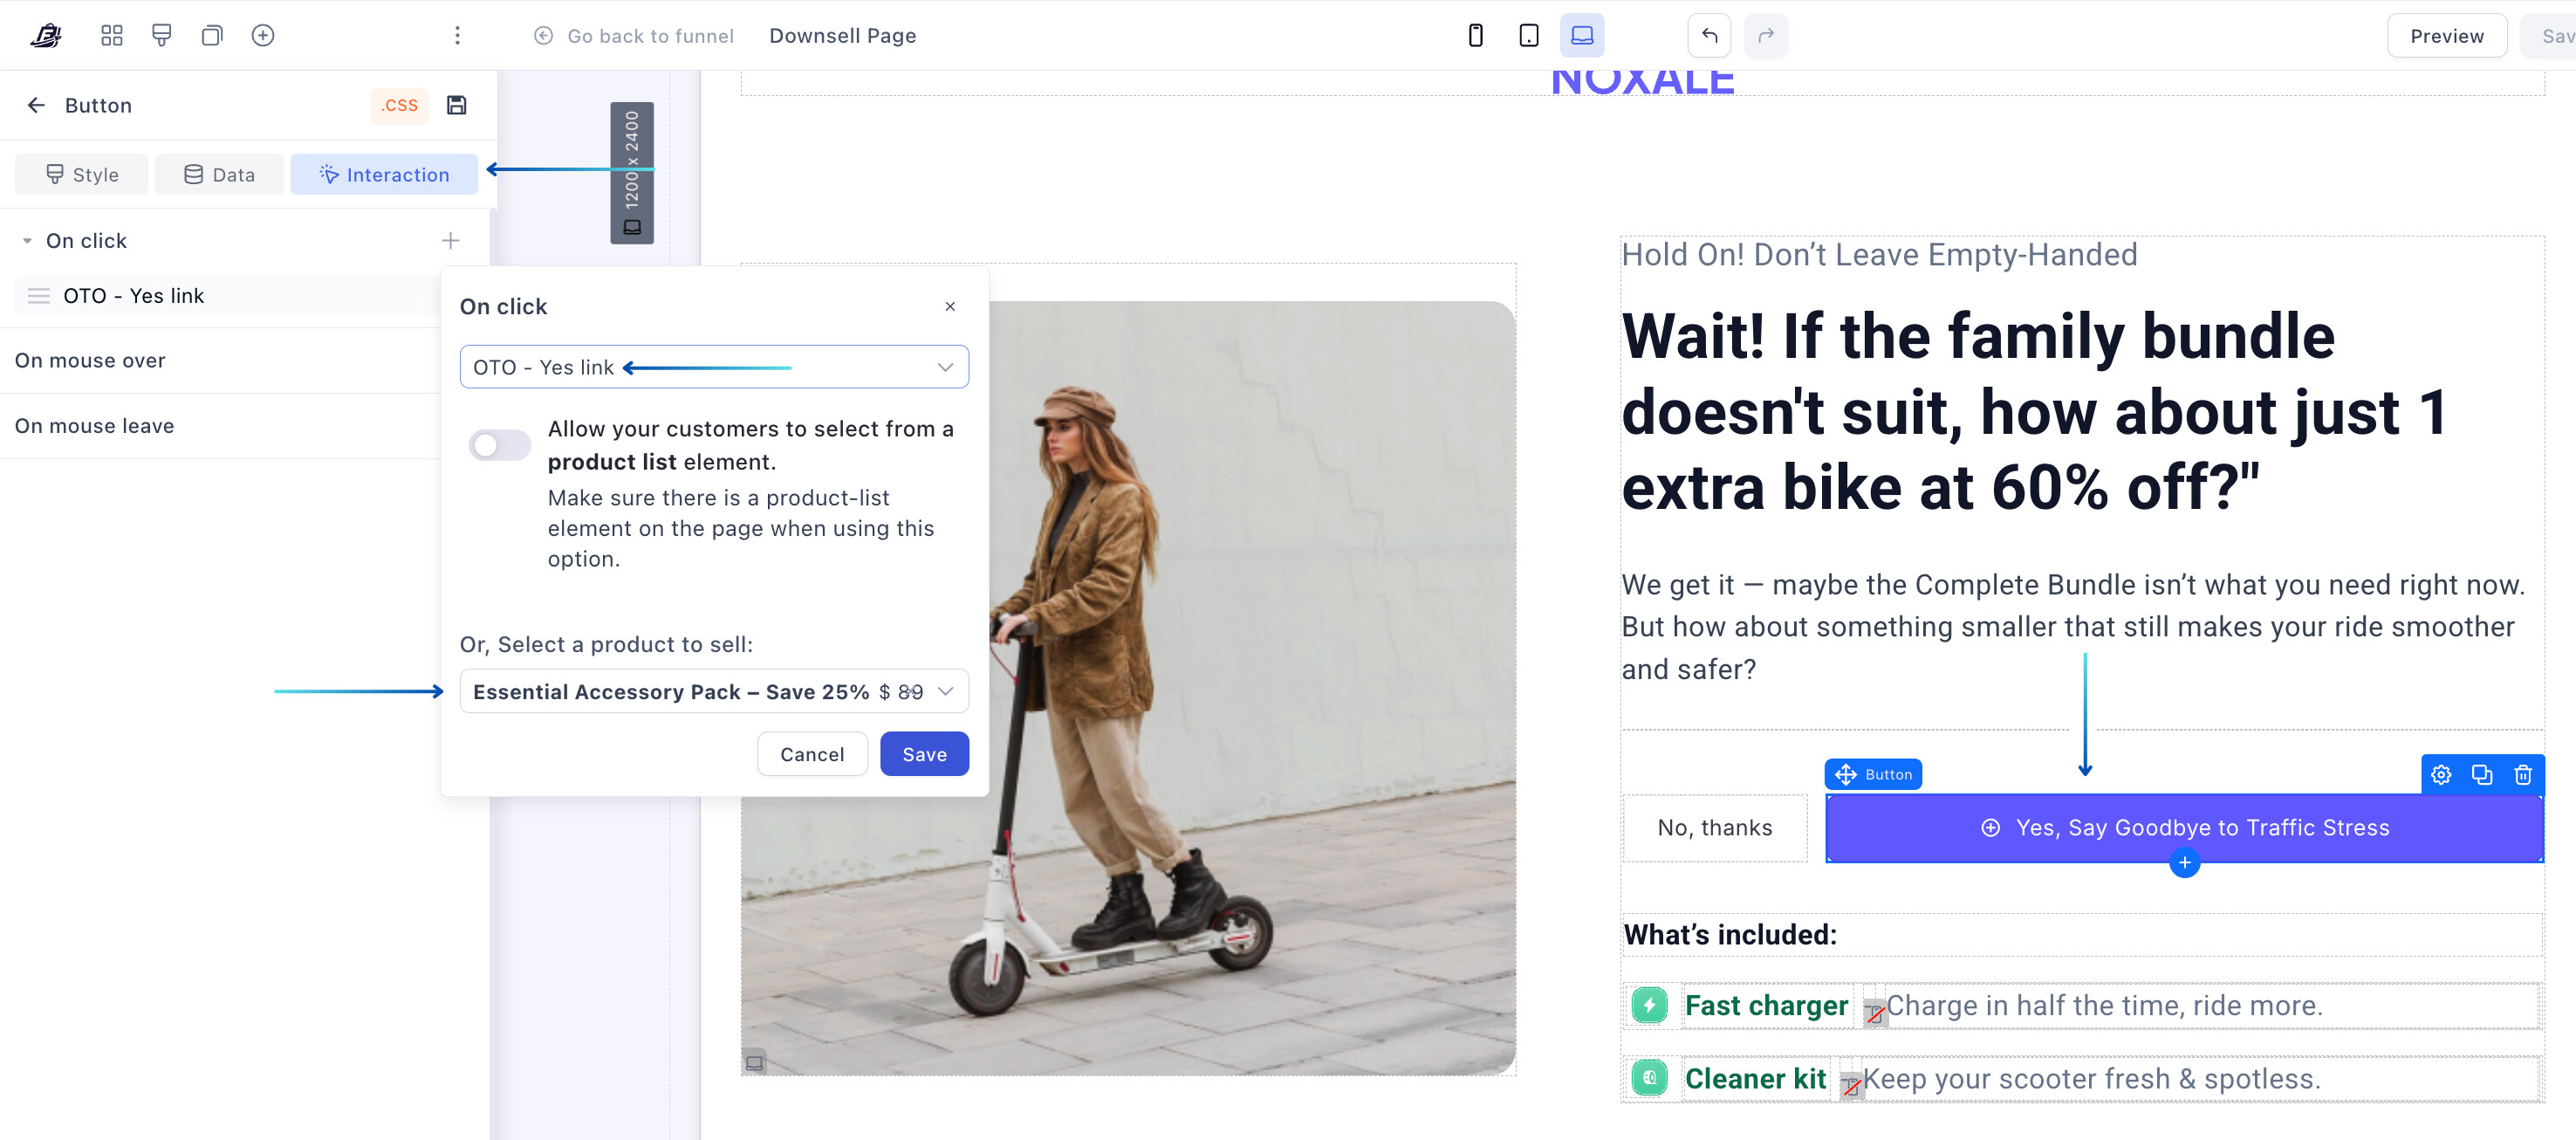
- Click on your “No” text/button. Go to Interactions, and set the click action to OTO NO Link (or Reject OTO).
That’s it.
![]() If they click “Yes,” the downsell price is instantly added to their order, and they are routed to the order confirmation page.
If they click “Yes,” the downsell price is instantly added to their order, and they are routed to the order confirmation page.
![]() If they click “No,” they bypass the charge and finish their journey. You just added a completely automated safety net to capture lost revenue!
If they click “No,” they bypass the charge and finish their journey. You just added a completely automated safety net to capture lost revenue!