In Funnelish, a step is simply a single page within your overall sales funnel.
If a funnel is the path your customer takes, the steps are the individual milestones along that journey. Whether you are scaling a dropshipping winner, growing a DTC brand, or looking to boost your Shopify store’s conversions, mastering how to sequence these steps is the secret to building a high-converting e-commerce sales funnel and maximizing your Average Order Value (AOV).
 Before You Start
-
If you selected a template: Your funnel comes preloaded with a proven sequence of steps. You can easily add, remove, and edit these existing pages to fit your offer.
-
If you started from scratch: Your funnel will be completely empty. You are starting with a blank canvas and will need to add your first step manually.
 The 8 Core Step Types
Each step in Funnelish serves a highly specific psychological and sales function. The number of steps you need depends entirely on your product and strategy. Our system categorizes pages into eight distinct step types:
-
Advertorial: A powerful pre-sale page designed to look like a news article or educational blog post. It is perfect for warming up cold ad traffic before sending them to your actual product page.
-
Home Page: Acts as the central hub or traditional storefront for your brand. Ideal for DTC brands looking to showcase multiple product collections, tell their brand story, and build trust.
-
Landing Page (Opt-in / Sales Page): Usually the first product-focused step your customers see. It’s ideal for highlighting specific product benefits, showcasing offers, or collecting email leads.
-
Checkout: The most critical step. This is where you collect the initial payment via a standard or highly-optimized two-step order form.
-
Upsell (OTO - One Time Offer): A post-purchase page that allows customers to add more products to their order with a single click, without having to re-enter their credit card details.
-
Downsell: A cart recovery strategy. This step is only shown to customers who click “No” on your previous Upsell offer, giving them a lower-priced alternative or payment plan.
-
Thank You Page: The final confirmation page your customers see. It summarizes their order and is a great place to link to your social media or offer a referral link.
-
Other: Any informational page that doesn’t fit the direct sales flow, such as your Terms of Service, Privacy Policy, or Contact Us pages.
Important E-commerce Rule: You can only attach physical or digital Products to Checkout, Upsell, and Downsell steps.
 Step Paths & URL Configuration
When setting up your funnel, having clean, readable URLs is vital for SEO and customer trust. Funnelish gives you total control over how your step URLs are structured.
-
Creating a Homepage: If you want a specific step to act as the main homepage for your custom domain (e.g.,
mydomain.com), simply leave the step path completely empty. Funnelish will automatically serve this step as the root page. -
Multi-Segment Paths: Both Funnels and Steps can have multiple segments in their paths. For example, your funnel could be located at
/summer-sale/and your step at/shoes/, resulting in a clean, nested URL likemydomain.com/summer-sale/shoes/. -
URL Uniqueness: Step URLs must be unique across your entire workspace. The only exception to this rule is if your funnel is part of a Geo-Funnel group (where the same URL might serve different localized pages based on the customer’s country).
 Adding a New Step
Ready to build out your customer journey? Here is how to add a new step to your funnel:
-
Open your funnel from the Funnelish dashboard.
-
On the top header, click the New step button.
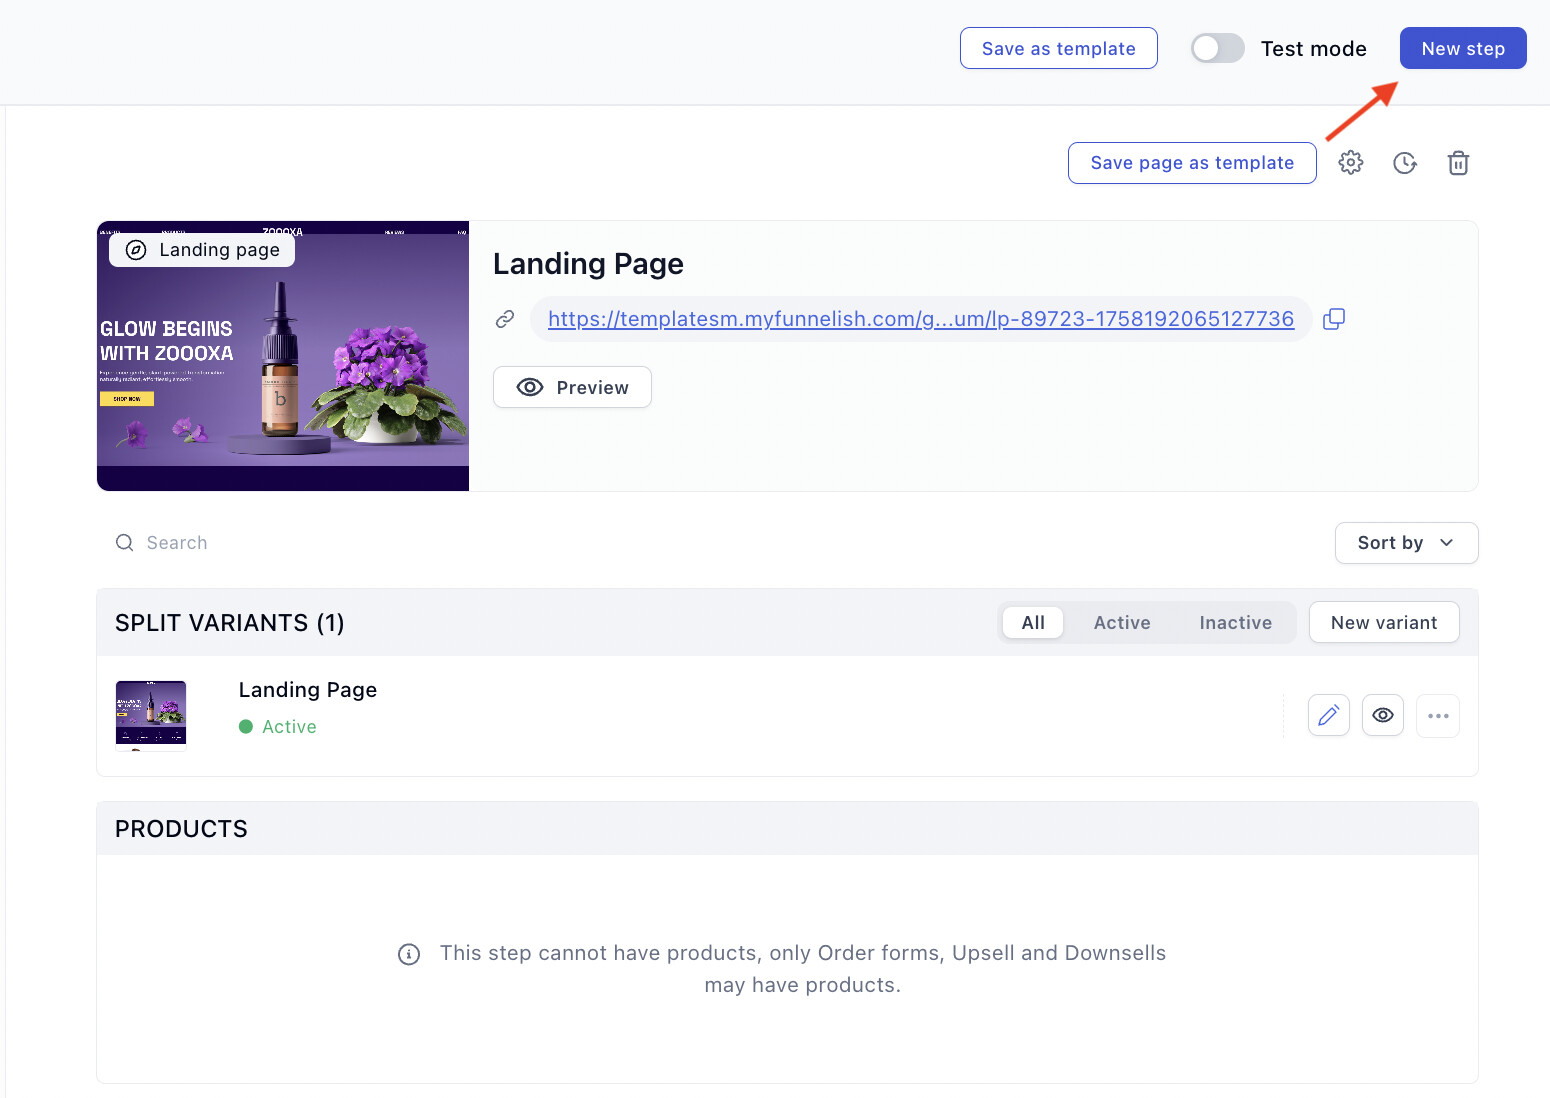
Adding new step.
-
Scroll through the list of pre-made templates designed specifically for dropshipping and DTC brands.
-
Click an option to preview the design, or select Build from scratch.
-
Click Continue.
-
In the setup window, edit the Step name and customize the Step path (remember, leave it empty if you want this to be the homepage).
-
Choose your specific Step type from the dropdown menu so Funnelish knows how to process the page.
Adding a new Funnelish Step.
- Click Create step and repeat this process for every page you want to add!
 Step Actions & Redirection Rules
Understanding how customers move from one step to the next is crucial. In the Funnelish Page Builder, you trigger movements by assigning specific Actions to your Call-To-Action (CTA) buttons.
Depending on the action you choose, Funnelish applies advanced logic to validate data and route the customer appropriately.
1. The Direct Jump (#next-step)
If a CTA button is set to #next-step, clicking it will instantly transport the visitor to the immediate next step in your funnel sequence.
Note: This action bypasses all forms. It will not validate emails, collect phone numbers, or process payments. Use this purely for navigation (e.g., clicking “Learn More” on an Advertorial to go to the Sales Page).
2. Form Submission & Validation (#submit-step)
If your CTA is set to #submit-step, Funnelish runs a series of intelligent checks before allowing the customer to proceed:
-
On Lead Gen / Opt-in Pages: If the page contains an email or phone number field (but no payment form), Funnelish validates the data first. It ensures the email format is correct and all required fields are filled. If validation fails, the funnel will halt. If it passes, the data is saved and they move to the next step.
-
On Checkout Pages: If the page contains a payment form, Funnelish attempts to process the transaction.
-
First, it checks if an email/phone number is present (either on the current form or collected in a previous step). If missing, the submission fails.
-
Next, it validates the payment details and processes the charge based on the selected method.
-
Once successful, Funnelish automatically skips all subsequent Checkout steps in your funnel and routes the buyer directly to the next valid step (like an Upsell, Downsell, or Thank You Page).
-
3. One-Click Upsells & Downsells (#yes-link & #no-link)
Inside your post-purchase steps, you use special actions to maximize AOV without adding friction to the buying experience.
-
Accepting an Offer (
#yes-link): When a customer clicks a button set to#yes-link, Funnelish attempts to process the payment for the product on that page. If your payment gateway supports it (most do), this triggers a One-Click Upsell (OCU), charging their card instantly without requiring re-confirmation.- Advanced Routing: You can link to a specific product by using
#yes-link-[productID]. If you just use#yes-link, Funnelish defaults to the first valid product on the step.
- Advanced Routing: You can link to a specific product by using
-
Declining an Offer (
#no-link): When a customer declines an upsell by clicking a#no-linkbutton, Funnelish safely routes them to the next logical step.
#no-linkbutton on the Upsell step immediately preceding it. If they click#yes-linkon the Upsell, the funnel will automatically skip the Downsell and move to the next Upsell or Thank You page!
![]()
 Need Help?
No time to map out your funnel logic? Get in touch with our team using the blue chat bubble in the bottom right corner of your dashboard, and learn how we can assist you in building the perfect flow for your brand.
 Next Up:
Now that you have your steps and routing in place, it’s time to design them and add your offers.
Read the next guide: Using the Drag-and-Drop Page Builder