RazorPay is the gateway for businesses registered in India collecting payments in INR. It connects with two credentials, a Key ID and a Key secret, and your customers pay through RazorPay’s own checkout.
What connecting RazorPay gives you
Your customer completes payment inside RazorPay’s checkout, so what they can pay with is decided by your RazorPay account, not by Funnelish: typically cards, UPI, netbanking and wallets. Some methods are available by default and others need RazorPay’s approval, which you request from your RazorPay dashboard.
RazorPay doesn’t unlock the European methods in Funnelish. If you need Klarna or iDEAL alongside it, connect a second gateway.
Before you start
-
A payment form element is on your checkout step, with Funnelish Pay switched on. See Add payment methods to your checkout.
-
A RazorPay account with KYC completed. RazorPay won’t process live payments until your account is activated, however correct your setup is.
-
Your funnel’s currency set to INR. Accepting international cards is a separate permission you enable inside RazorPay.
Get your Key ID and Key secret
-
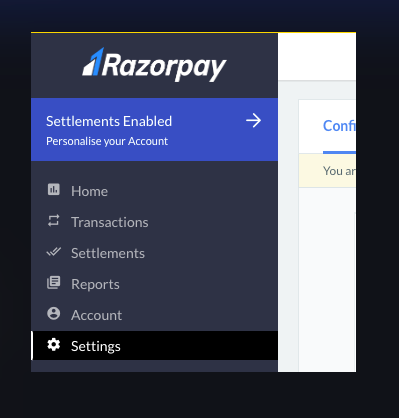
In your RazorPay account, go to Settings.
-
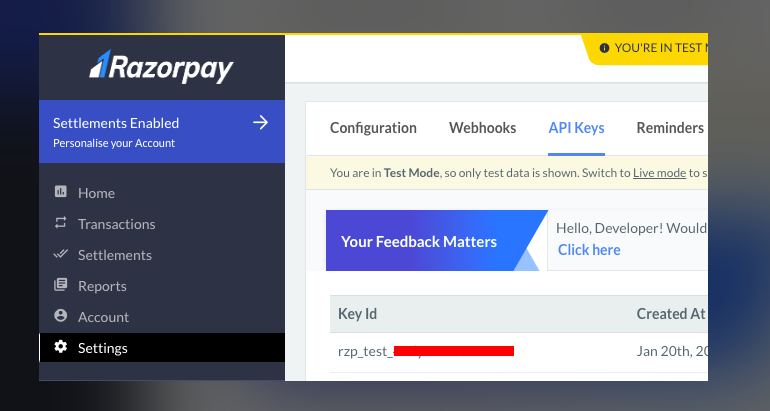
Open API keys and generate a new key.
-
RazorPay will offer to deactivate the old key. Read the warning below before choosing.
-
Copy the Key ID and the Key secret.
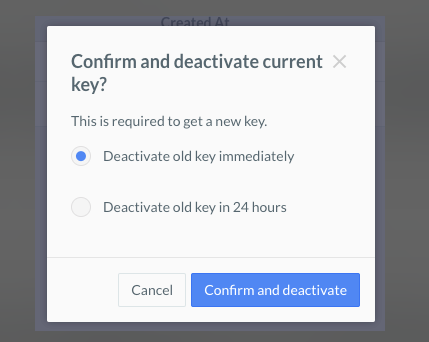
Only deactivate the old key if nothing else is using it. If this RazorPay account also powers a website, plugin, or app, deactivating its key will stop those taking payments, silently and immediately. If Funnelish is your only RazorPay integration, either option is fine.
The Key secret is shown once. Copy it somewhere safe before you close the dialog, because you can’t read it back afterwards. You’d have to generate another key.
Your Key ID says which environment you’re in. Test keys begin
rzp_test_, live keys beginrzp_live_. That’s the quickest way to check what a gateway is pointing at later, when you can’t remember.
Connect RazorPay
You can start this from either Account → Payments → Gateways or the page builder. These steps use the builder, so you can see the result on the form as you go.
-
Open your checkout step and click the payment form element.
-
In the settings panel, click Edit payment options.
-
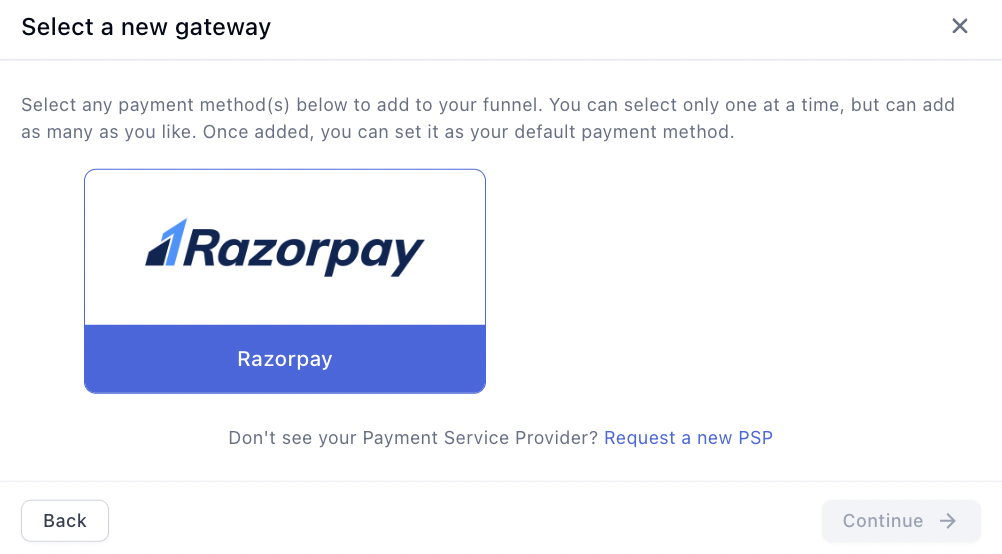
Click Connect a new gateway, then choose RazorPay.
-
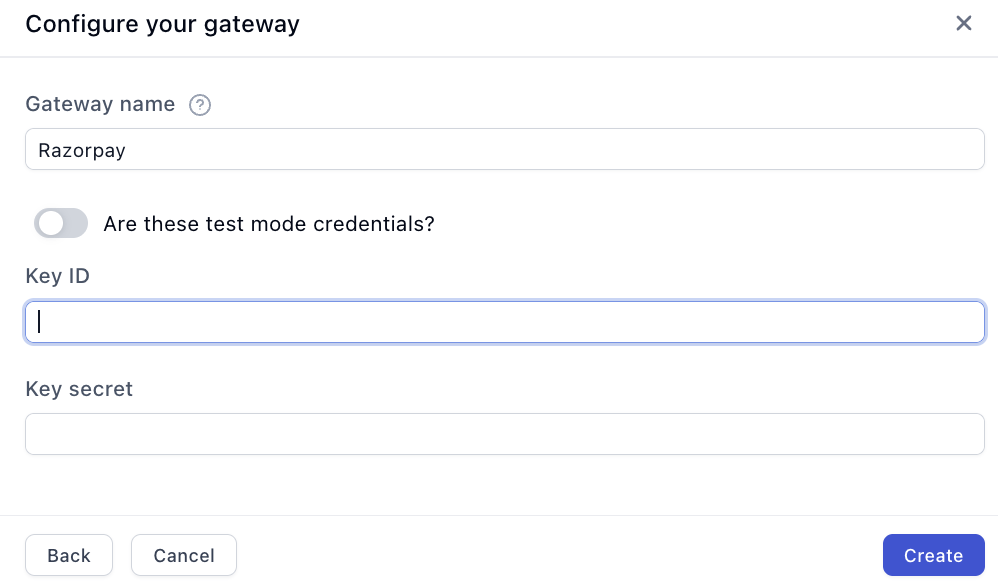
Enter a gateway name. It’s internal only, so name it for what it points at:
RazorPay — liveandRazorPay — testwill save you confusion later. -
If you’re using test credentials, toggle the test switch on. Test keys with the switch off won’t work.
-
Paste your Key ID and Key secret into their fields.
-
Click Create, then select the gateway on the payment form and save your changes.
Testing your RazorPay setup
Set up a gateway with your test keys and the test switch on, then turn on Test Mode with the toggle in the funnel’s top bar. RazorPay’s test mode shows a mock bank page with Success and Failure buttons, so no real money moves.
Test card
-
Number:
4111 1111 1111 1111 -
Expiry: any future date
-
CVV: any random digits
Then the useful part: the OTP decides the outcome.
| To test | Enter an OTP of |
|---|---|
| A successful payment | 4 to 10 digits, any value |
| A failed payment | fewer than 4 digits |
One card gives you both paths, so there’s no excuse for only testing the happy one. Knowing what your customer sees when a payment fails is worth more than confirming that success works.
Test UPI
If UPI is enabled on your account, these two IDs simulate each outcome instantly:
-
success@razorpay: payment succeeds -
failure@razorpay: payment is declined
Check the result at RazorPay’s end
Open the Transactions tab in your RazorPay dashboard. A successful test shows as Captured, a failed one as Failed. If the payment doesn’t appear at all, your keys are wrong.
Then go live
-
Generate live keys, or switch to a gateway that holds them.
-
Turn the test switch off on the gateway.
-
Run a real purchase for ₹1 or another nominal amount with a real card.
-
Check the order in both Funnelish and your RazorPay dashboard.
-
Refund yourself, and set the price back.
-
Turn Test Mode off for the funnel. It’s the first item on the funnel launch checklist: a funnel left in test mode looks like it’s taking orders and charges nobody.
What to check beyond “the payment went through”
-
The order appears in Funnelish with the correct product, amount and currency
-
Any upsell or OTO step charges correctly, not just the first step
-
Your confirmation email and any automations actually fired
-
The checkout works on mobile, not only on desktop
See Test payments before launch for the full pre-launch process.
Where your gateways live
A gateway belongs to your account, not to a funnel. You connect RazorPay once and it’s available everywhere from then on: every funnel, existing or new, just selects it from the list.
You can see and manage every gateway on your account under Account → Payments → Gateways (app.funnelish.com/settings/payments/gateways).
If something isn’t working
“Card issuer is invalid” or “invalid card input”. You’re using a test card against live keys. RazorPay returns exactly these errors for that mistake, so it’s a reliable signal rather than a real card problem.
Payments work in test mode but not live. Check your RazorPay KYC is complete and the account is activated. Also check the test switch is off on the gateway and Test Mode is off on the funnel.
RazorPay is connected but the checkout shows no payment option. Check the gateway is selected and saved on the payment form, and that Funnelish Pay is switched on in the payment options.
A payment method is missing from RazorPay’s checkout. It isn’t enabled on your RazorPay account. Some methods need RazorPay’s approval, which you request from your dashboard.
Something else stopped taking payments after you generated a new key. You deactivated a key another integration was using. Generate a fresh key for that integration too.
Payment processing is the fiddliest part of building a funnel. Gateway credentials, currencies, country rules, the form itself: a lot of moving parts, and the one area where a mistake costs you orders rather than just looking wrong.
If your RazorPay connection isn’t behaving, start a topic in Ask the community. Someone will help. For anything tied to your account or a specific transaction, contact us on chat support.