Is it just me, or is it wild that Shopify still expects you to pay $2,000/month ![]() just to add a simple “Delivery Note” or “Gift Message” box to your checkout?
just to add a simple “Delivery Note” or “Gift Message” box to your checkout?
Since Checkout Extensibility became the mandatory standard, those old liquid “hacks” are officially dead. If you aren’t on Plus, you’re stuck with a generic, rigid checkout that kills your conversion rate if you’re in a niche that needs custom customer info.
We’ve been digging into this with a lot of stores lately. If you’re trying to collect VAT numbers, gate codes, or custom engraving text, here is how you actually bypass the Plus requirement:
1. The Cart Attribute Method (The “Side-Door”)
When merchants realize they’re locked out of the checkout, these are usually the first workarounds they attempt:
-
The No-Code way: In the Theme Editor, navigate to your Cart Page, click “Add Block,” and look for a “Text Field” or “Order Note” block.
-
The Custom way: If your theme doesn’t have that block, you have to go into the code (
main-cart-footer.liquid) and manually add an HTML<input>with the attributename="attributes[Your Custom Label]".
![]() The Reality: This works for simple notes, but it lives before the checkout.
The Reality: This works for simple notes, but it lives before the checkout.
The Risk: This method is increasingly unreliable. Most customers now use Express Checkout (Shop Pay, Apple Pay, Google Pay). These buttons often bypass the cart page entirely. If a customer clicks “Buy with Apple Pay” directly from a product page, your custom field is skipped, and you’ll be stuck chasing them via email to get their info.
If you rely on this, expect to lose data on 40-60% of your mobile orders.
2. Line Item Properties (The “Product-Level” Way)
This is for when the info is specific to one item (like a custom name for a necklace).
How to add it (Step-by-Step):
-
Open the Theme Editor: Go to Online Store > Themes > Customize.
-
Navigate to the Product Page: Use the dropdown at the top to select Products > Default Product.
-
Add a Custom Liquid Block: In the left sidebar, under “Product Information,” click Add Block and select Custom Liquid.
-
Paste this input code:
<p class="line-item-property__field">
  <label for="custom-name">Engraving Name:</label>
 <input
    id="custom-name"
    type="text"
    name="properties[Engraving Name]"
    form="product-form-{{ section.id }}"
    placeholder="Enter text here..."
    required
  >
</p>
- Position it: Drag that “Custom Liquid” block so it sits right above the “Add to Cart” button & hit Save.
![]() The Reality: This works, and the text will show up in your Shopify Admin under that specific item.
The Reality: This works, and the text will show up in your Shopify Admin under that specific item.
If your theme uses an AJAX Cart (a slide-out drawer or pop-up), the “Required” attribute in your HTML might be ignored. If the theme doesn’t perform a full page refresh when adding to cart, the validation can fail, allowing customers to add blank items.
3. The “Sync & Note” Strategy
Most high-level operators we work with have stopped fighting Shopify’s checkout limits entirely.
Instead of hacking a theme that wasn’t built for custom data, they use a dedicated ecommerce funnel that handles the checkout but syncs everything back to Shopify.
How to set it up (The Technical Steps):
-
Add the Field: In your checkout page editor, drag a Text Input or Text Area onto your checkout page.
-
Assign the Custom Data Type: This is the crucial part. In the field settings, you’ll assign a “Custom Data” key (e.g.,
delivery_instructions). This tells the funnel to store this specific string of text.
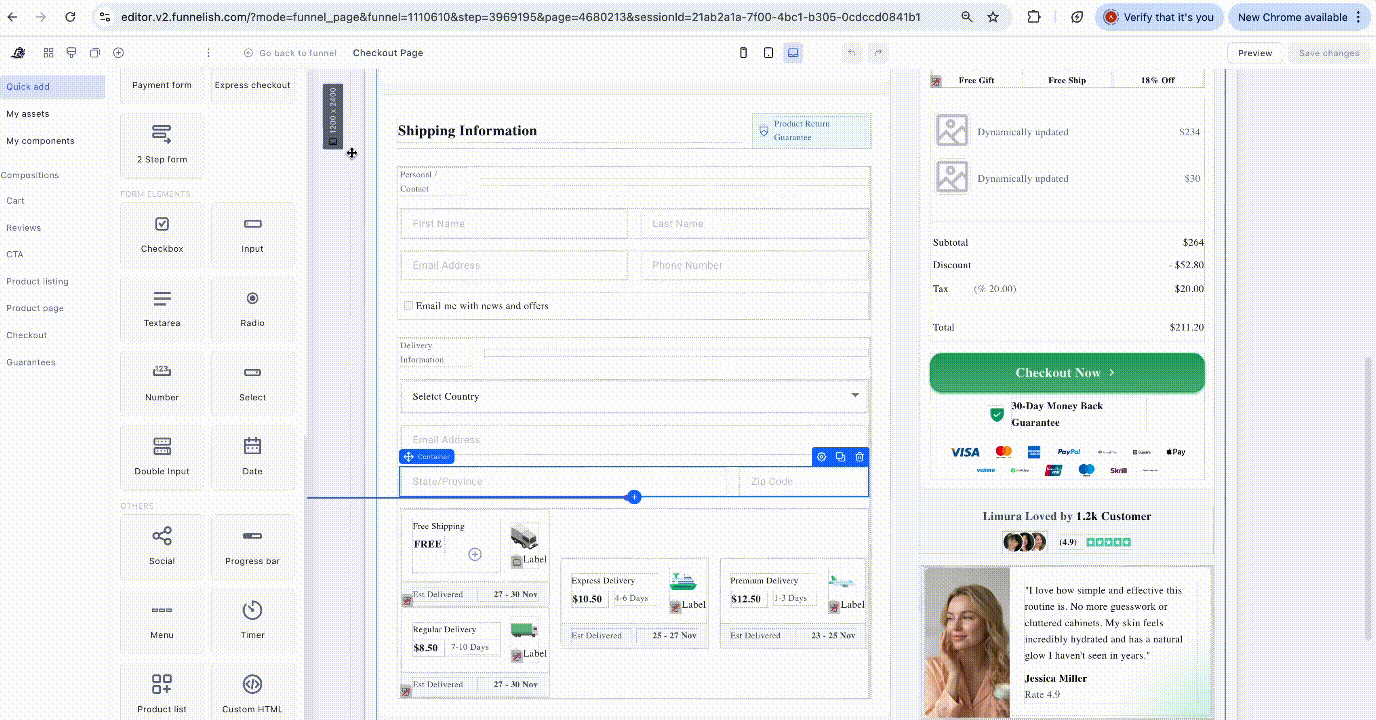
- Enable the Shopify Sync: In your Shopify automation settings within Funnelish, you toggle the option to “Enable custom notes”.
- Inside the “Note” field just give the same Data Name your custom field has inside the editor.
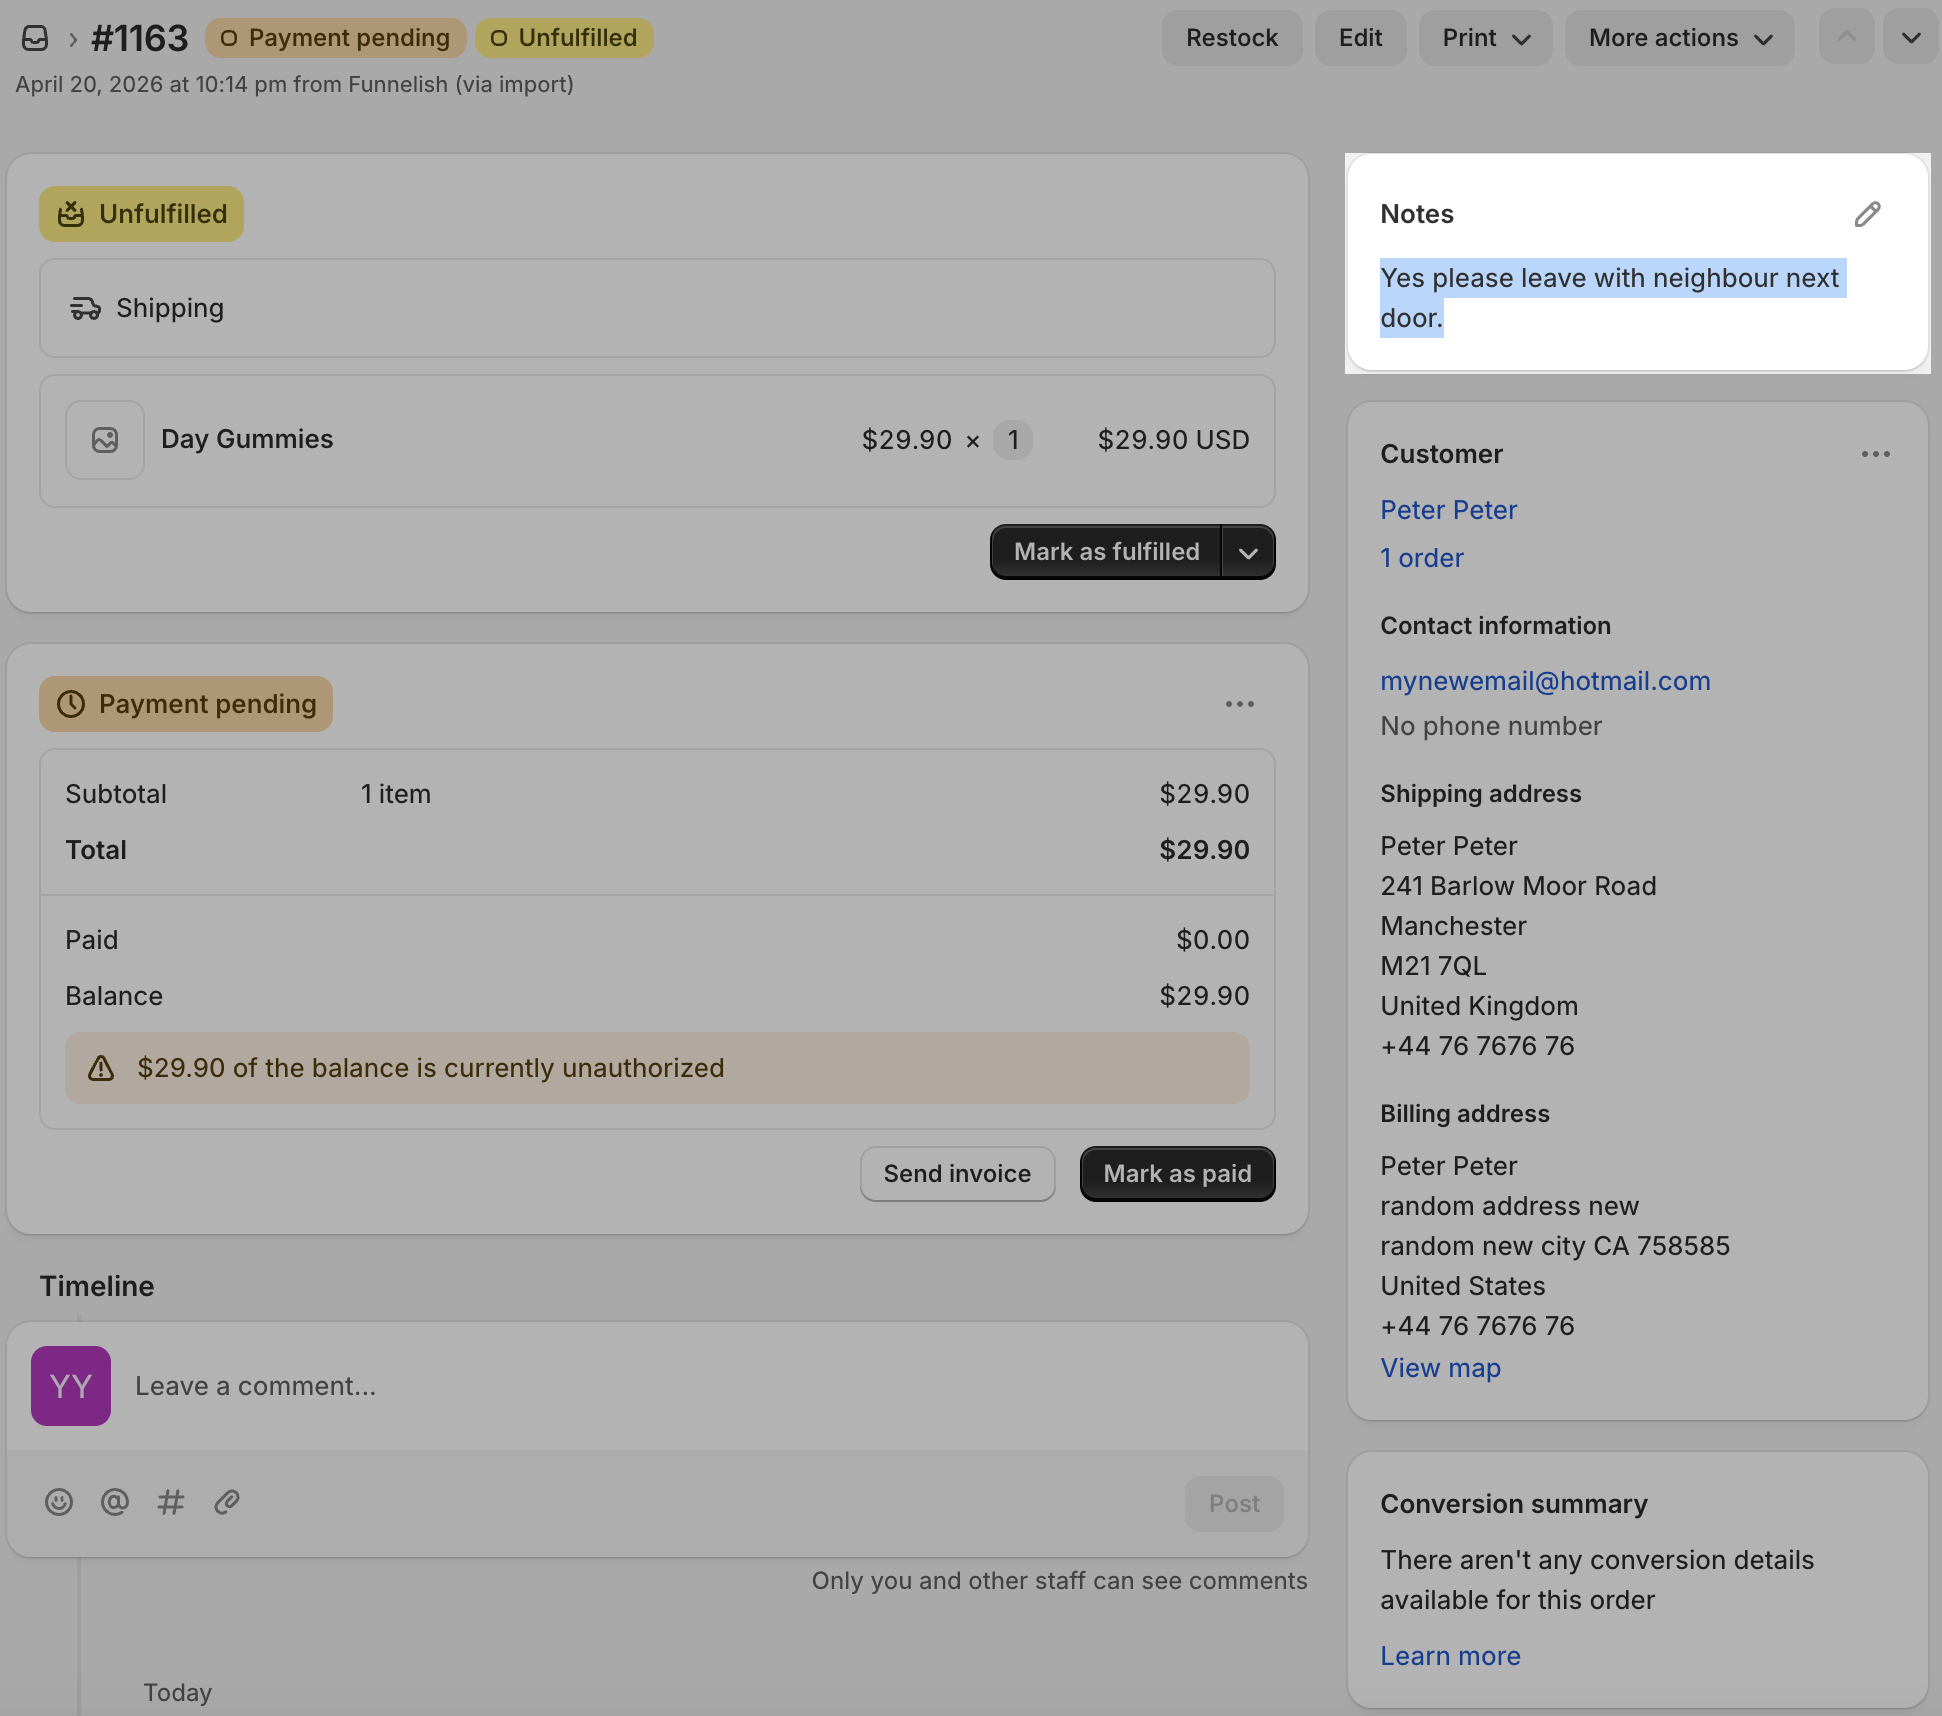
- The Auto-Injection: When the order is placed, Funnelish bundles all your custom fields and “injects” them directly into the Shopify Order Notes section.
Read a detailed guide on Sending Custom Notes & Attributes to Shopify
Why this wins:
![]() Zero Express Checkout “Skips”: Because you control the sequence, you can place your data-capture before the Express Checkout buttons are even triggered. Customers literally cannot pay until they’ve provided the info you need. No more chasing people via email.
Zero Express Checkout “Skips”: Because you control the sequence, you can place your data-capture before the Express Checkout buttons are even triggered. Customers literally cannot pay until they’ve provided the info you need. No more chasing people via email.
![]() Fulfillment Friendly: Your 3PL or warehouse team doesn’t need to change their workflow. The VAT number or gate code is right there in the Shopify Admin order page where it belongs.
Fulfillment Friendly: Your 3PL or warehouse team doesn’t need to change their workflow. The VAT number or gate code is right there in the Shopify Admin order page where it belongs.
![]() AOV Boost: Since you aren’t restricted by “Extensibility” rules, you can pair that custom checkout with 1-click upsells that actually convert.
AOV Boost: Since you aren’t restricted by “Extensibility” rules, you can pair that custom checkout with 1-click upsells that actually convert.
What kind of custom data are you guys trying to collect?
Is it just simple gift notes, or are you trying to do something more complex like file uploads or conditional logic? Drop it below, I’m curious to see what workarounds people are using.