Use this feature to automatically pass custom order notes and specific attributes from your ecommerce funnels directly into your Shopify dashboard.
The notes and attributes tool is absolutely vital for print-on-demand (POD) services, personalized DTC products (like custom engravings), or simply giving customers a place to leave special delivery instructions.
By setting this up, your fulfillment team gets exactly what they need without having to email the customer for clarification. Here is how to build the forms and map the data in three simple steps.
 Step 1: Creating the Input Forms
First, you need to add form elements to your funnel step to actually collect the custom information from your buyer.
In this guide, we will set up two common examples: a standard text input (for a custom printed message) and a checkbox (for a specific product attribute).
Example A: The Text Input (For Custom Notes)
If you sell custom printed mugs, you need the customer to type in the name or phrase they want printed.
-
Open your checkout step in the Page Builder.
-
Drag an Input form element onto your canvas.
-
Click the input element to open its settings. Scroll down to the Props heading.
-
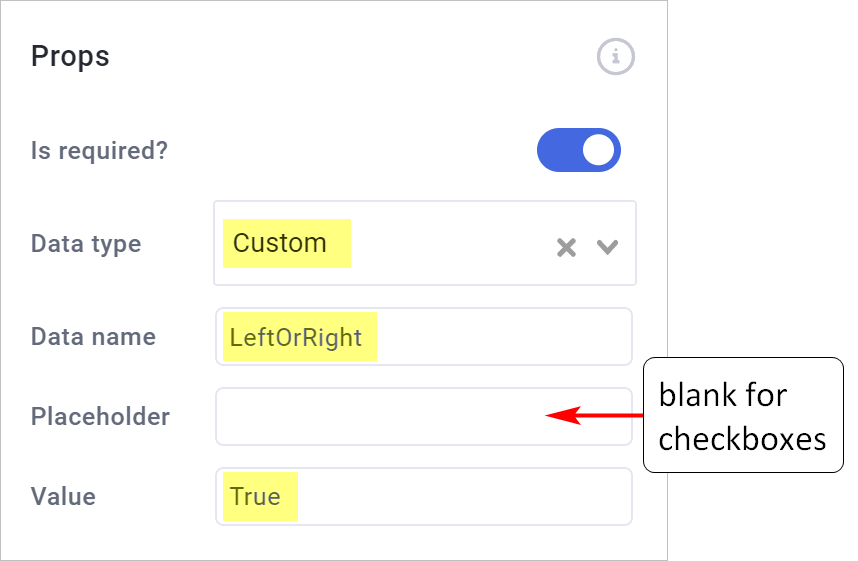
Set the Data type to Custom.
-
Click the Data name field and enter a unique internal identifier (e.g.,
PrintOnMug). Note: The customer does not see this text. -
Enter a Placeholder to tell the customer what to do (e.g., “Enter the name for your mug”).
Important Data Name Rule: Your Data name must NOT contain spaces or special characters! If you need multiple words, use an abbreviation or camelCase (e.g.,
PrintOnMug).

Example B: The Checkbox (For Attributes)
Next, let’s ask the customer if they want a left-handed or right-handed mug (which changes which side gets printed). We will use a checkbox for this.
-
Drag a Checkbox element onto the canvas.
-
Click it to open the settings, and ensure the Data type is set to Custom.
-
Replace the Label text with your question (e.g., “Make this a left-handed mug?”).
-
Enter a unique Data name (e.g.,
LeftHanded). -
Enter
Truein the Value field. (If the customer checks the box, it sends “True”. If left unchecked, it sends nothing).
Be sure to click Save changes before leaving the Page Builder!
 Step 2: Enabling Notes & Attributes in the Automation
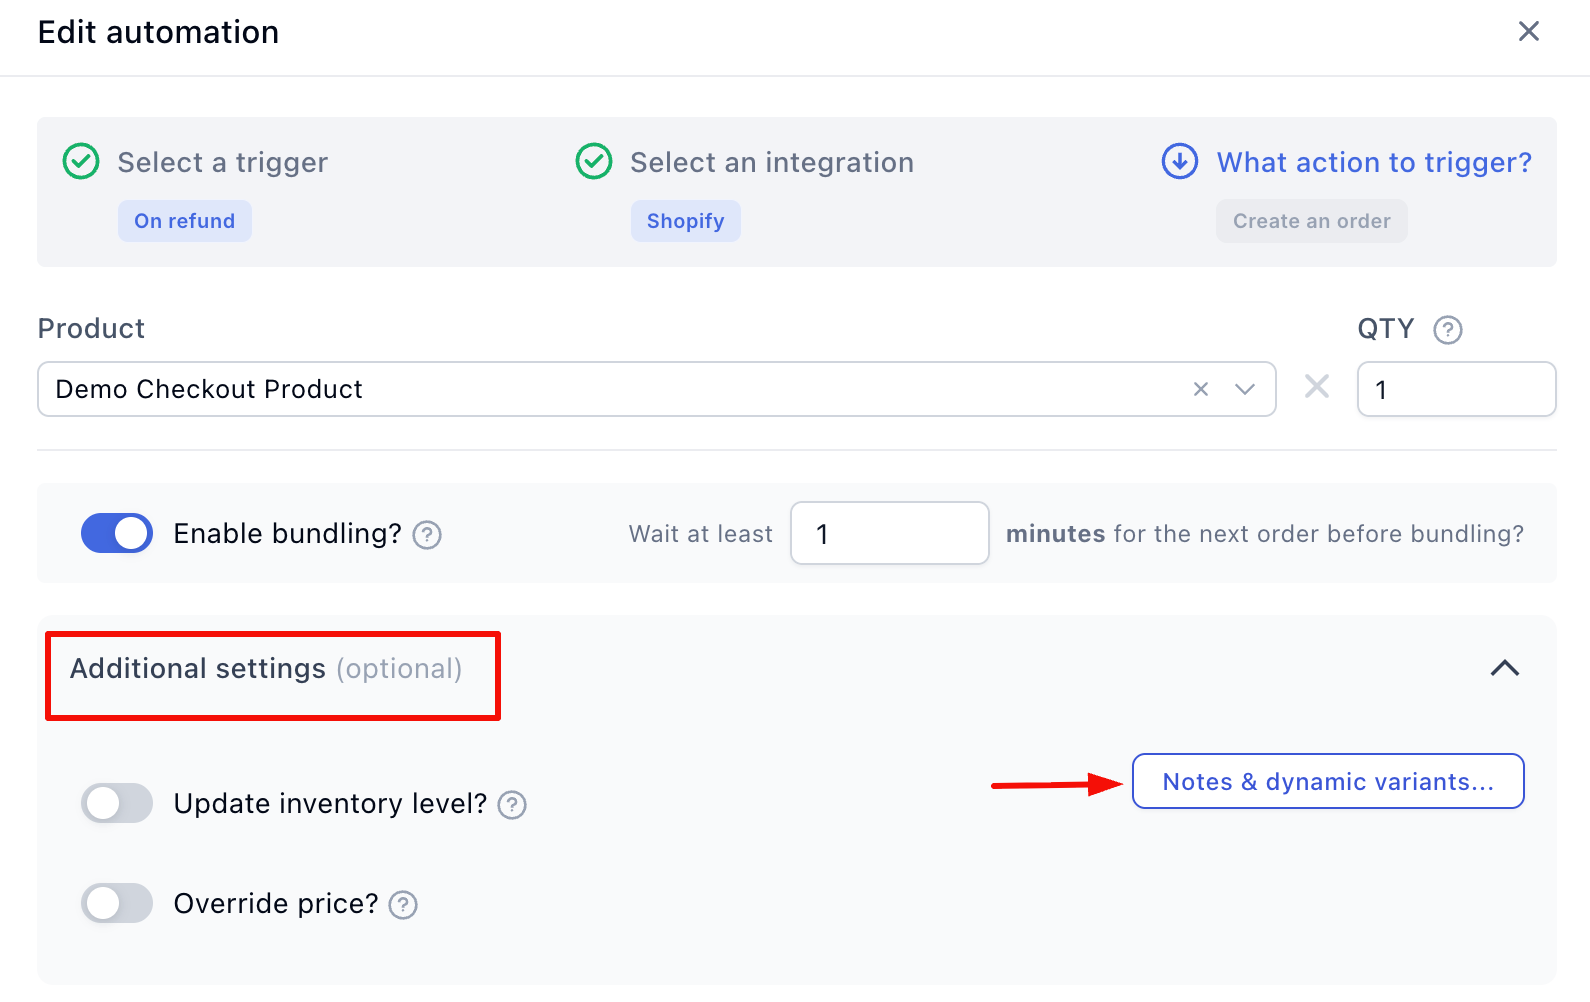
Now that your funnel is collecting the information, you need to tell your Shopify automation to look for it and send it.
-
Return to your step dashboard and click on your product to open its settings.
-
Scroll down and click on your existing Shopify Automation.
-
In the Edit Automation panel, click the Notes & dynamic variants button.
-
Toggle Enable sending notes and attributes? to the ON position.
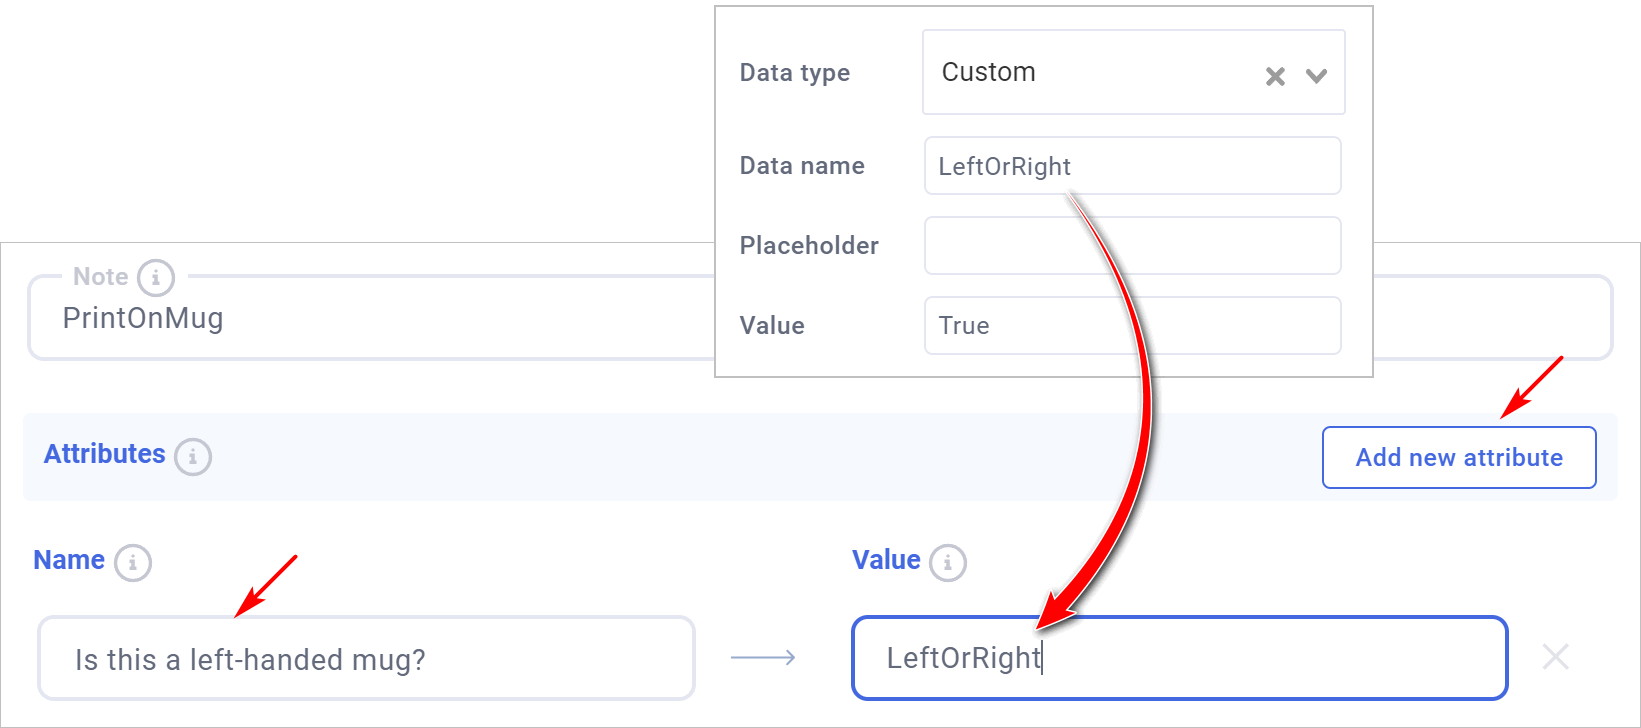
Mapping the Data Names (Crucial Step)
You must map the exact Data Names you created in Step 1 using brackets.
-
To add the Order Note: In the Note field, type your custom data name wrapped in brackets:
[PrintOnMug]. -
To add the Attribute: Click Add new attribute. In the Name field, type what you want Shopify to display (e.g., “Left Handed?”). In the Value field, type your data name wrapped in brackets:
[LeftHanded].
Click Done, then click Save changes on all automation panels.
 Step 3: Run a Test Purchase
You are fully configured! Let’s run a test transaction to verify the custom text and attributes are showing up in Shopify correctly.
-
Go back to your step dashboard and click Preview.
-
Select your product, type a custom message into your text field, and check your attribute box.
-
Complete the checkout using a test credit card number (if your gateway is in test mode).
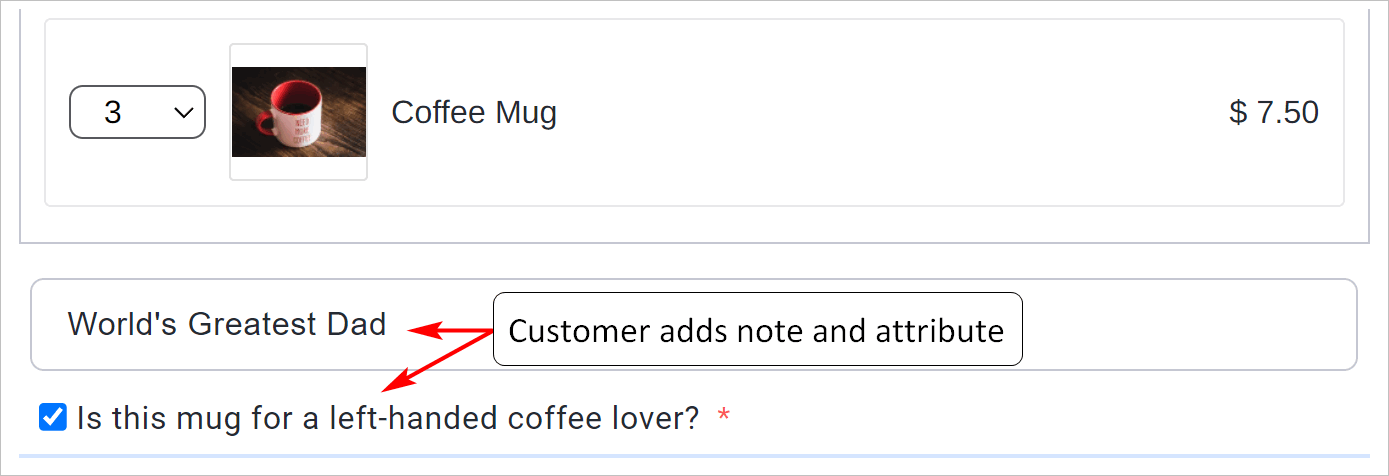
Check Your Shopify Admin:
-
Log in to your Shopify store.
-
Navigate to Orders and open the test order you just generated.
-
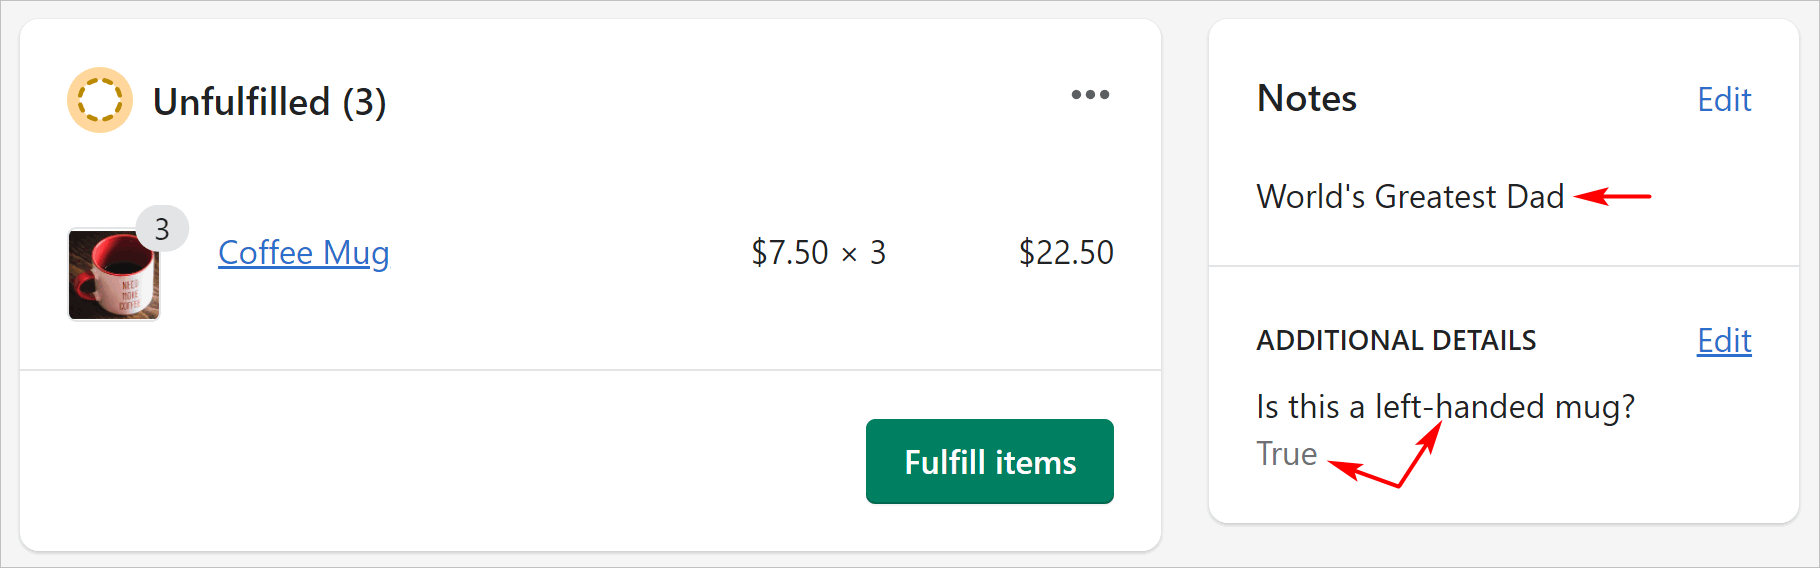
On the right-hand side of the order page, you will see your custom text safely stored under Notes, and your custom checkbox value listed under Additional Details (Attributes).
 Resources & Next Steps
Your Shopify integration is now passing complex, customized data flawlessly. To continue optimizing your store and scaling your campaigns, check out these related resources:
Related Shopify Documentation:
-
Connect Your Shopify Store: Review the foundational steps to link Funnelish to your Shopify backend.
-
Set Up Product Automations & Order Bundling: Learn how to merge post-purchase upsells into a single Shopify order.
-
Set Up Dynamic Variants: Discover how to bypass Shopify’s native 3-variant limit for highly customizable products.
Helpful Links from Funnelish:
-
Funnelish.com: Discover more features designed to maximize your ecommerce profits.
-
Funnelish Blog: Read the latest Conversion Rate Optimization (CRO) strategies, dropshipping tips, and case studies.
-
Funnelish Community: Connect with other high-volume sellers, share your funnel layouts, and get expert advice from our team.