You have successfully connected your Shopify store to Funnelish. Now, it is time to map your funnel products to your backend store so Shopify knows exactly what to fulfill when a customer buys.
In this guide, we will show you how to automatically push orders to Shopify, sync your inventory, and configure Order Bundling—a highly recommended feature for scaling your ecommerce funnels and managing post-purchase upsells.
Prerequisite: To complete these steps, you must first connect Funnelish to your Shopify store. If you haven’t done that yet, please read our Connect Your Shopify Store guide.
 Optimizing Checkout UX with Dynamic States
Shopify has strict formatting rules for shipping addresses. For many countries, Shopify requires that states and regions use the exact correct ISO codes or official names. If a customer manually types a state name incorrectly (like “Texs” instead of “Texas” or “TX”), Shopify might reject the order sync!
To prevent this, we highly recommend enabling Dynamic States on your checkout form.
While using Dynamic States is not strictly required (you can still use a custom dropdown, or no field at all if you only ship to regions that don’t require them), it provides the absolute best user experience:
-
Auto-Loading: It automatically loads the correct shipping and billing states based on the customer’s selected country.
-
Auto-Hiding: If a customer selects a country that does not commonly use states or regions in their addresses, Funnelish will dynamically hide the state box entirely, reducing friction and speeding up checkout!
How to enable it:
-
Open your checkout page in the Funnelish Page Builder.
-
Click on your Checkout Form element.
-
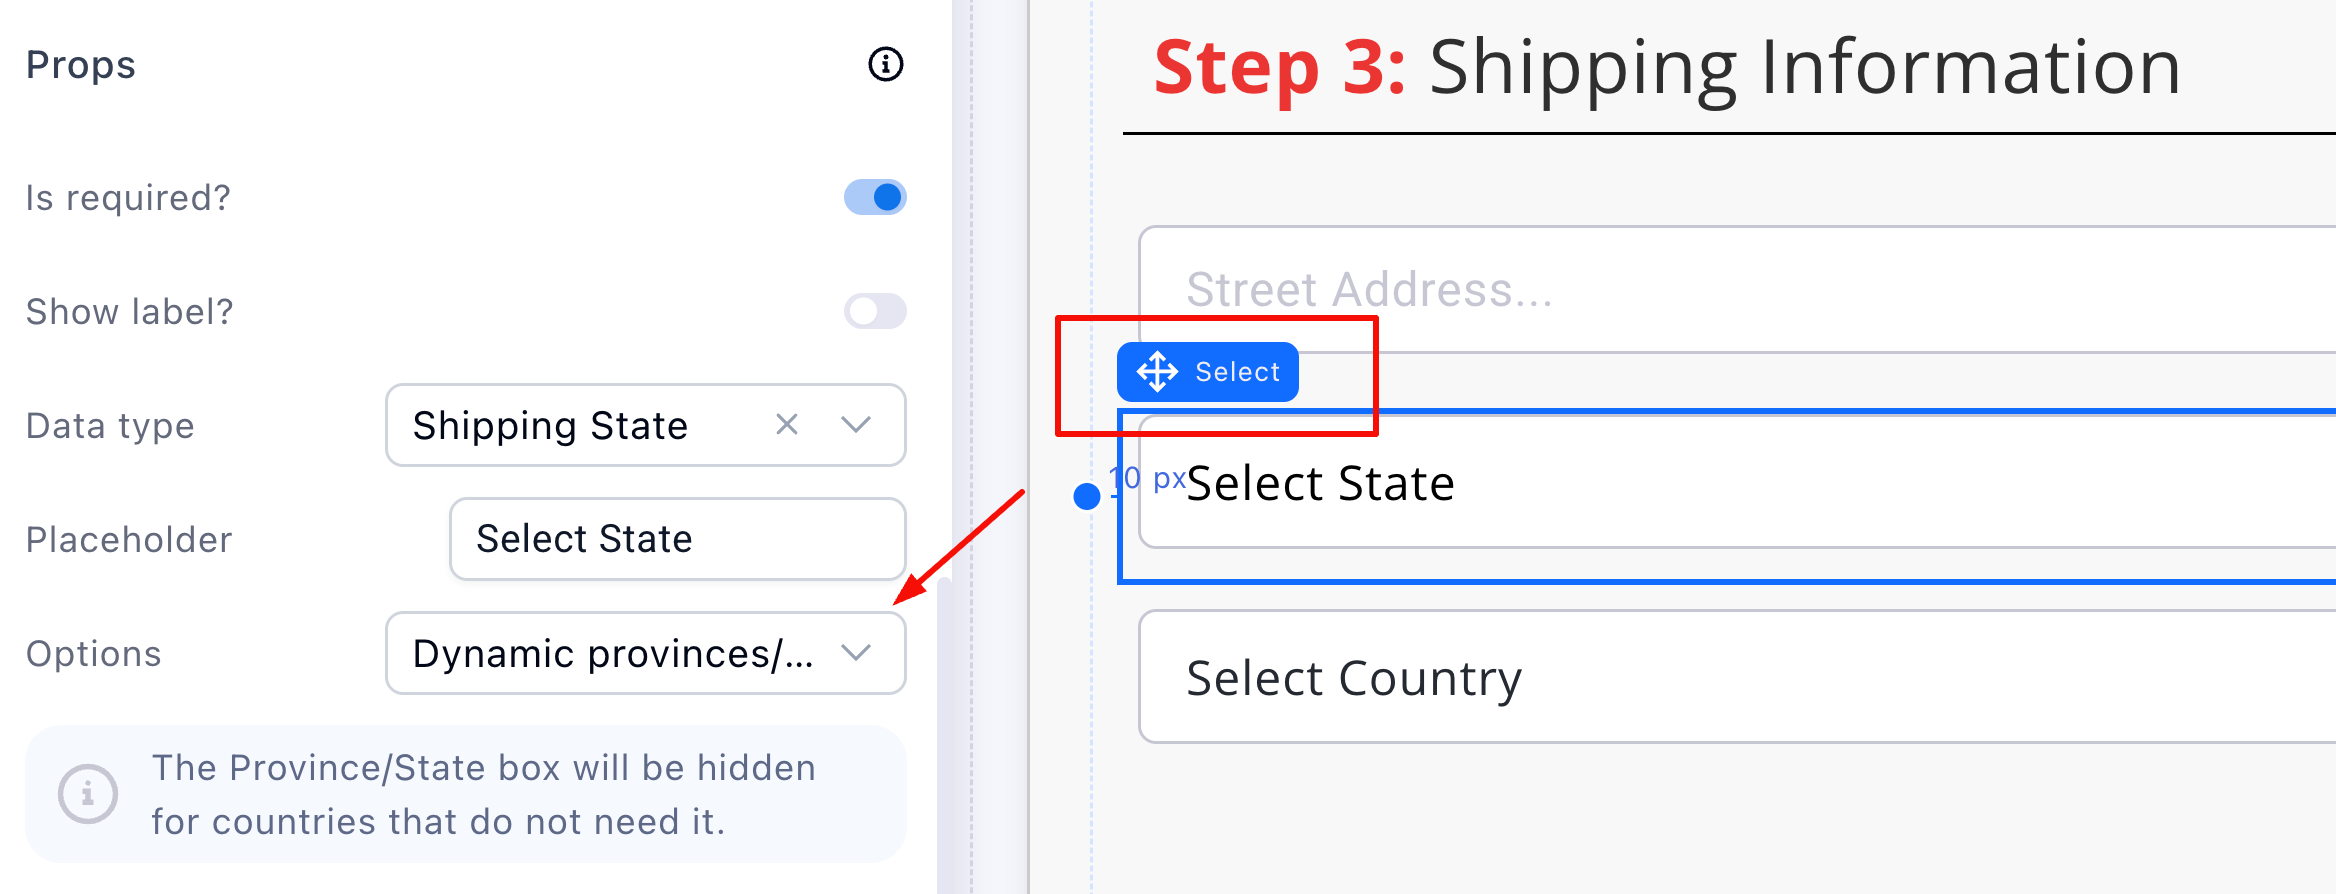
In the settings panel, find the State/Province field.
-
Ensure the Dynamic States toggle is enabled.
 Highly Recommended: What is Order Bundling?
If you are running dropshipping campaigns or a DTC brand with One-Click Upsells and Downsells, Order Bundling is an incredibly common and highly recommended feature to activate.
Without bundling, if a customer buys your main product, and then accepts two separate upsells, Shopify will generate three entirely separate orders for the same customer. This creates a massive headache for your fulfillment team and drastically increases your shipping costs.
How Bundling Fixes This:
When you enable Order Bundling, Funnelish adds a short waiting period (e.g., 5 minutes) after the initial checkout. This delay gives the customer time to navigate your post-purchase Upsell and Downsell pages. Once the timer expires, Funnelish merges the initial product, the order bumps, and all accepted upsells into one clean, single order before sending it to Shopify!
 Step 1: Creating a Shopify Automation
Let’s link a product in your funnel to the corresponding item in your Shopify backend and enable bundling.
-
Log in to your Funnelish account and open your funnel.
-
Click the specific Step that holds your product (e.g., your Checkout or Upsell step).
-
Click on the product you want to automate to open its settings panel.
-
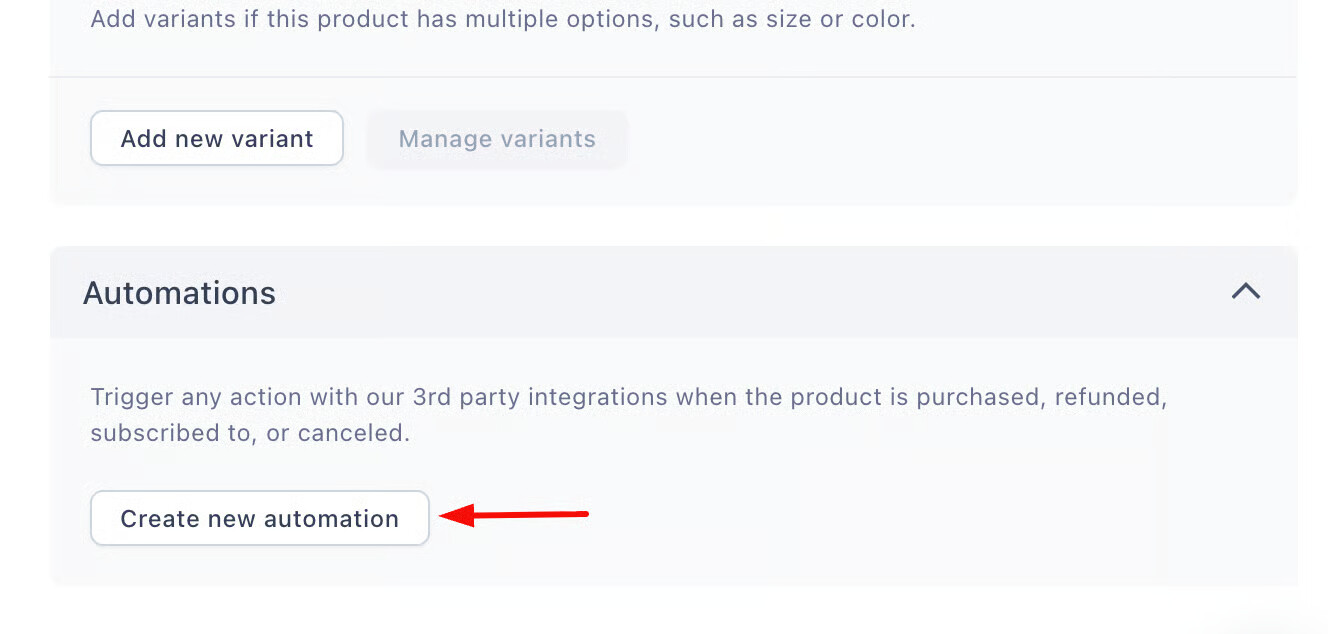
Scroll to the bottom of the panel and click the Create new automation button.
-
In the workflow window, click the On Purchase trigger, then click Continue.
-
Select Shopify as your integration.
-
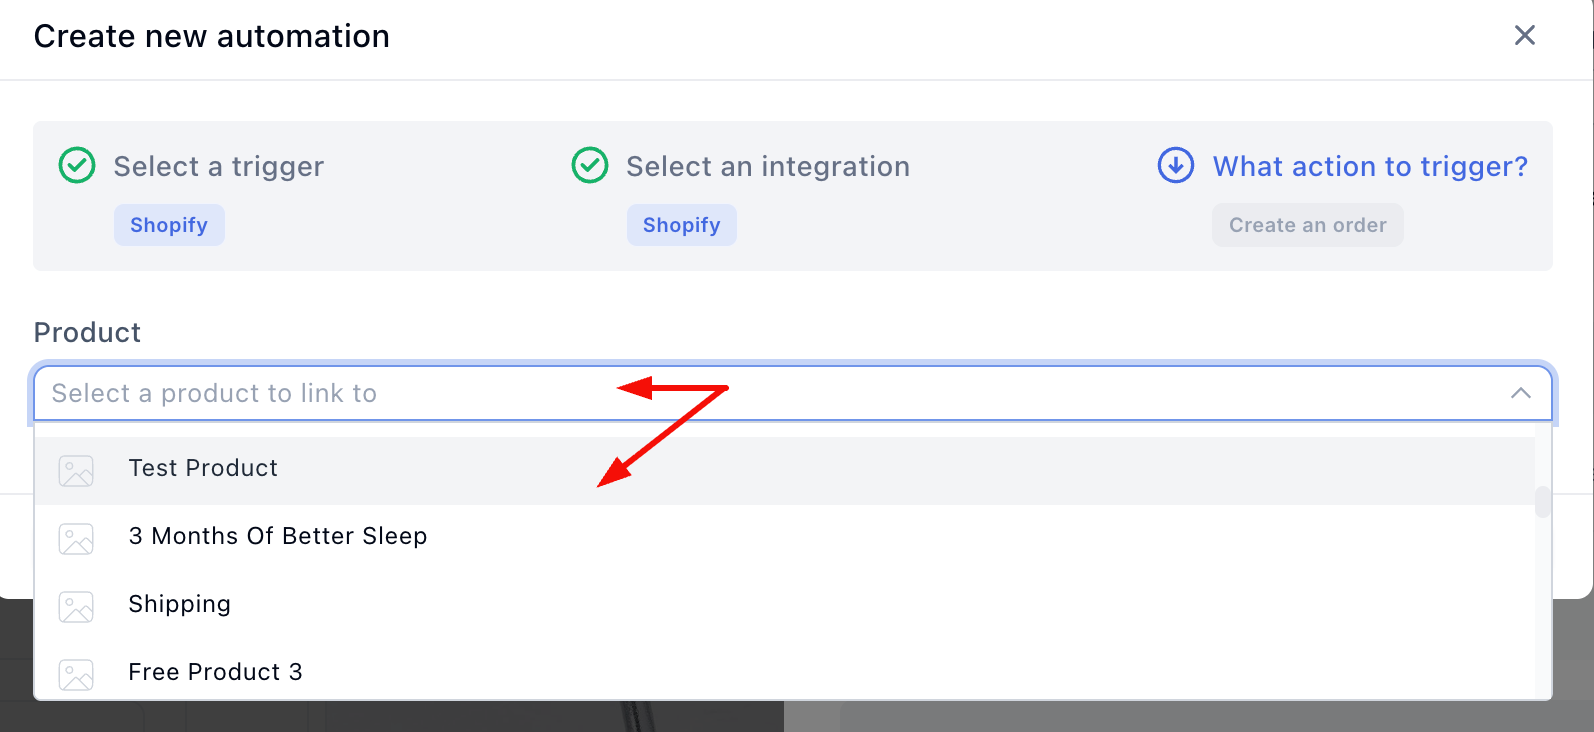
Click the product dropdown menu and select the exact Shopify product you want to link to this Funnelish product.
Enabling the Bundle
On the next screen, you will configure the automation behavior:
-
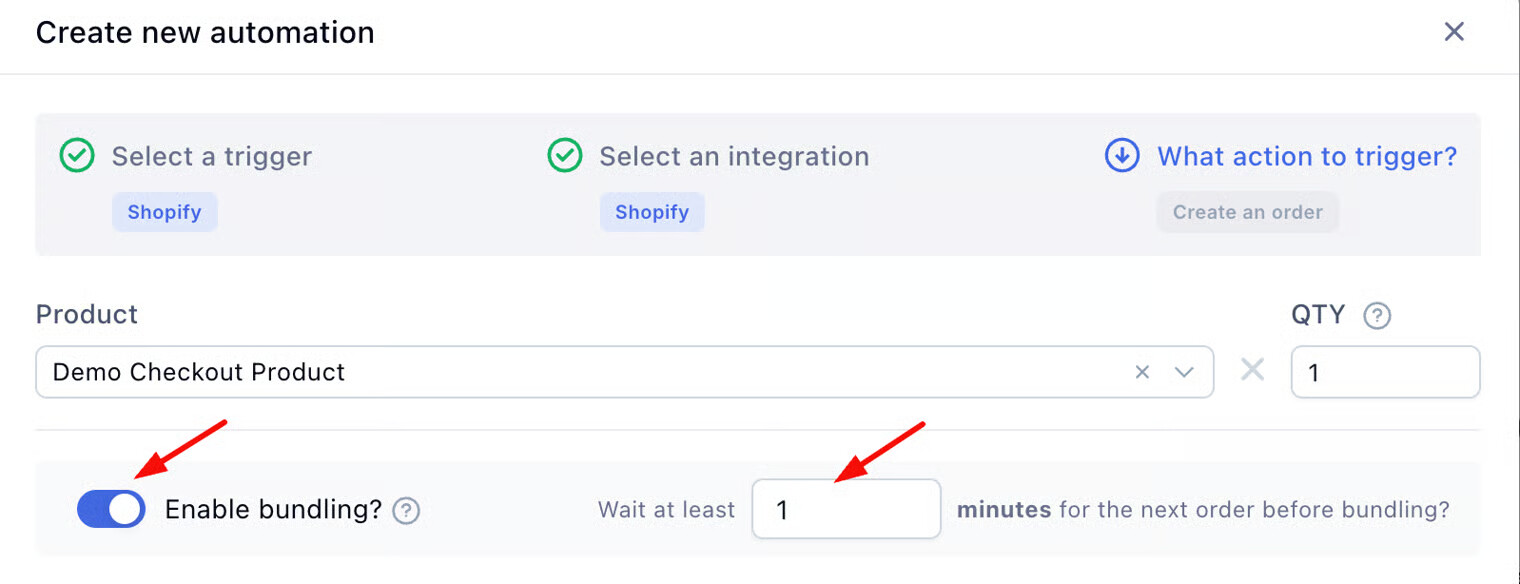
Switch the Enable bundling toggle to the ON position.
-
Enter a time limit in the Wait at least field. We highly recommend setting this between 5 to 7 minutes. This is the perfect amount of time to let the customer finish browsing your funnel before the order syncs.
 Step 2: Mapping Variants (Linking)
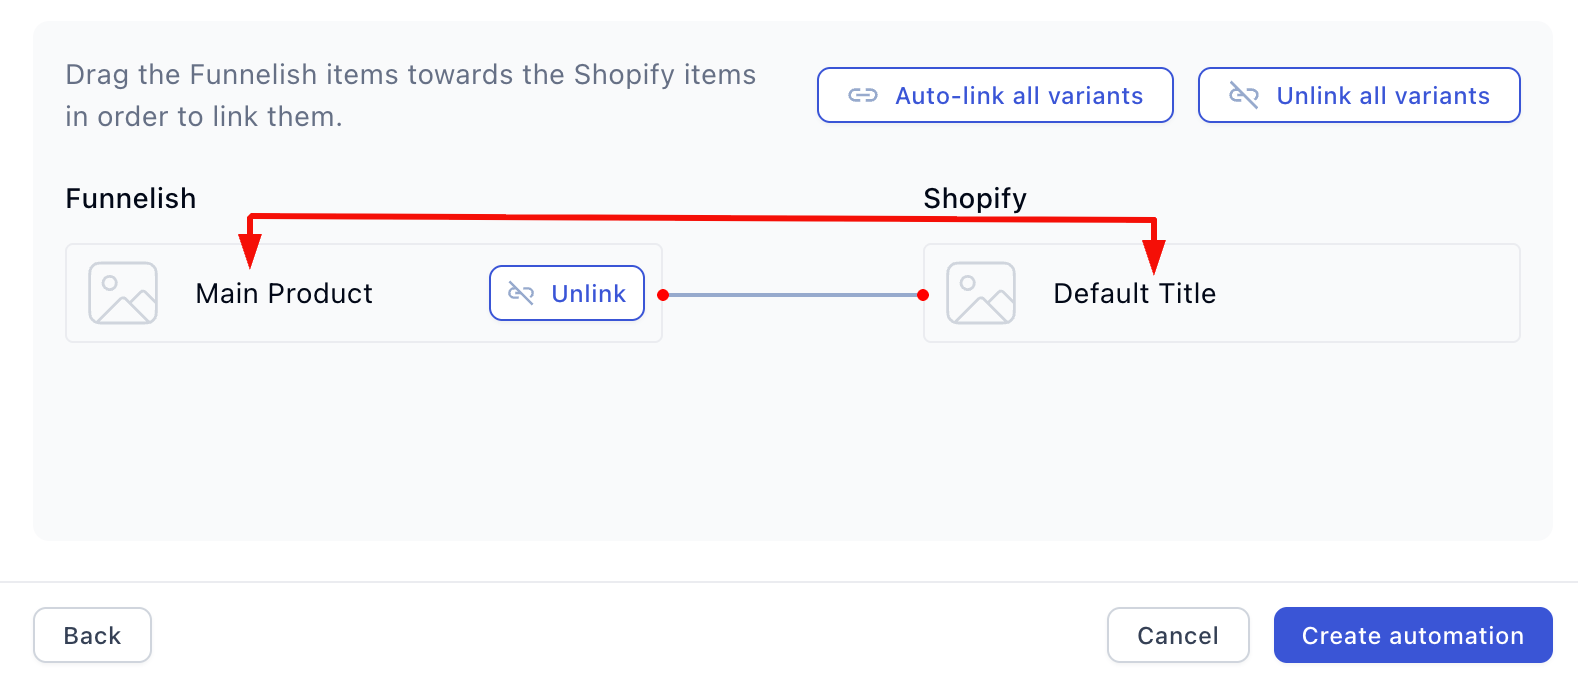
If your product has multiple variants (like Size or Color), you need to map them so Shopify knows exactly which version the customer selected.
On the linking screen, you will see your Funnelish variants on the left and your Shopify variants on the right.
- Click the Auto-link all variants button to have Funnelish instantly match them based on their names.
- Alternatively, you can manually drag a Funnelish variant to the corresponding Shopify variant.
 Step 3: Advanced Settings (Inventory & Pricing)
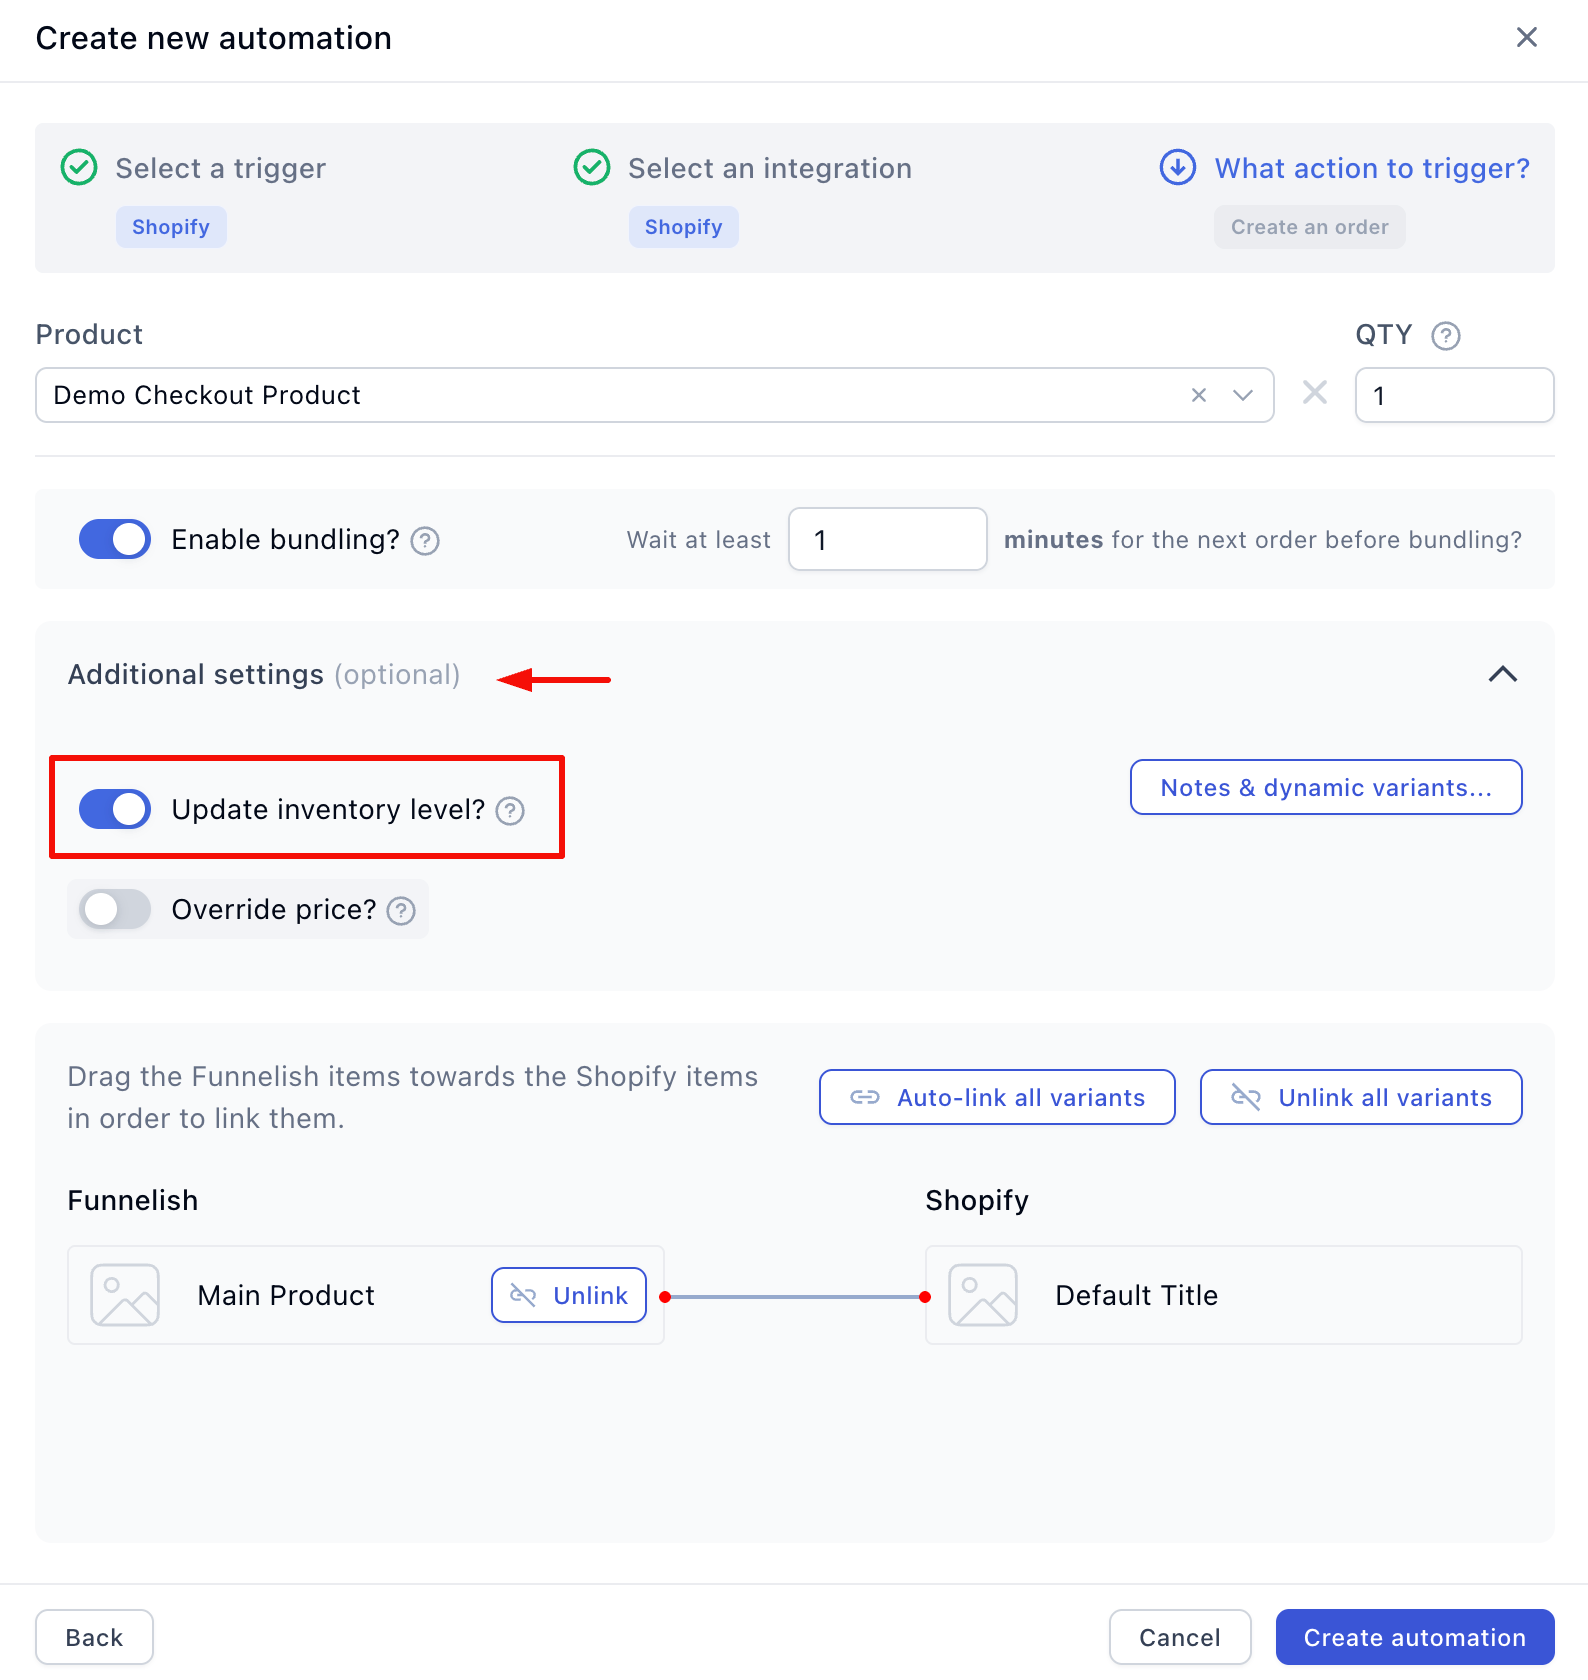
Under the Additional settings folder on your automation screen, you have access to two powerful optional features.
1. Update Inventory Level
If you manage strict stock levels in your Shopify store, switch the Update inventory level? toggle to ON. Funnelish will automatically decrease the inventory count in Shopify every time this product is purchased.
Warning: Ensure your product has enough stock in Shopify! If bundling is enabled, make sure all products in the bundle have sufficient inventory. If an item is out of stock in Shopify, the sync may fail.
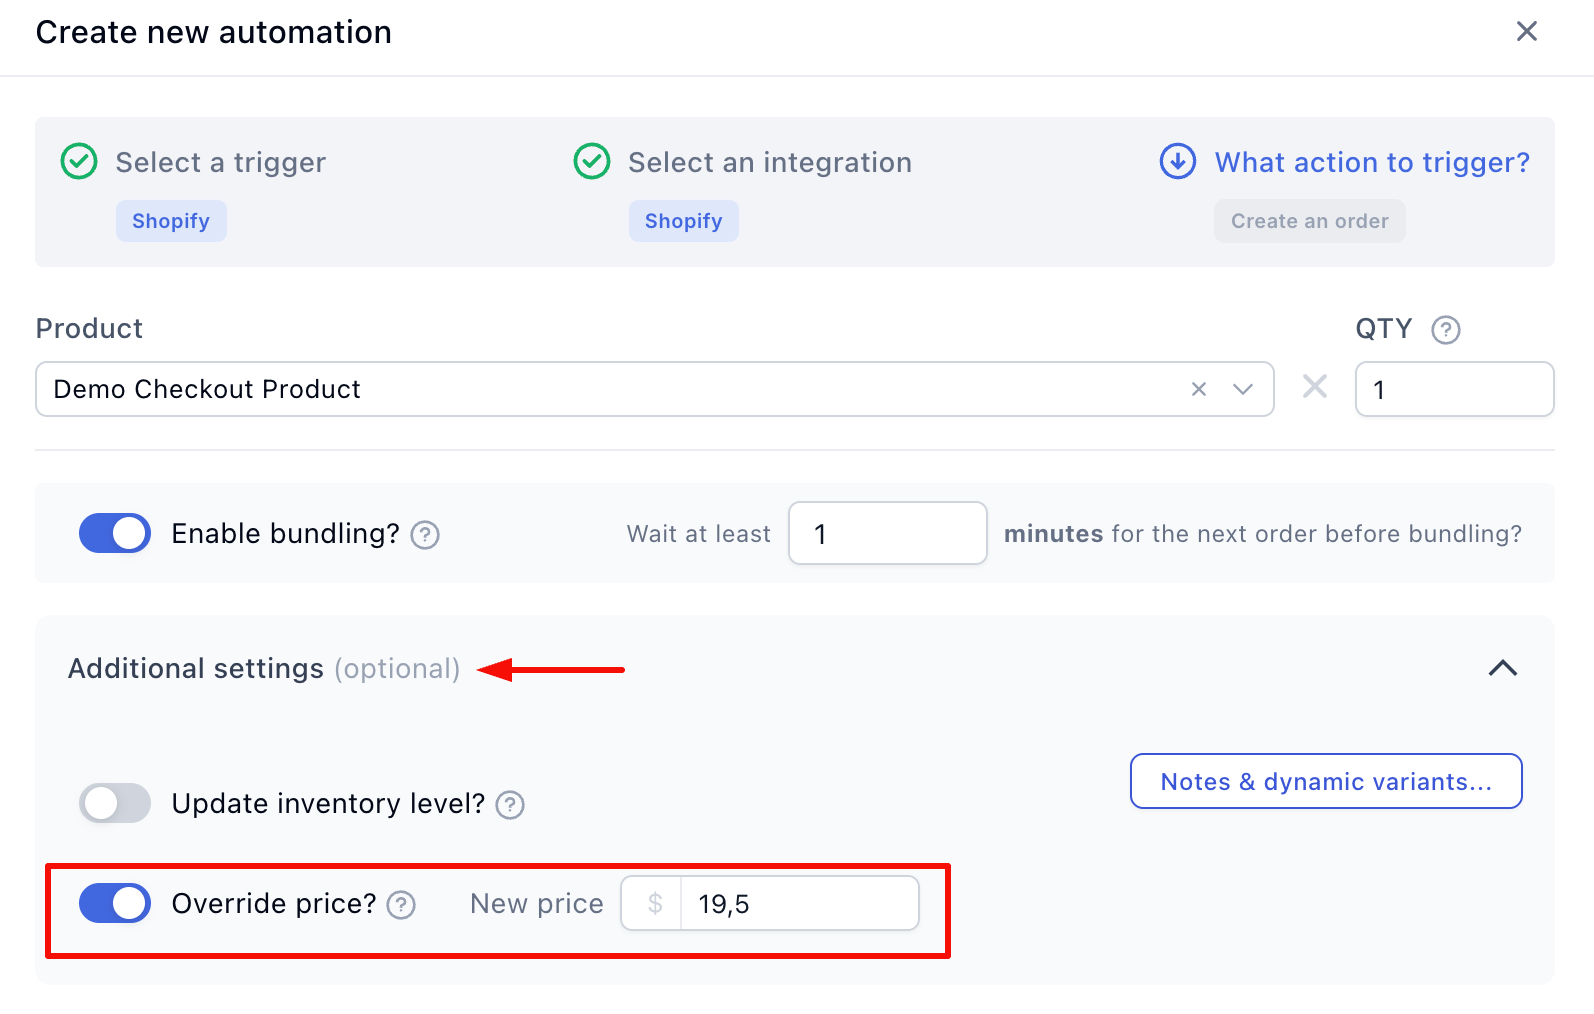
2. Override Price
By default, Funnelish sends the exact price the customer paid in your funnel over to Shopify. You rarely need to change this.
However, if you are running a special promotion in Funnelish but need the order to register at a different wholesale or tax value in Shopify, you can use the override feature.
- Switch the Override price? toggle to ON.
- Enter the new price. (e.g., If the product was sold for $25 in Funnelish, but you override it to $19.50, Shopify will record the revenue as $19.50).
Once everything is configured, click Save changes. Your product is now fully automated! Repeat this quick process for any other products in your funnel.
 Next Up:
Your products are synced and bundling is active! Let’s take your integration one step further by sending custom data directly to your fulfillment team.
Read the next guide: Setting Up Shopify Order Notes & Attributes