When building ecommerce funnels that push orders directly to Shopify, sellers often hit a frustrating roadblock: Shopify limits product variants to a maximum of three options (e.g., Size, Color, and Material).
If you are a DTC brand selling a product with lots of variables—like a custom travel bag that has a Size, Color, Leather Type, and Strap Style—Shopify’s native system will reject it.
Funnelish has a powerful solution: Dynamic Variants. This feature allows you to bypass Shopify’s limitations, collect as many variant options as you need on your funnel step, and pass them flawlessly into your Shopify order dashboard.
Here is the three-step process to set it up.
 Step 1: Creating the Variant Selectors (Forms)
The first step is to build the dropdown menus on your funnel page so your customers can choose their options.
Example Scenario: We are going to create dynamic variants for a leather travel bag. We need the customer to select a Color and a Size.
-
Open your funnel and navigate to the step with your product (e.g., your Checkout page).
-
Open the Page Builder.
-
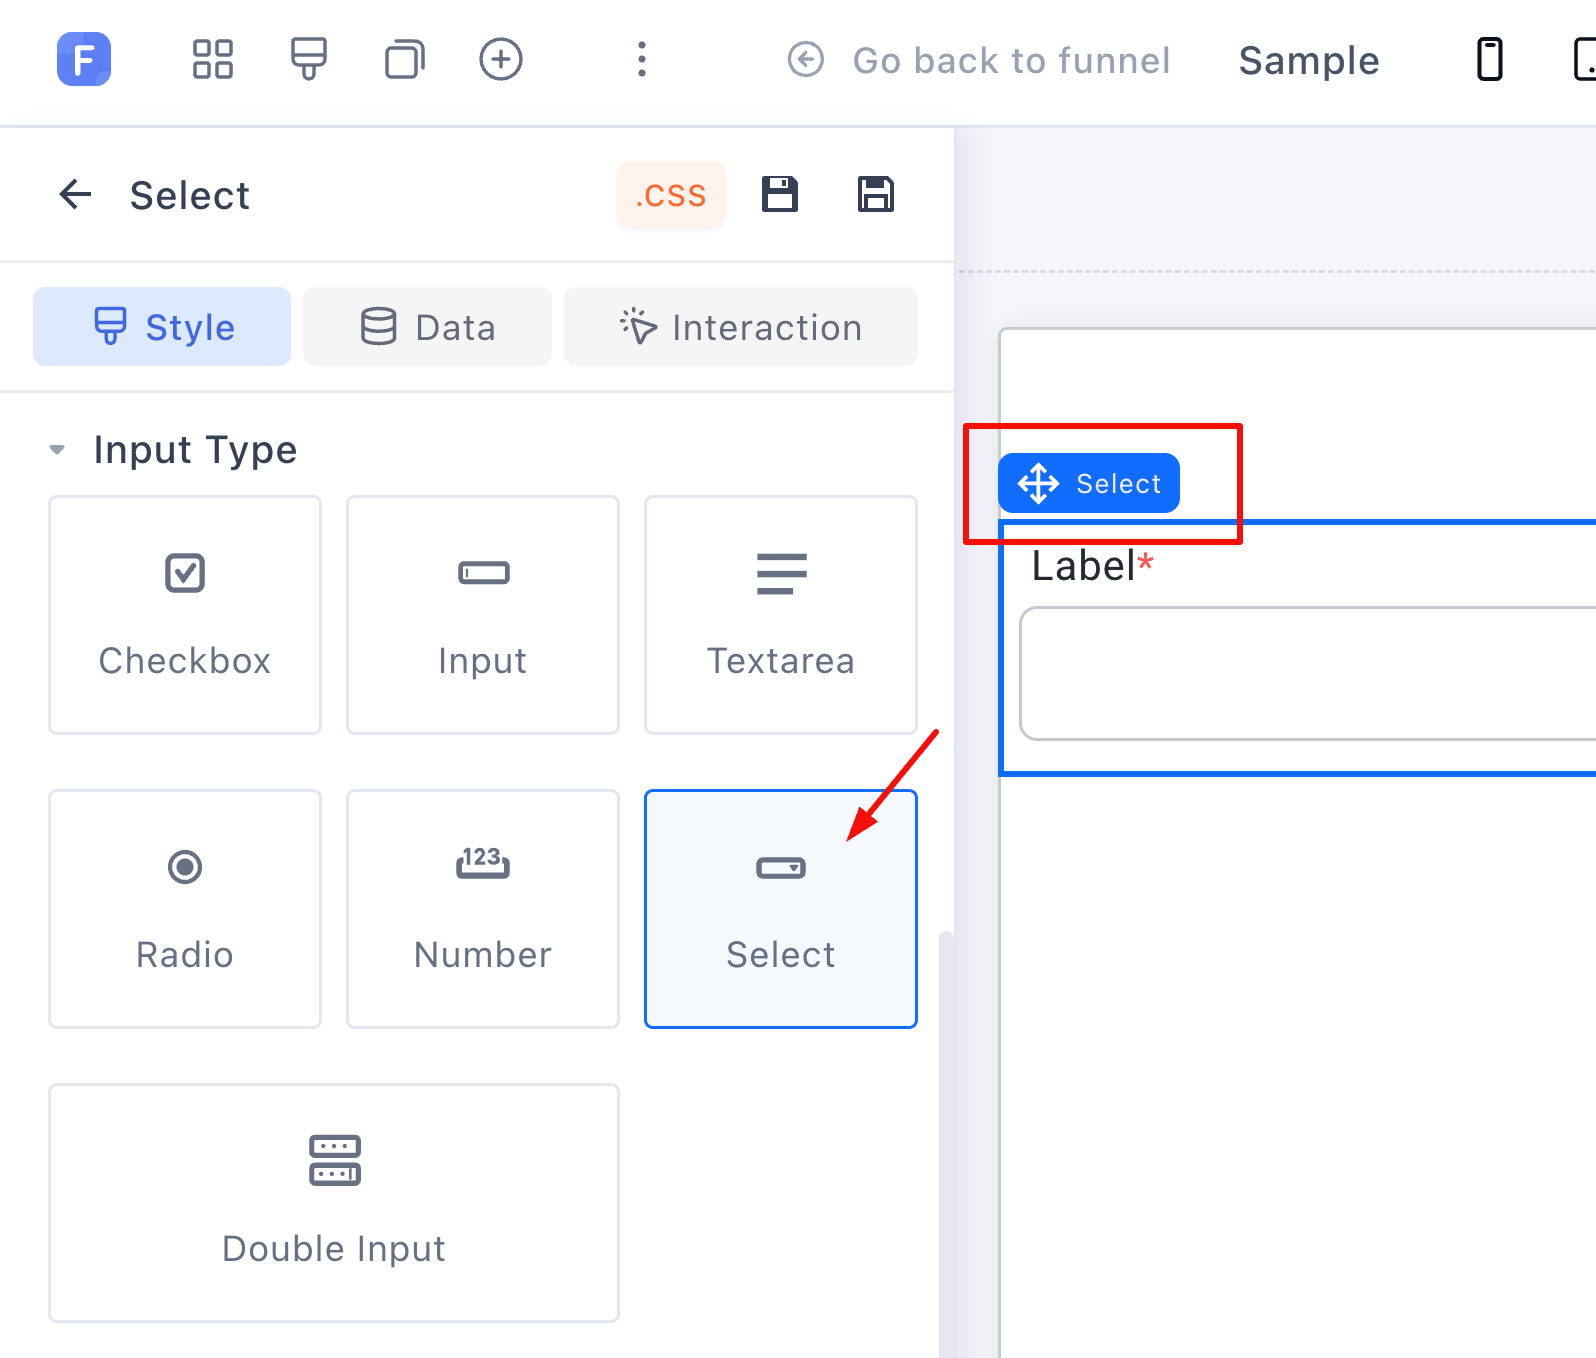
Drag a Select form element onto your canvas where you want the dropdown menu to appear. (Note: You can also convert any existing input field into a dropdown by changing its “Input type” to “Select”).
Configuring the Data Type
Now, we need to tell Funnelish that this dropdown is for a custom variant.
-
Click your new dropdown element to open its settings.
-
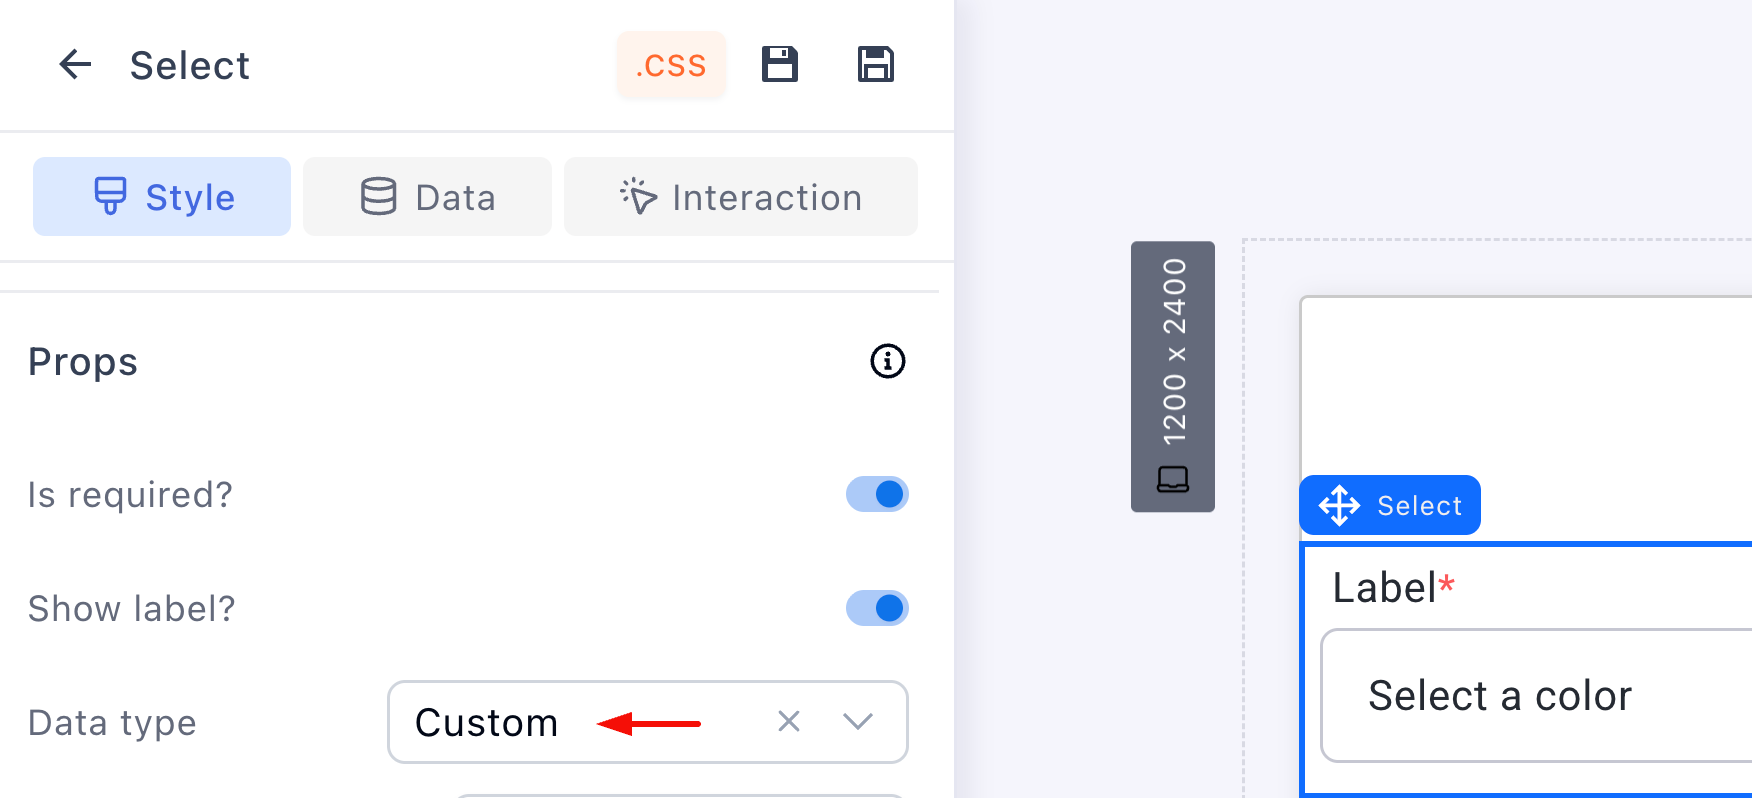
Scroll down to the Props heading.
-
Click the Data type dropdown and select Custom.
Naming the Data & Adding Options
-
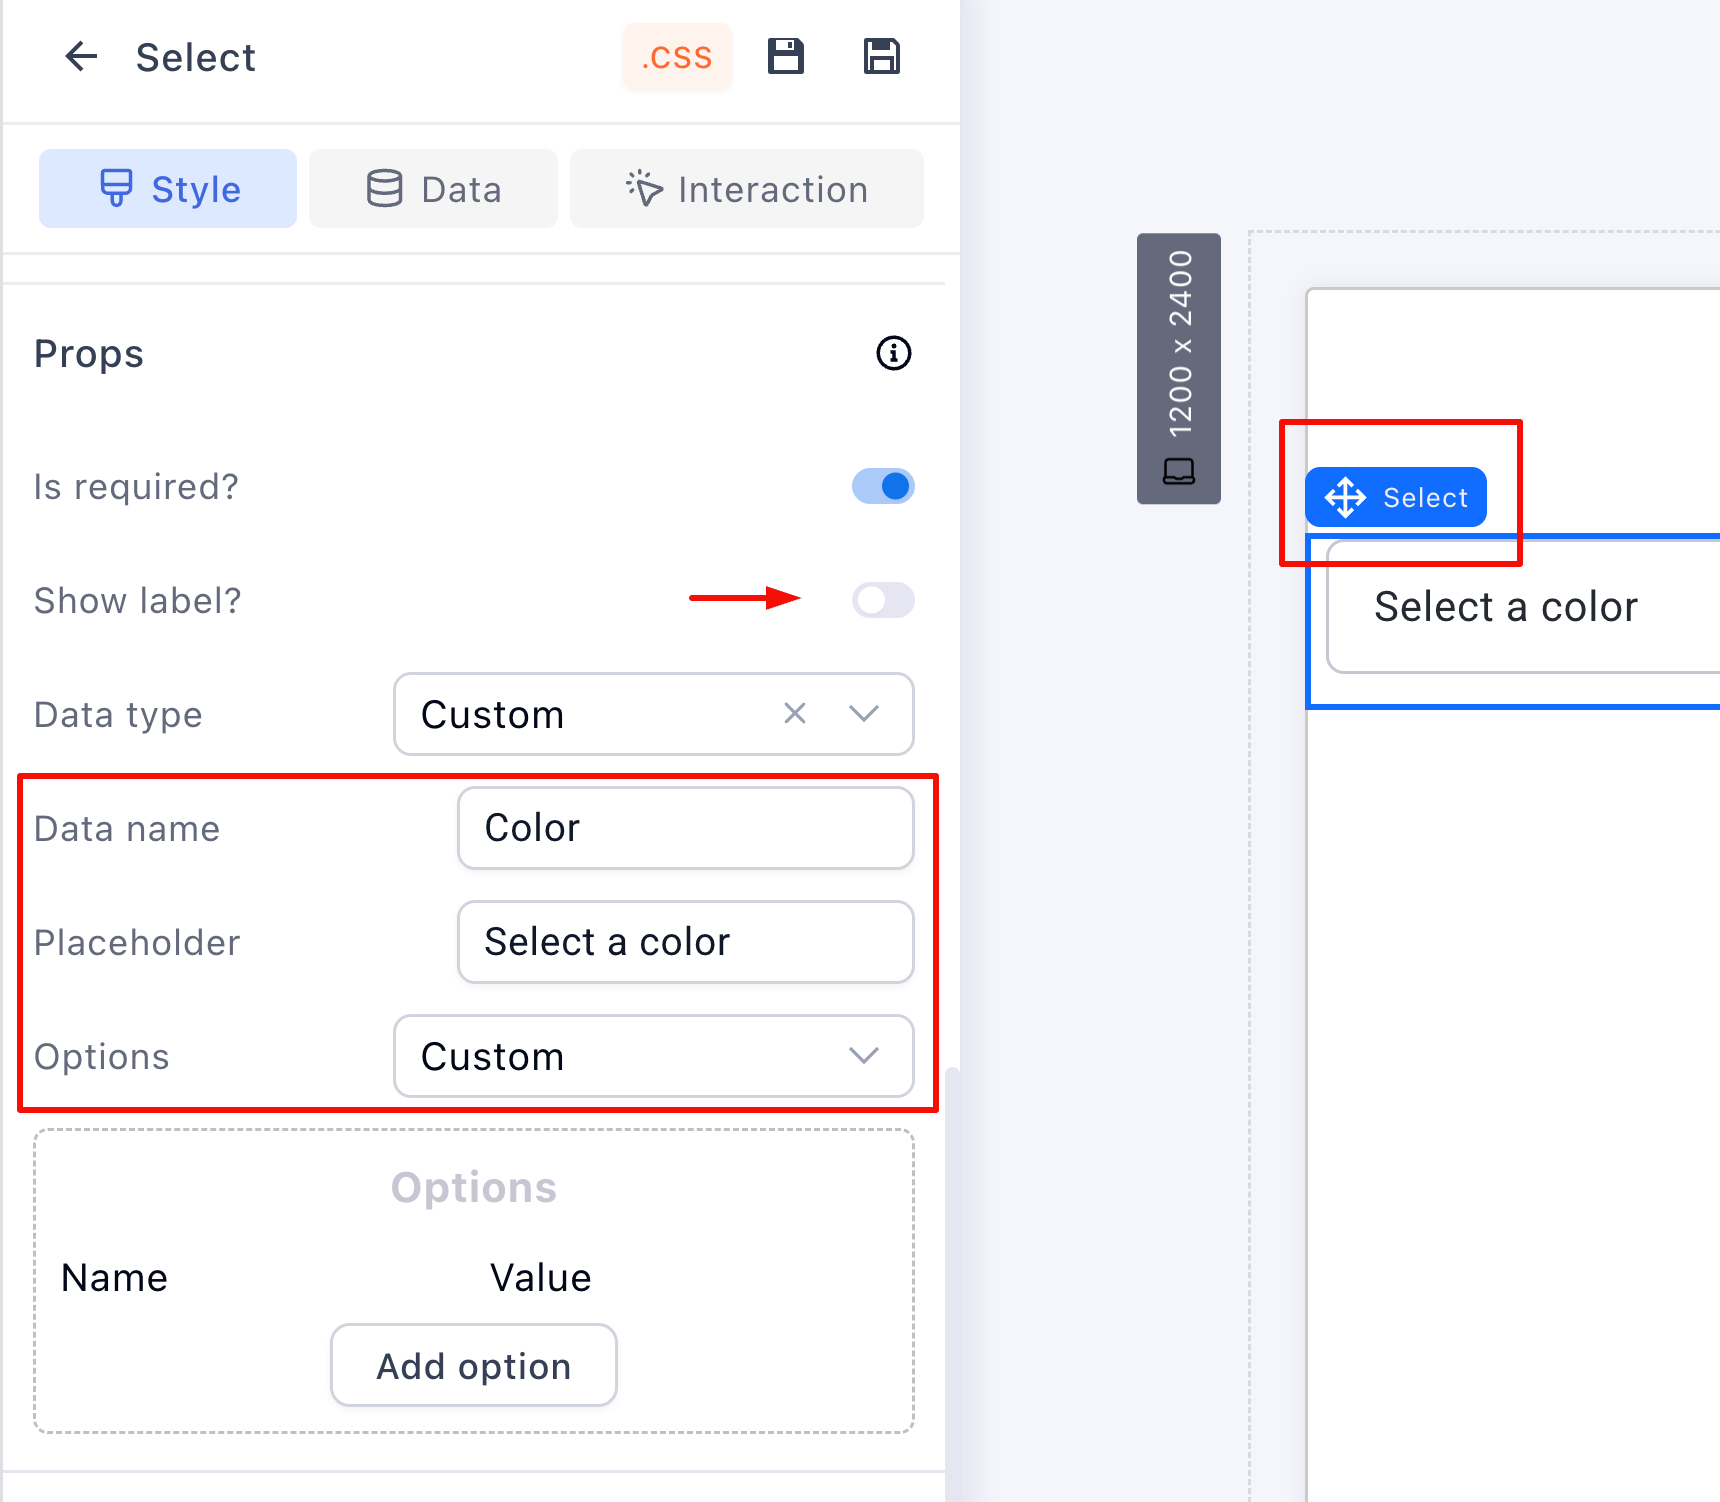
Locate the Data name field and enter a unique, internal identifier (e.g.,
Color). The customer will not see this text. -
Enter your Placeholder text. This is the instruction the customer sees (e.g., “Select a color…”).
-
Change the Options dropdown to Custom.
Important Data Name Rule: Your Data name must NOT contain spaces or special characters! If you need multiple words, use an underscore (e.g.,
Bag_Color).
-
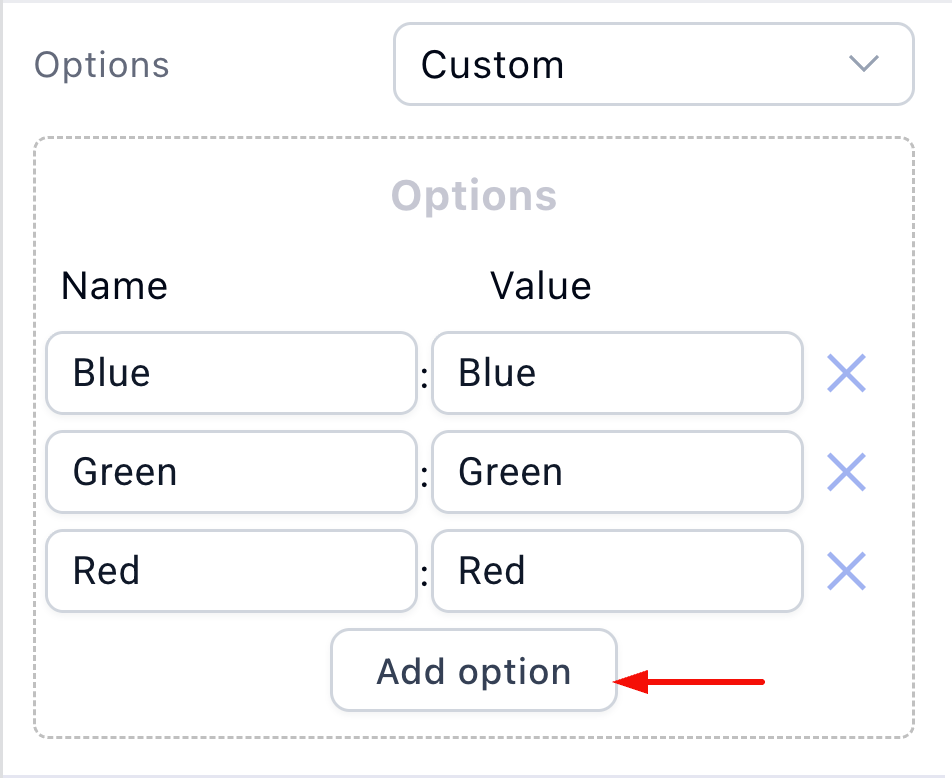
Click the Add option button.
-
Enter the Name (what the customer sees, e.g., “Blue”) and the Value (what the system records, e.g., “Blue”). Repeat this until all your colors are added.
Adding Your Next Variant
We have successfully created the “Color” variant! Now we need to create the “Size” variant.
Sizeand update the options to Small, Medium, Large!

Be sure to click Save changes in the top right corner of the builder.
 Step 2: Customizing the Shopify Automation
Now that our funnel is collecting the variant data, we need to map it so it pushes correctly to Shopify.
(Note: This step assumes you have already set up a standard Shopify automation for this product. If not, read the setup guide here.)
-
Exit the Page Builder and go to your step dashboard.
-
Click on your product to open its settings window.
-
Scroll down and click on your existing Shopify Automation.
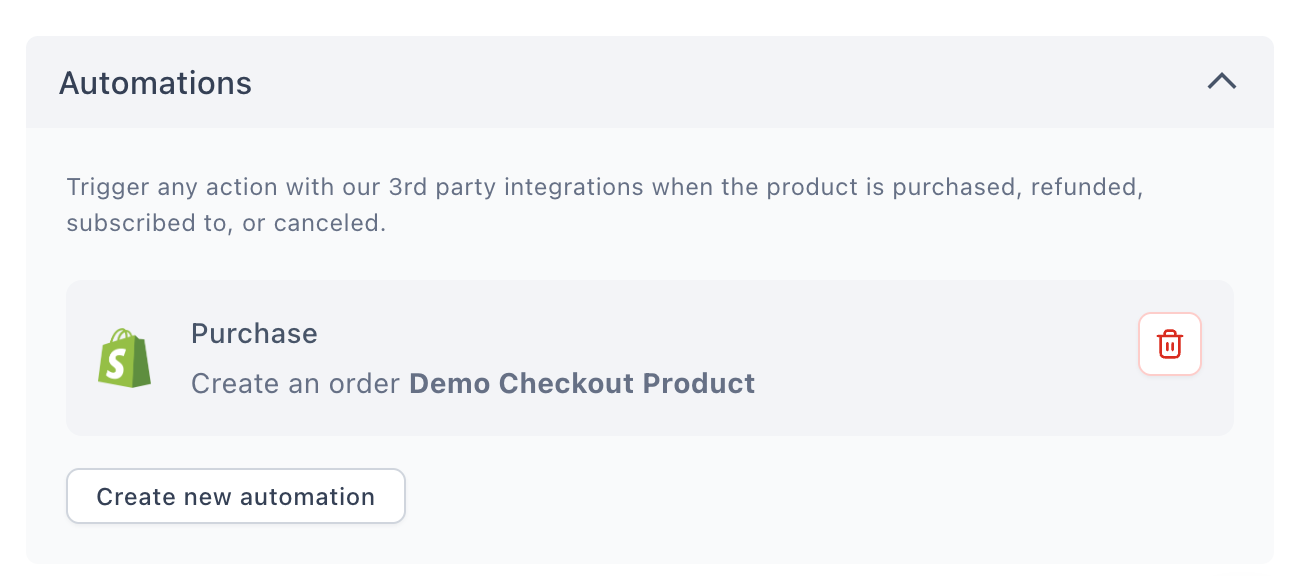
-
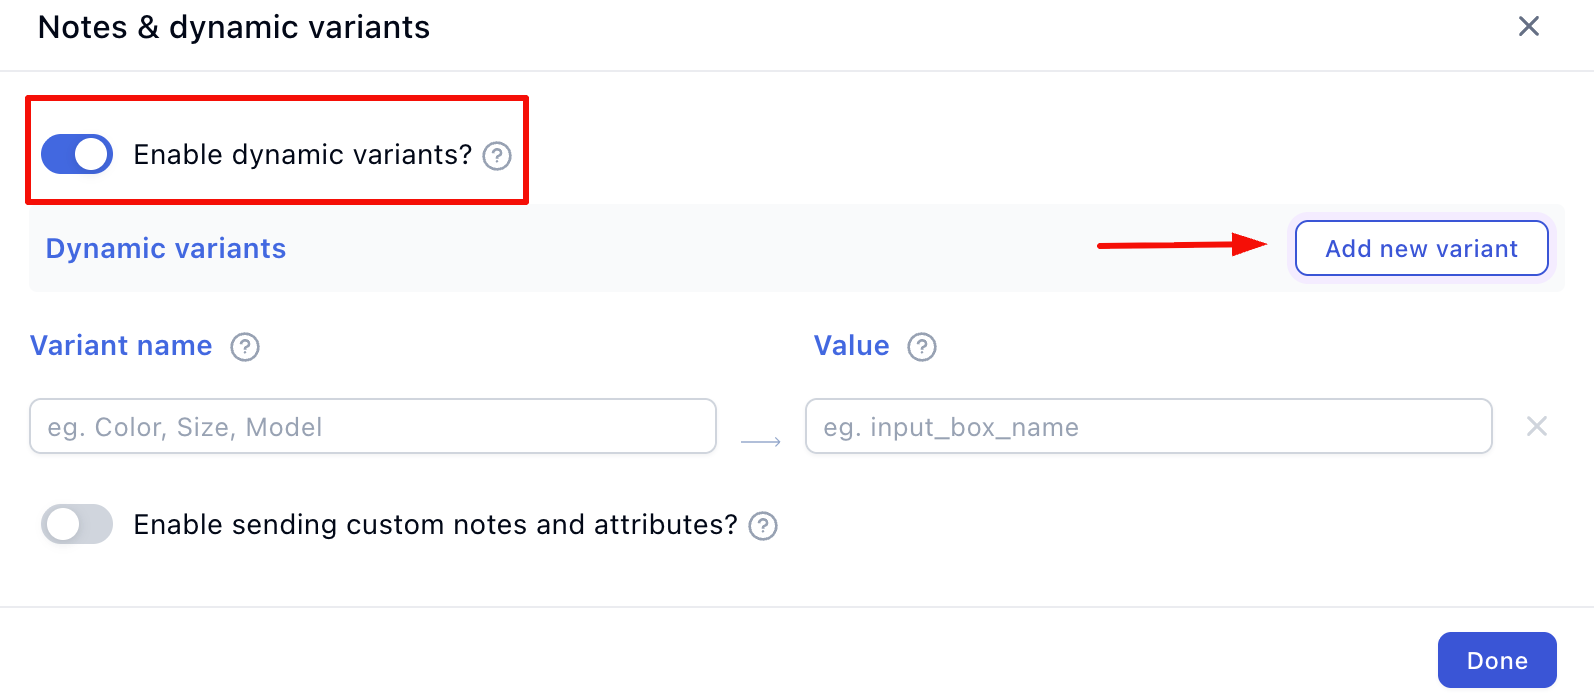
In the Edit Automation panel, click the Notes & dynamic variants button.
-
Toggle Enable dynamic variants? to the ON position.
-
Click Add new variant.
Mapping the Data Names
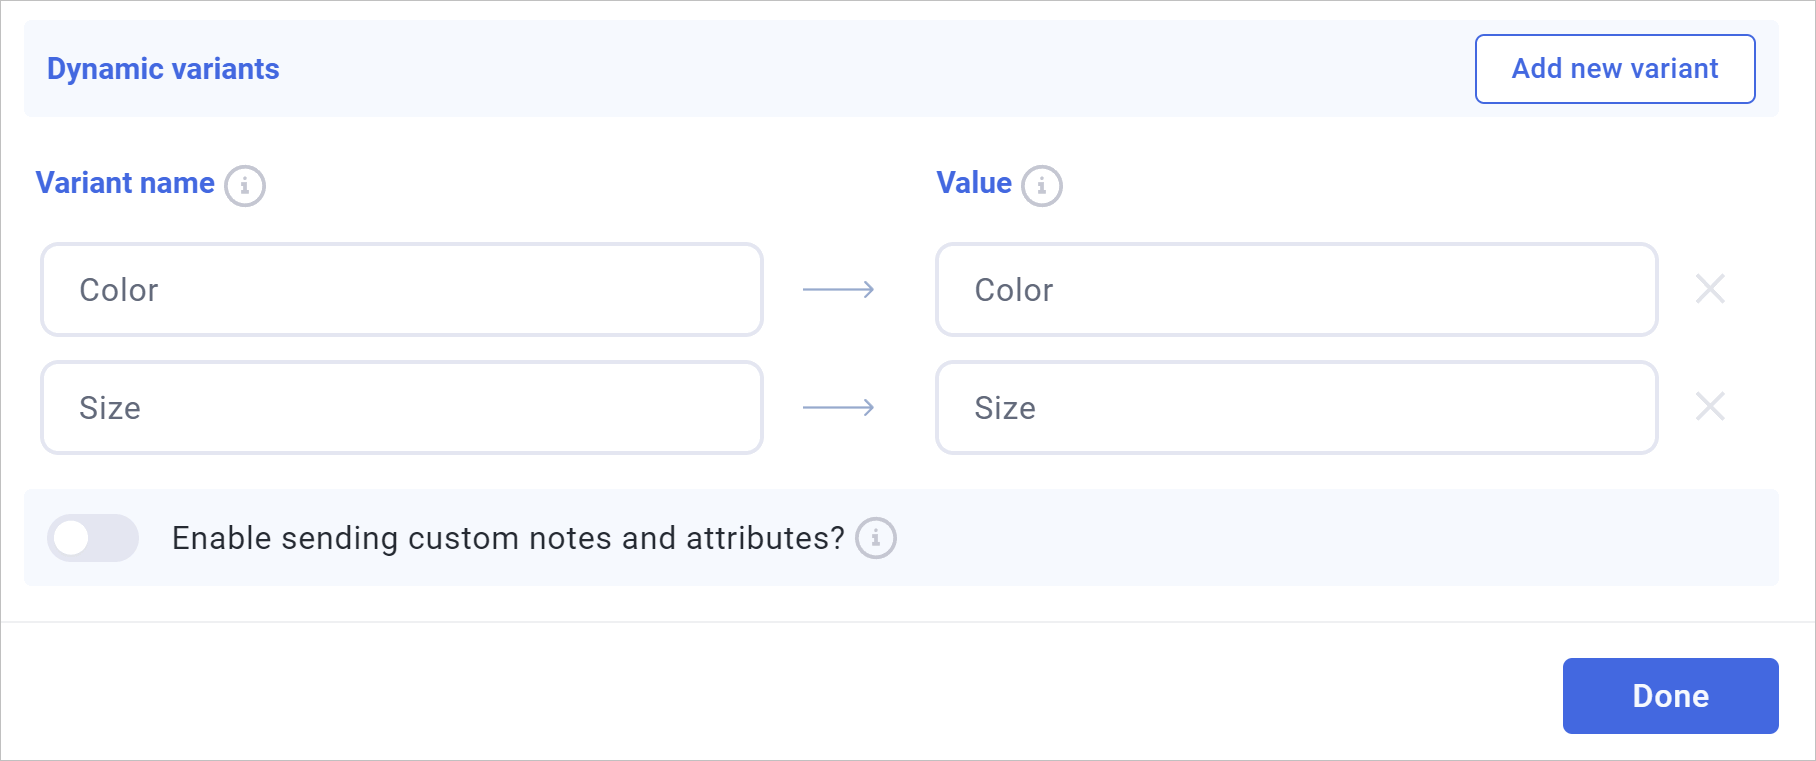
This is the most crucial step! You must map the exact Data Name you created in Step 1.
-
Under Variant Name, enter what you want Shopify to display on the order page (e.g.,
Color). -
Under Value, type your Data Name wrapped in brackets (e.g.,
[Color]). The brackets tell Funnelish to pull the dynamic option the customer selected. -
Click Add new variant again and repeat for the next one (Variant Name:
Size, Value:[Size]). -
Click Done, then Save changes.
 Step 3: Run a Test Purchase
You are all set! Let’s run a test transaction to verify the data is passing to Shopify correctly.
-
Go back to your step dashboard and click Preview.
-
Select your product and choose specific options from your new dropdowns (e.g., “Black” and “Large”).
-
Complete the checkout using a test credit card number (if your gateway is in test mode).

Check Your Shopify Admin:
-
Log in to your Shopify store.
-
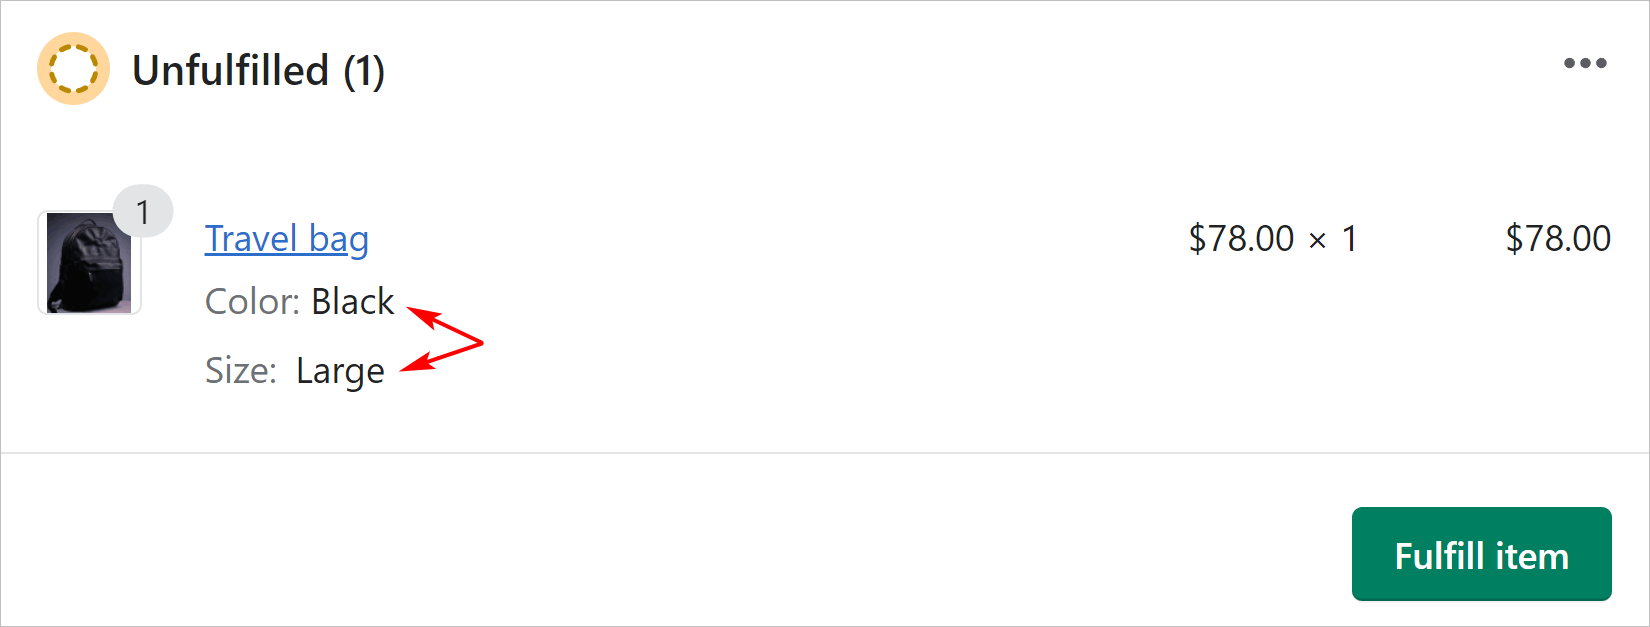
Navigate to Orders and open the test order you just generated.
-
You will see the exact dynamic product variants (Color: Black, Size: Large) beautifully formatted directly beneath the product name!
 Next Up:
Your variants are perfectly synced. Did you know you can also send custom instructions, gift messages, and UTM tracking data directly to your fulfillment team?
Read the next guide: Setting Up Shopify Order Notes & Attributes