Seamlessly sync new orders from your ecommerce funnels directly to your Shopify backend!
Our Shopify integration puts your fulfillment on absolute autopilot. It natively supports product variants, adjusts your inventory levels in real-time, and completely eliminates the constant struggle of upsells and downsells being added to Shopify as separate customers or split orders.
Watch this quick video walkthrough to see how the direct integration works:

 Step 1: Connect Your Shopify Store
To automatically send your funnel orders to your fulfillment center, you need to connect Funnelish to your Shopify account. There are two ways to do this: the recommended 1-click install, or the fallback custom app method.
Method A: The 1-Click App Install (Recommended & Easiest)
For 99% of ecommerce brands, this is the fastest way to connect your store.
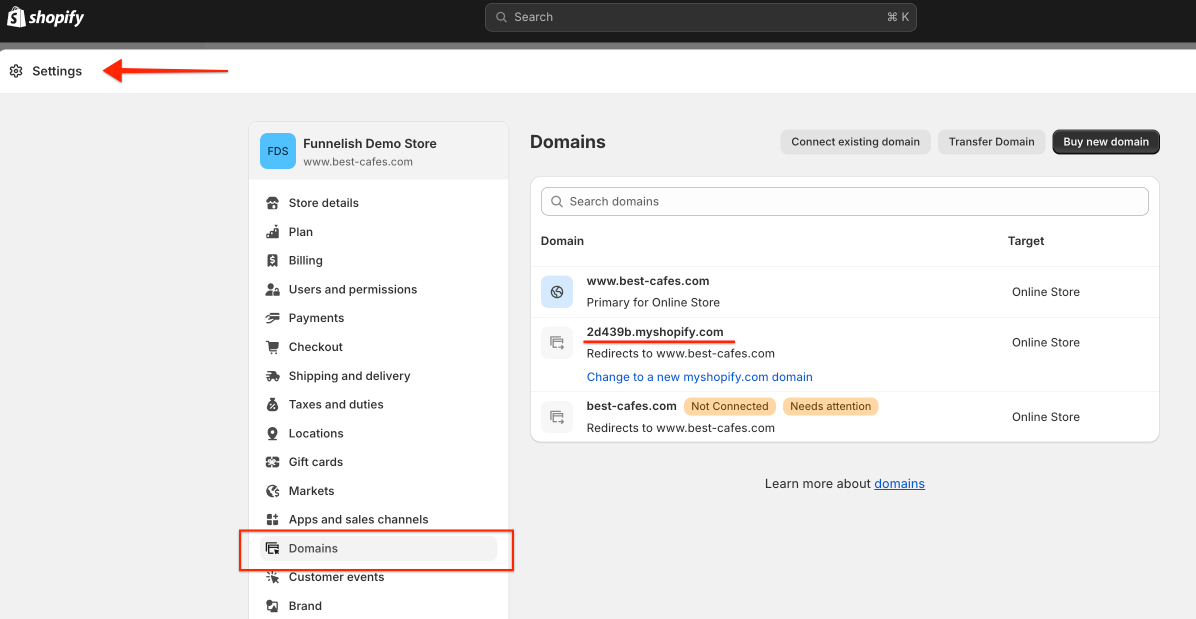
Part 1: Get your Shopify Domain
-
Open a new browser tab and log in to your Shopify store admin panel.
-
Go to Settings > Domains and copy your primary
.myshopify.comdomain name (it should look likeyourstore.myshopify.com).
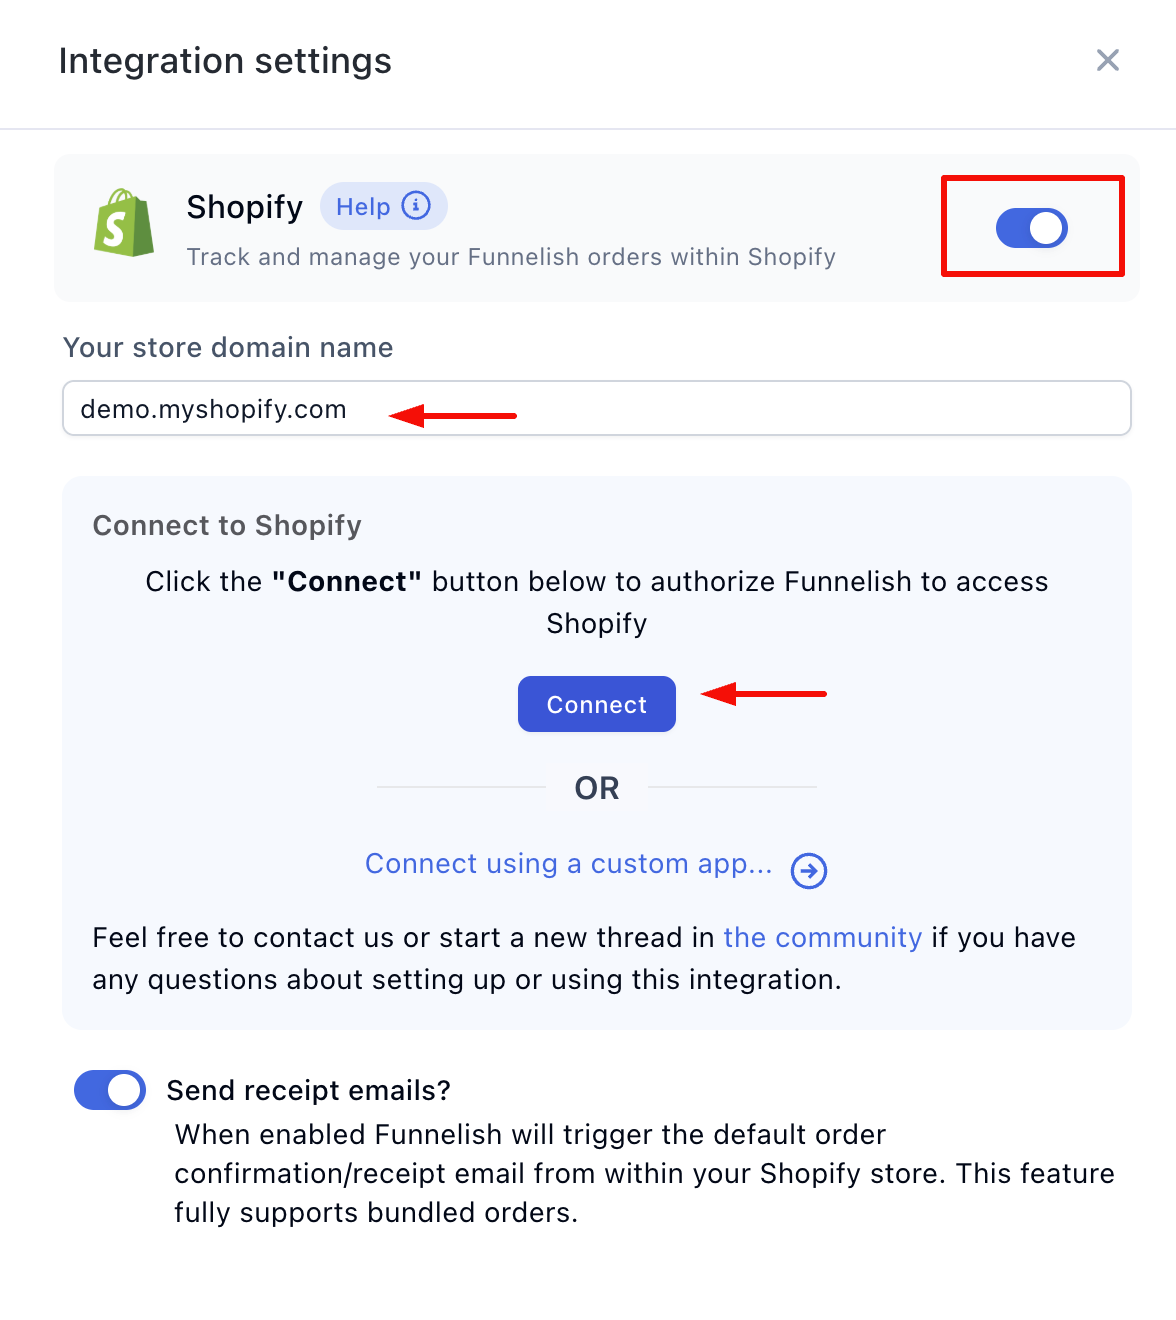
Part 2: Connect in Funnelish
-
Log in to your Funnelish account.
-
Click the Settings gear icon at the top right, then select Integrations.
-
Click on Shopify to open the side panel.
-
Switch the connection toggle to the ON position.
-
Paste your copied Shopify domain into the domain field.
-
Click Connect. This will automatically open a Shopify permissions page on your screen.
-
On the Shopify page, click the Install unlisted app button.
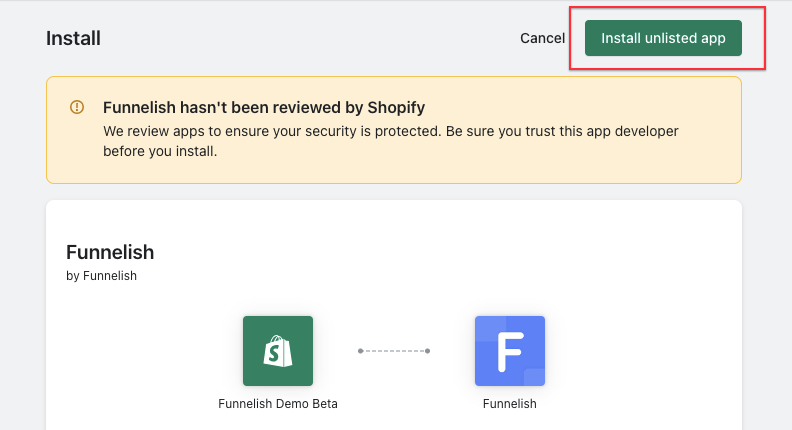
Install the Funnelish app on Shopify
- Go back to the Funnelish side panel and click Save changes. Your Shopify store is now seamlessly connected!
Method B: The Custom App Setup (Fallback)
Only use this method if the 1-click install above does not work for your specific store setup.
1. Create the Custom App in Shopify
-
In Shopify, go to Apps > App and sales channel settings.
-
Click Develop apps for your store. (If asked, click “Allow custom app development”).
-
Click Create an app and name it “Funnelish”.
2. Assign Access Scopes
-
Click Configure Admin API scopes.
-
Check the boxes for:
read_products,write_products,read_orders,write_orders,read_customers,write_customers,read_fulfillments, andwrite_fulfillments. -
Click Save.
3. Install & Link
-
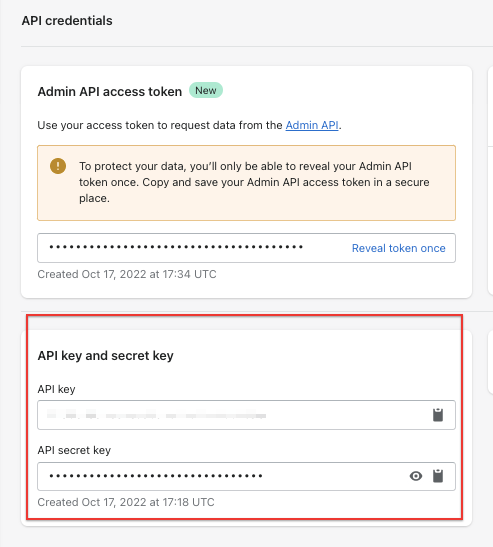
Click Install app.
-
Click Reveal token once and instantly copy the Admin API access token.
 WARNING: This token is shown only once. Copy it immediately!
 -
In Funnelish, go to Settings > Integrations > Shopify and click Connect using a custom app…
-
Paste the Access Token, along with the API Key, API Secret Key (found in Shopify), and your store name into Funnelish.
-
Click Save Changes.
 Crucial Next Step: Order Bundling (99% Use Case)
Once your store is connected, you need to configure how Funnelish sends data to Shopify.
By far the most important feature to set up next is Order Bundling. If a customer buys a main product on your checkout page, adds an Order Bump, and then accepts a One-Click Upsell, you do not want those to show up as 3 separate orders in Shopify!
Our Order Bundling feature holds the initial transaction for a few minutes, waits to see if the customer accepts any post-purchase Upsells or Downsells, and then merges them all into a single, clean order for your fulfillment center.
![]() Learn how to set up Order Bundling here.
Learn how to set up Order Bundling here.
 Next Up: Automations & Advanced Settings
Your store is connected! Now you need to map your Funnelish products to your Shopify SKUs and configure your advanced syncing preferences so your ecommerce funnels process orders flawlessly.
Choose your next guide below to finish your Shopify integration:
-
Set up Product Automations (Required): Learn how to map your products so Shopify knows exactly what was sold.
-
Set up Dynamic Variants: Sync sizes, colors, and specific variant IDs.
-
Set up Order Notes and Attributes: Pass custom data, UTM parameters, or personalized gift messages directly to your Shopify order notes.