This guide connects a domain managed on Cloudflare to your funnel. Two steps: add one DNS record in Cloudflare, then connect the domain in Funnelish. Five minutes of work, and Cloudflare propagates changes within seconds.
Not sure whether to use your main domain or a subdomain? See Connect Your Domain first. The short version:
-
www.counts as a subdomain -
If your main domain already serves something else (like a Shopify store), use a subdomain for your funnels, e.g.
go.mydomain.com
The one Cloudflare rule: turn the proxy off
Cloudflare records have a Proxy status toggle: an orange cloud (Proxied) or a grey cloud (DNS only). For the record pointing to Funnelish, it must be DNS only (grey cloud).
Why: with the orange cloud on, traffic routes through Cloudflare’s own servers instead of reaching Funnelish directly. That blocks domain verification, interferes with the SSL certificate Funnelish issues for you, and depending on your Cloudflare SSL mode can cause endless redirect loops. Funnelish already handles SSL and a global CDN for your funnel, so the proxy adds nothing here. Click the orange cloud while creating the record and it turns grey.
Option 1: main domain (A record)
Use this only if the main domain itself (e.g. mystore.com) should open your funnel.
Pointing your main domain at Funnelish replaces whatever that domain currently serves.
-
Log in to the Cloudflare dashboard and select your domain
-
In the left menu, go to DNS, then Records
-
Click Add record
-
Set Type to A, and enter @ in the Name field
-
Enter 151.101.2.184 in the IPv4 address field
-
Click the orange cloud so Proxy status shows DNS only (grey cloud)
-
Click Save
Option 2: subdomain (CNAME record)
-
Log in to the Cloudflare dashboard and select your domain
-
In the left menu, go to DNS, then Records
-
Click Add record
-
Set Type to CNAME, and enter your prefix in the Name field, e.g.
goforgo.mydomain.com -
Enter domains.funnelish.com in the Target field
-
Click the orange cloud so Proxy status shows DNS only (grey cloud)
-
Click Save
Cloudflare applies DNS changes within a few minutes. Continue below.
Connect the domain in Funnelish
-
Open the funnel you’re connecting and click the Funnel Settings icon
-
Under Funnel Settings, click Connect a new domain and enter your domain
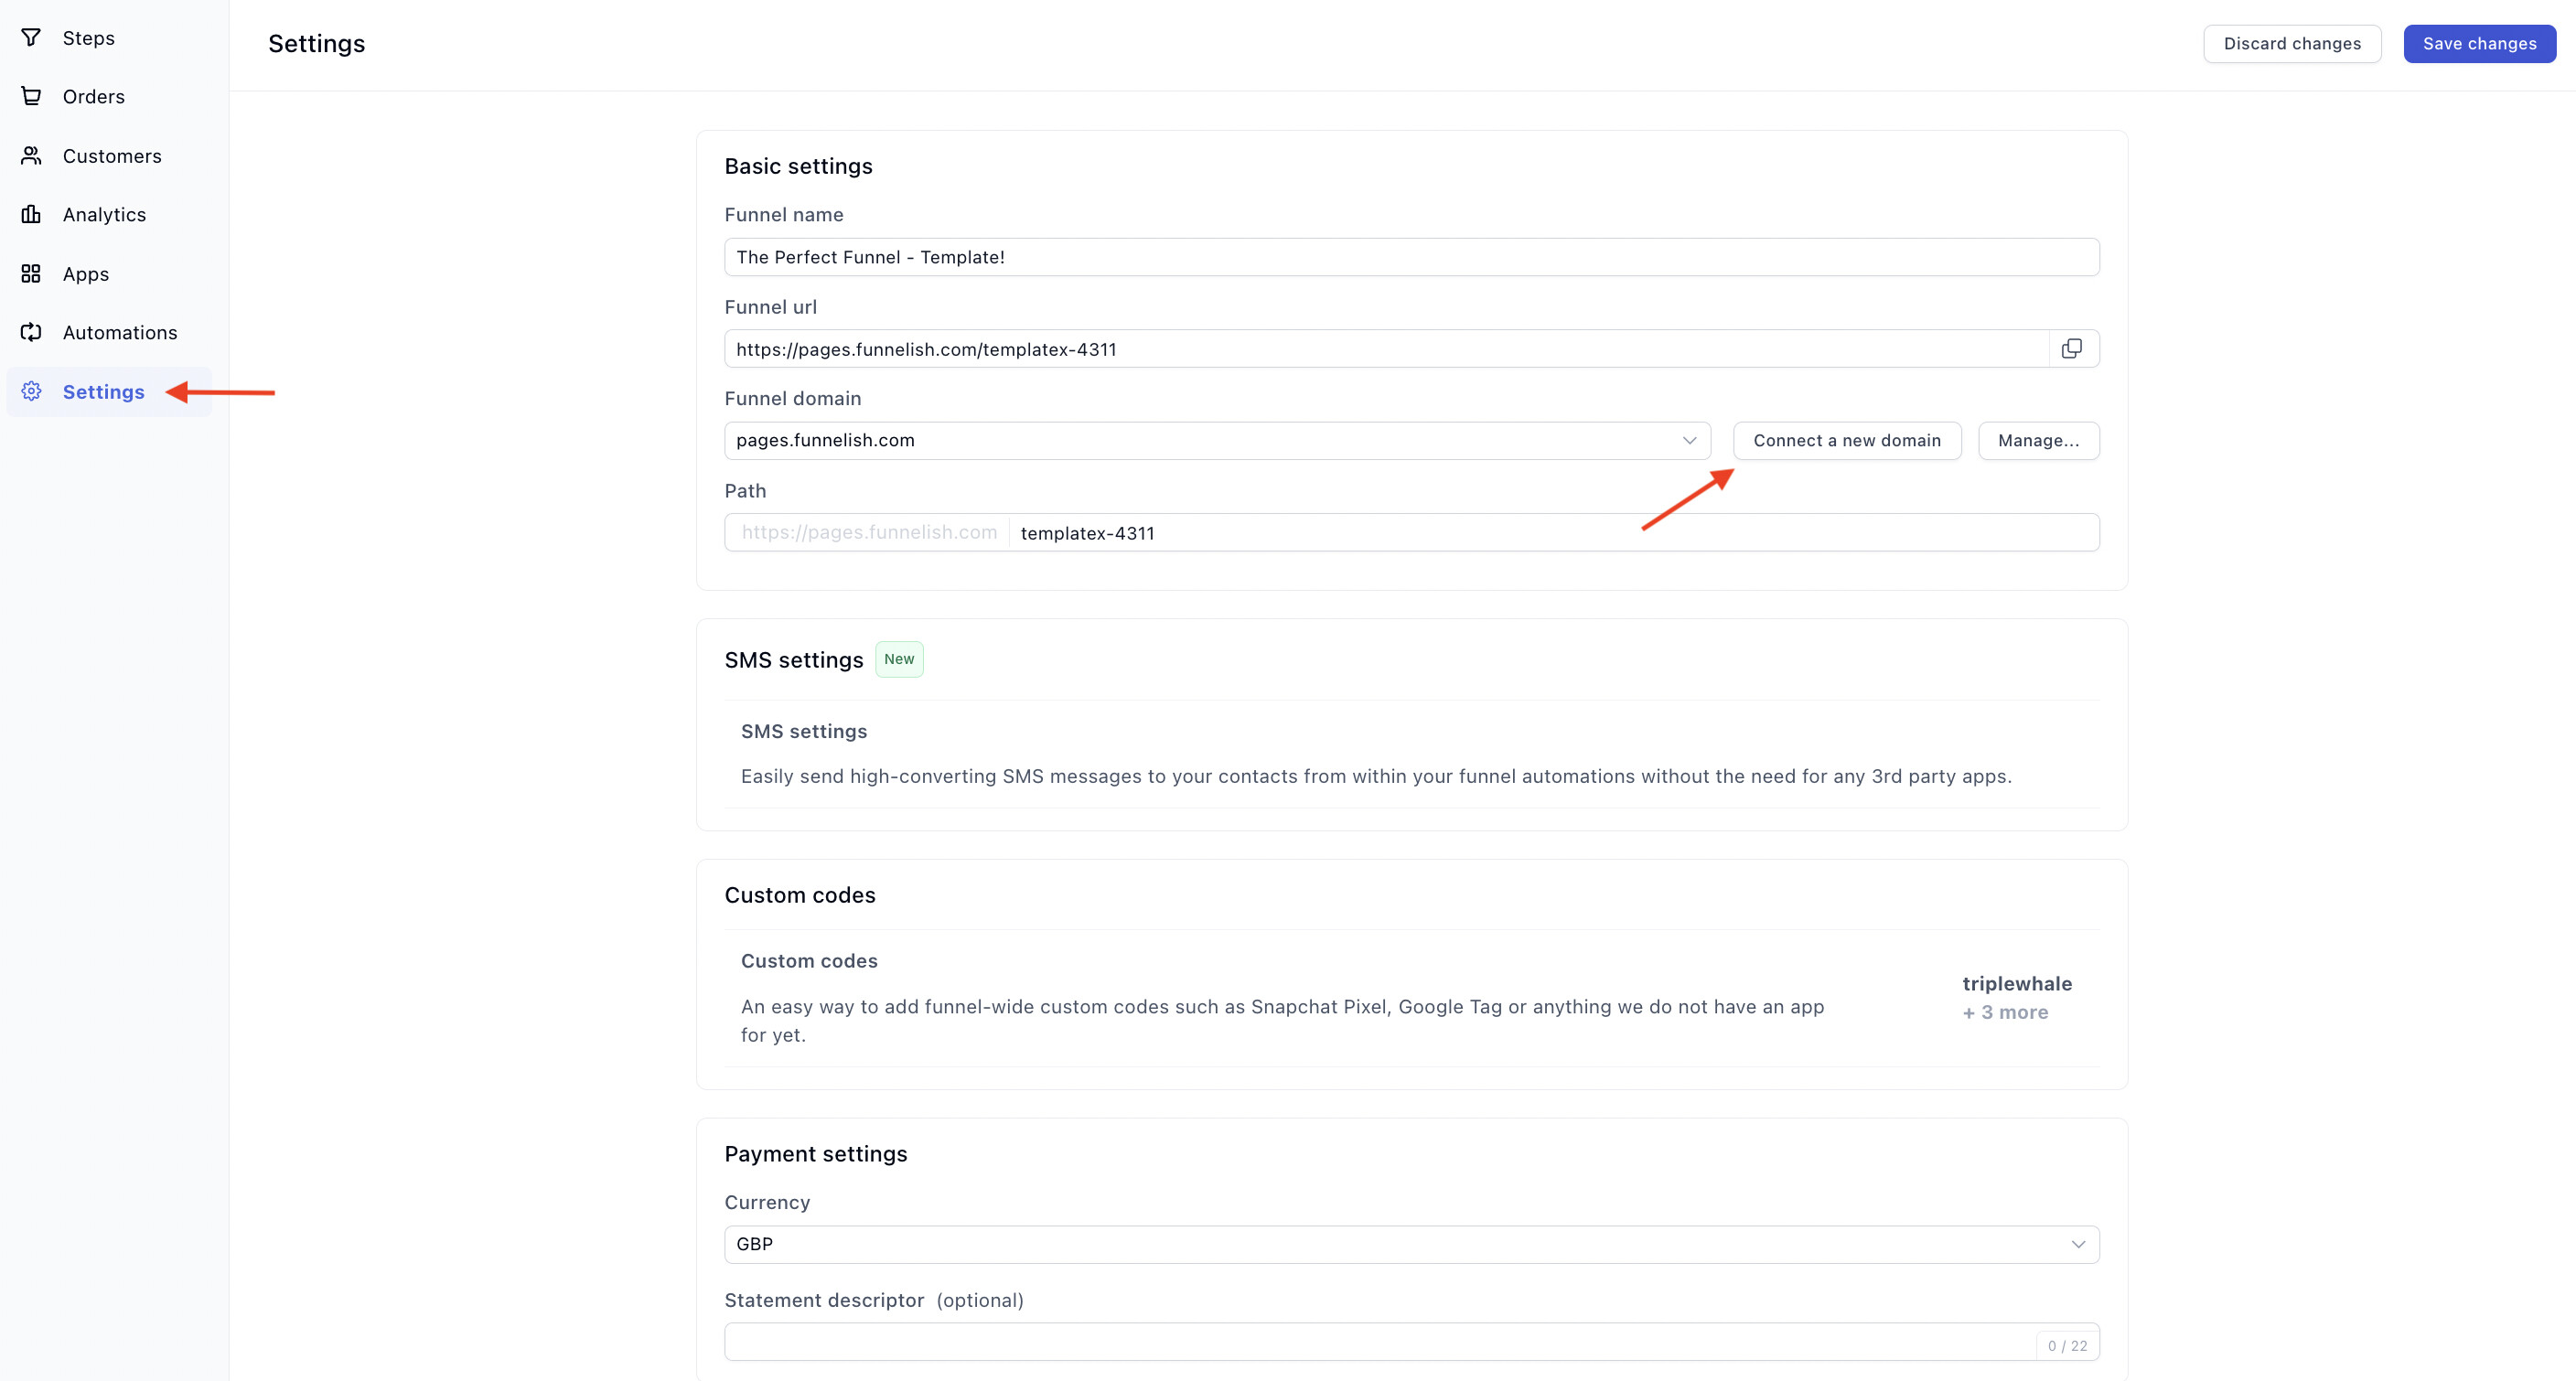
Enter it exactly as you configured it:
-
Subdomain: write it in full, e.g.
go.mydomain.com -
Main domain: write the naked domain, e.g.
mydomain.com, withoutwww
-
Click Connect, then Verify
-
Once verified, pick the new domain from the Domain dropdown and click Save changes
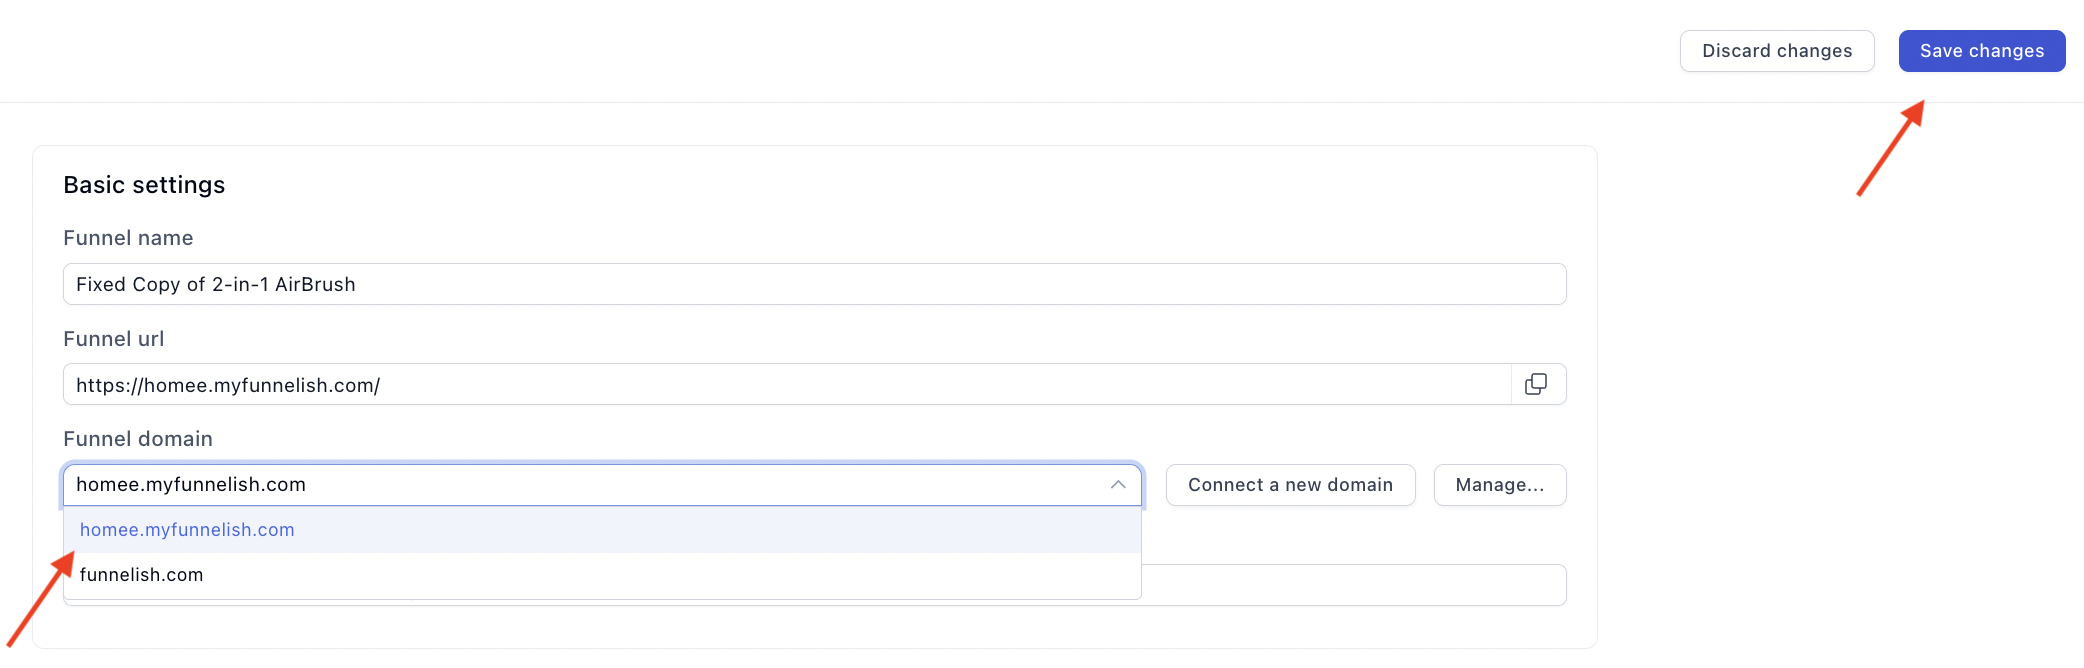
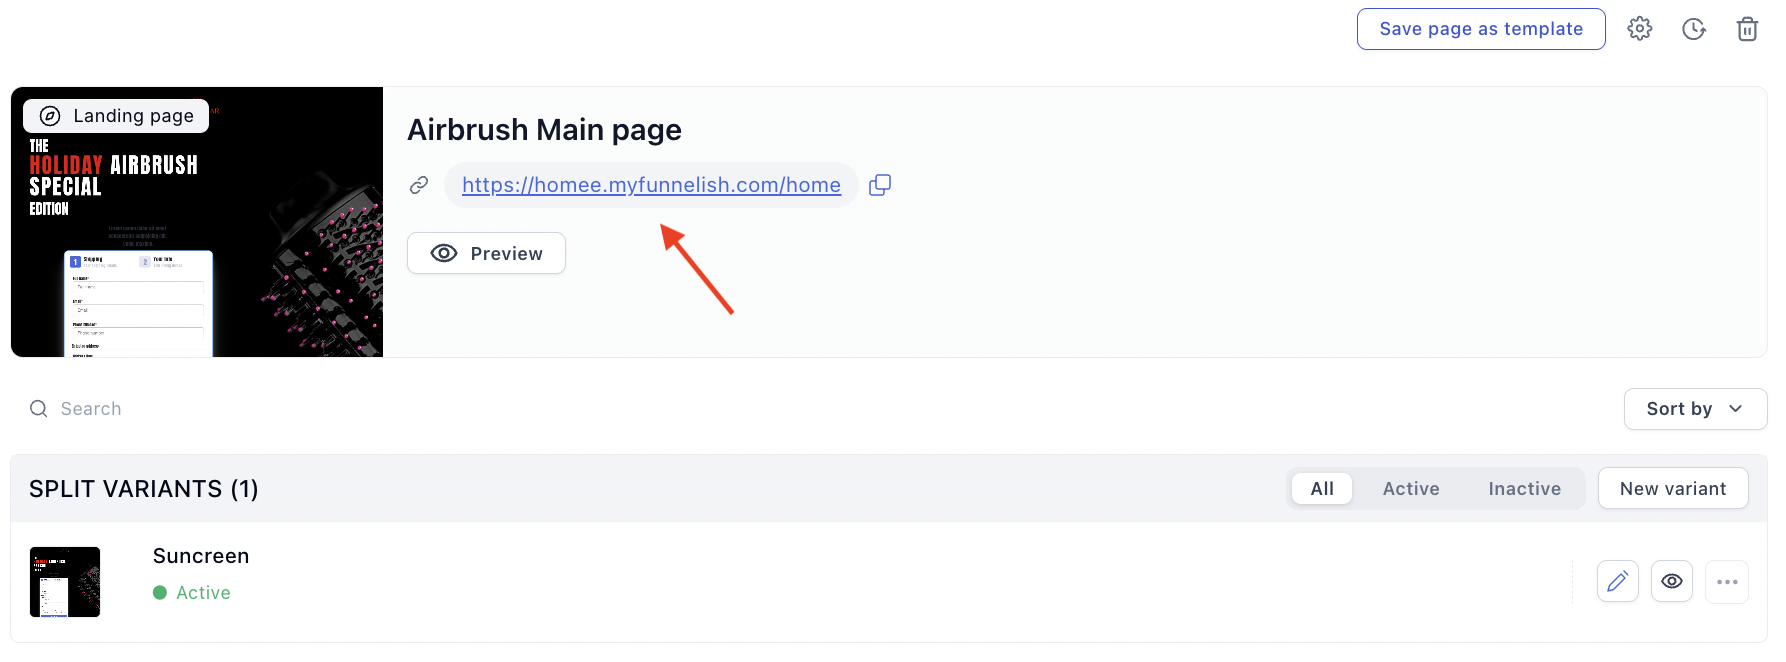
Funnelish updates the funnel’s URL automatically:
If verification fails
On Cloudflare, the first thing to check is the proxy: open DNS → Records and confirm the Funnelish record shows a grey cloud (DNS only). That’s the cause of most Cloudflare connection and SSL problems, including redirect loops after connecting.
If your domain has CAA records (DNS → Records, look for type CAA), add one authorizing our certificate authority: type CAA, name @, flag 0, tag issue, value certainly.com. Without it, the SSL certificate can’t be issued. Details in Connect Your Domain.
Otherwise wait a few minutes and click Verify again, re-check the steps above, and see Common Domain Setup Issues & How to Fix Them. All in order and still stuck? Contact support and we’ll take a look.
Setting up a different host? See GoDaddy, Namecheap or Shopify.