This guide walks you through creating a blog in Funnelish and configuring its settings: name, domain, URL path, favicon, and custom code.
New here? Read Funnelish Blogs: start here first for an overview of what Blogs can do.
Create your blog
-
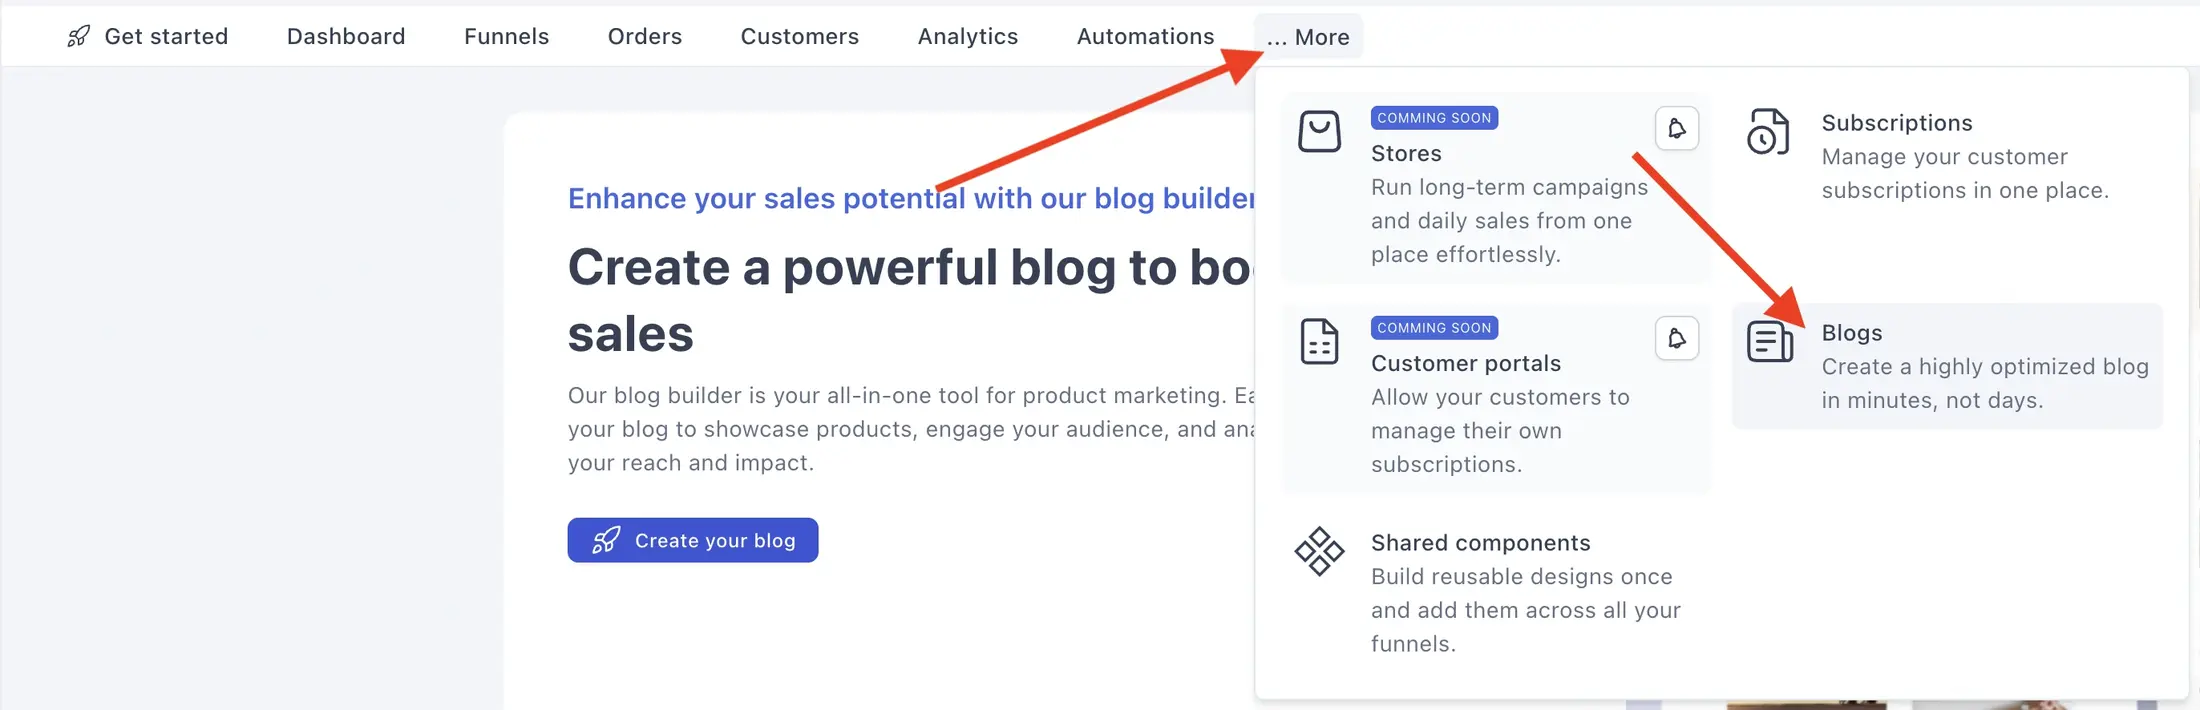
From your Funnelish dashboard, click … More in the top navigation and select Blogs.
-
Click Create your blog and give it a name.
-
Your blog is created with a complete set of pre-built pages (home, blog post template, category, contact, about, terms, and privacy) already published. You can start writing posts right away and customize everything as you go.
Use the sidebar to jump between Blog (pages and posts), Blog Apps, and Settings.
Create more blogs
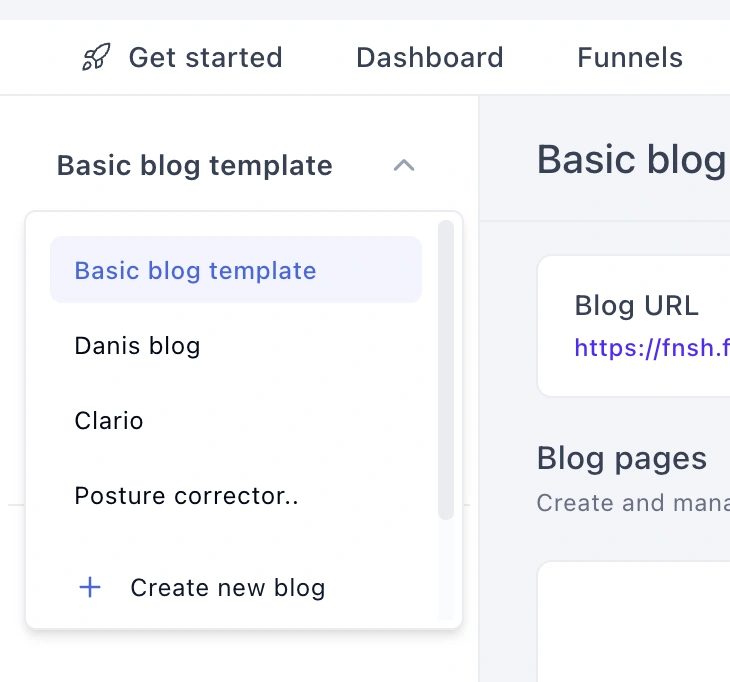
You’re not limited to one blog. To add another, open the blog switcher at the top of the left sidebar and click Create new blog. The same switcher is how you move between your blogs.
How many blogs you can create depends on your plan. Check the pricing page for the limits, which are generous across all plans.
Configure your blog settings
Open Settings in the left sidebar.
-
Blog name: the internal name of your blog, also used as the default site title.
-
Blog domain name: the domain your blog lives on. Pick any domain already connected to your Funnelish account from the dropdown, or click Connect a new domain to add one. Because blogs and funnels share the same infrastructure, you can host your blog on the same domain as your funnels. This is good for SEO, since all the authority your content earns stays on one domain.
-
Blog path (optional): a path segment appended to your domain, e.g.
yourdomain.com/blog. Leave it empty to serve the blog from the domain root. -
Blog URL: the resulting live URL of your blog. Use Copy URL to grab it, or Preview from the Blog tab to open it.
-
Favicon: the small icon shown in browser tabs for all blog pages. Use a square image.
Click Save settings when you’re done.
Add custom code (optional)
The Custom code section lets you add code to all of your blog pages at once. This is useful for third-party scripts, verification tags, or custom styling.
Click Create new code, paste your snippet, and save.
Before using custom code for tracking pixels or analytics, check Blog Apps first. Meta Pixel, Google Analytics, TikTok Pixel, and Pinterest Tag are all available as one-toggle apps with no code required.
 Deleting a blog
The Delete blog section at the bottom of Settings permanently removes the blog and all of its content: pages, posts, everything. This cannot be undone, so make sure you’ve saved anything you want to keep first.
Keep Learning
-
Blog pages: Home, templates, and custom pages: customize every page of your new blog.
-
Write and publish blog posts: start publishing content.
-
Funnelish Blogs: how blogs drive evergreen traffic into your funnels and stores.
Questions about setting up your blog? Reply below or ask in Ask the community and the community will help you out. For account-specific issues, contact us on chat support.