Email is the action you’ll use most in workflow automations: purchase confirmations, abandoned cart recovery, follow-up sequences. Funnelish sends these directly, no external email tool required, in two formats: plain text, or designed templates.
Before you start: connect a sender
Automation emails send through your own SMTP provider, so deliverability rides on your domain’s reputation rather than a shared pool. Setup happens in two places:
-
Connect the provider to your account. Connect one of:
-
Attach it to the funnel. The account-level connection makes the sender available, but each funnel picks its own. Open the funnel, go to Settings, then SMTP Settings, and select the sender this funnel’s automations should use. Without this step, the funnel has no sender and its automation emails will not go out.
The Sender email on every automation email must be the address you configured with your SMTP provider. A mismatched sender is the most common reason automation emails silently fail to arrive.
Add an email action
-
Open your automation and click the + button where the email should go in the flow.
-
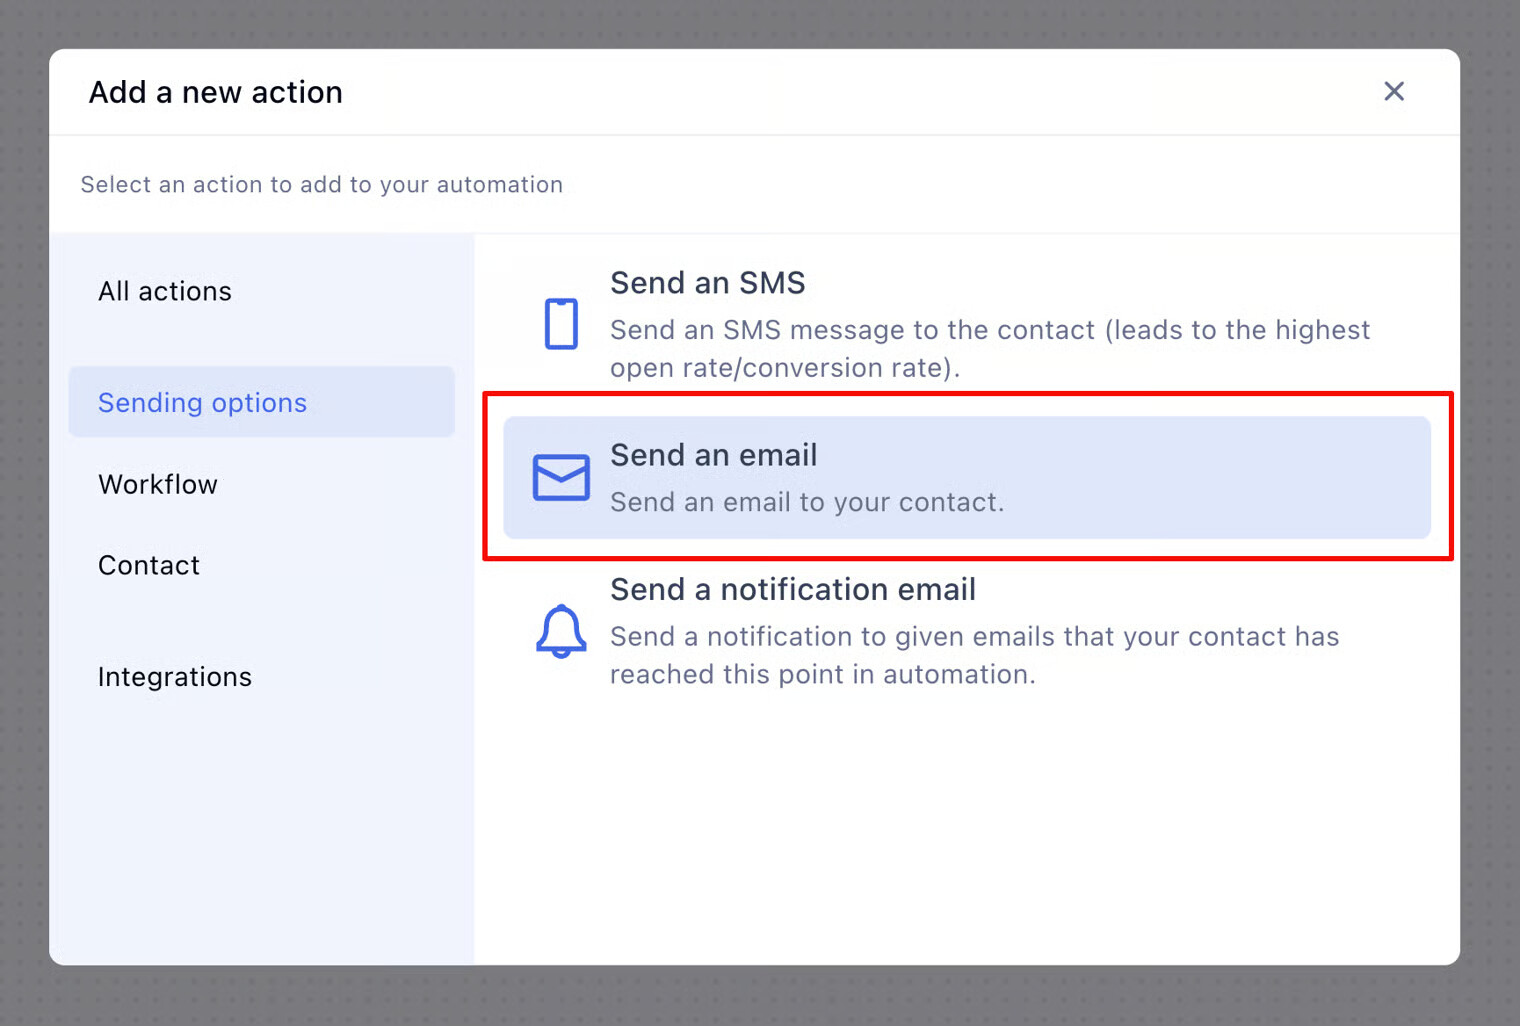
Select Sending Options, then Send an email.
- Fill in the Sender name (what recipients see, e.g. your brand), the Sender email (your SMTP address), and the Subject.
Choose your email format
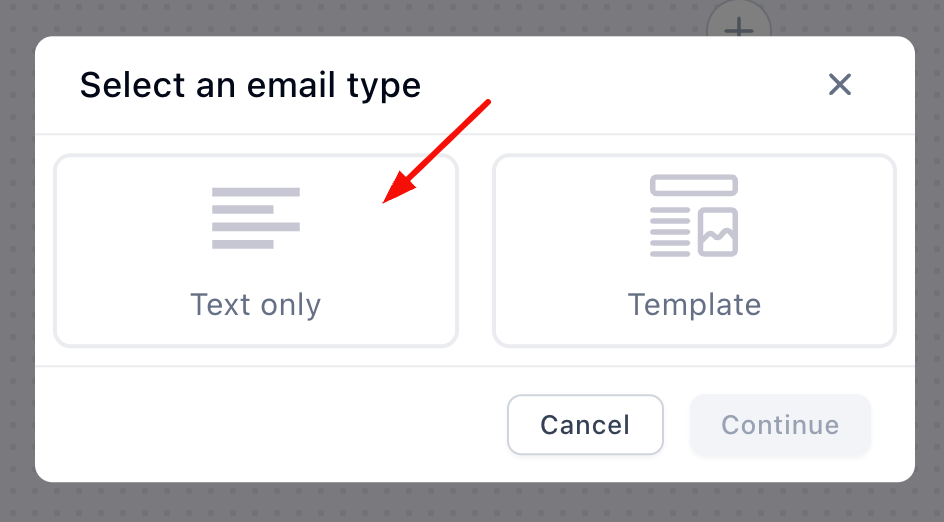
Next, Funnelish asks for the email type. This choice decides which editor opens and what kind of email your customer receives:
-
Text only: a simple written email. Best for recovery and follow-up, where a personal message from a person outperforms a designed campaign.
-
Template: a fully designed email built in a drag-and-drop builder. Best for anything that carries your brand: order confirmations, receipts, announcements.
Pick one, click Continue, and follow the matching section below.
Text-only emails
Text-only emails are written in a simple editor: fonts, colors, sizes, links, and inline images if you want them.
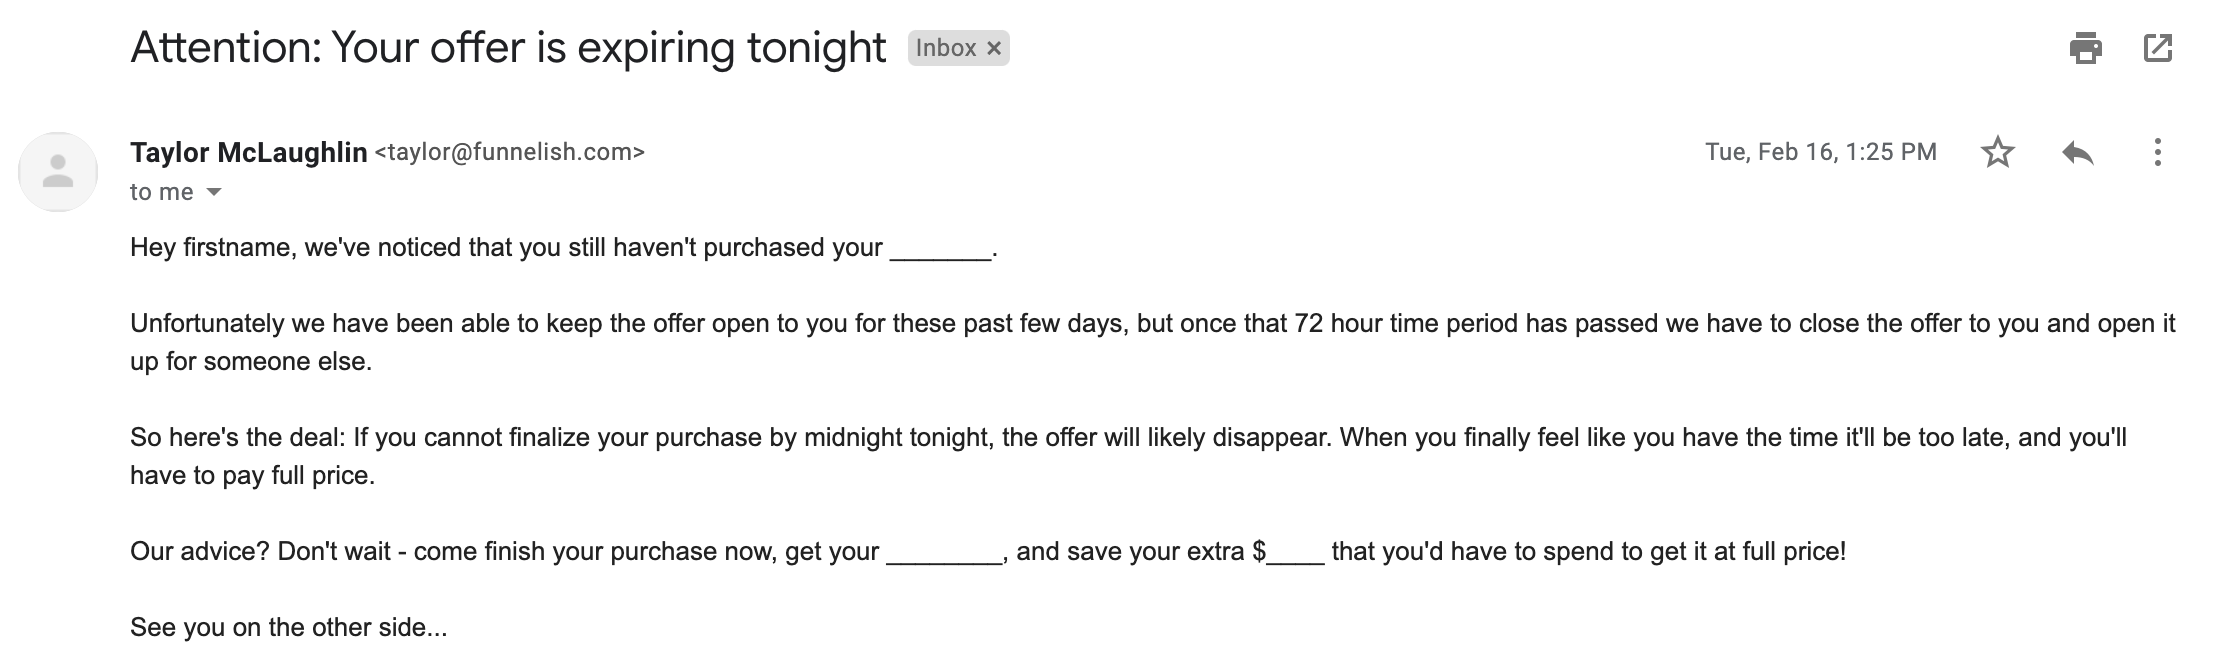
Don’t underestimate the plain format. For abandoned cart flows especially, a short “Hey, you left something in your cart, need a hand?” that reads like it came from the founder often converts better than a polished campaign.
Template emails
Templates open a drag-and-drop email builder with two starting points:
-
Build from scratch: works like the page builder. Click + on the canvas for a section, add a row, pick your columns, then drop in elements from the side panel: images, text, buttons, each with its own styling options.
-
Start from a pre-existing template: the time-saver. Swap in your image, adjust the copy, apply your branding, done.
Either way, toggle the device preview to check how the email renders on phone, tablet, and desktop before saving.
Personalize with fields
Both formats support personalized fields, inserted from the icons at the top of the editor. Pull in the customer’s name, order details, and more:
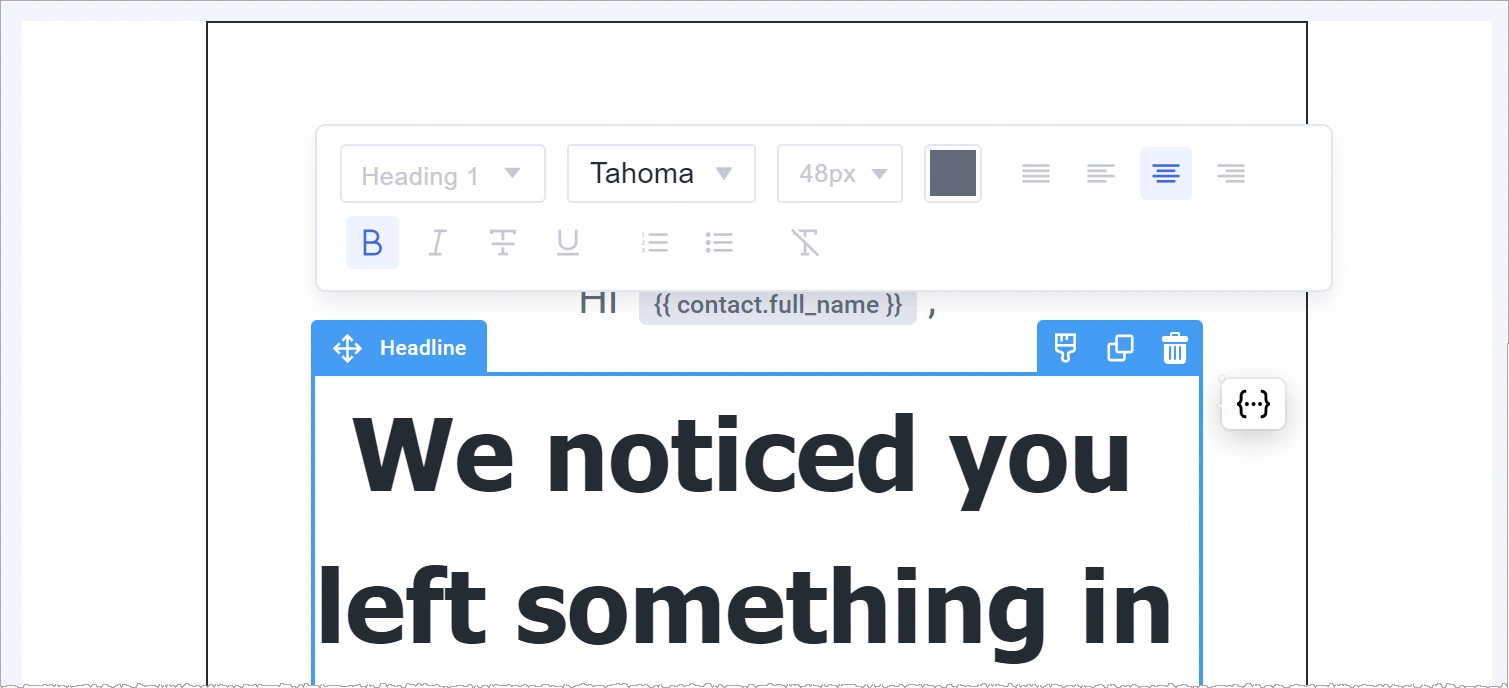
“Hi Sarah, your order #1042 is confirmed” beats “Dear customer” every time.
Test it
Before the flow goes live, trigger it yourself and check the email lands in the inbox, not the spam folder, with the sender name, subject, and personalization fields rendering correctly. The create a workflow automation guide covers testing the full flow.
Keep Learning
-
Automation Triggers: choose what starts your email flow.
-
Actions reference: delays and conditions, the actions that turn single emails into sequences.
-
Recipe: abandoned cart recovery emails: a complete email flow, built step by step.
Questions about automation emails? Reply below or ask in Ask the community and the community will help you out.