This guide walks you through building a workflow automation from scratch: choosing a trigger, adding actions, scoping where it runs, and switching it live.
New to automations? Read Funnelish automations: start here first for the difference between workflow and product automations.
Global and funnel automations use the same builder, so everything below applies to both. The only real difference is where you create them and how far they reach.
Create a global automation
Global automations run account-wide, across your funnels, blogs, customer portals, and stores.
-
Click Automations in the top navigation of your dashboard.
-
Click Create a new automation.
-
Select Start from scratch, then click Create.
-
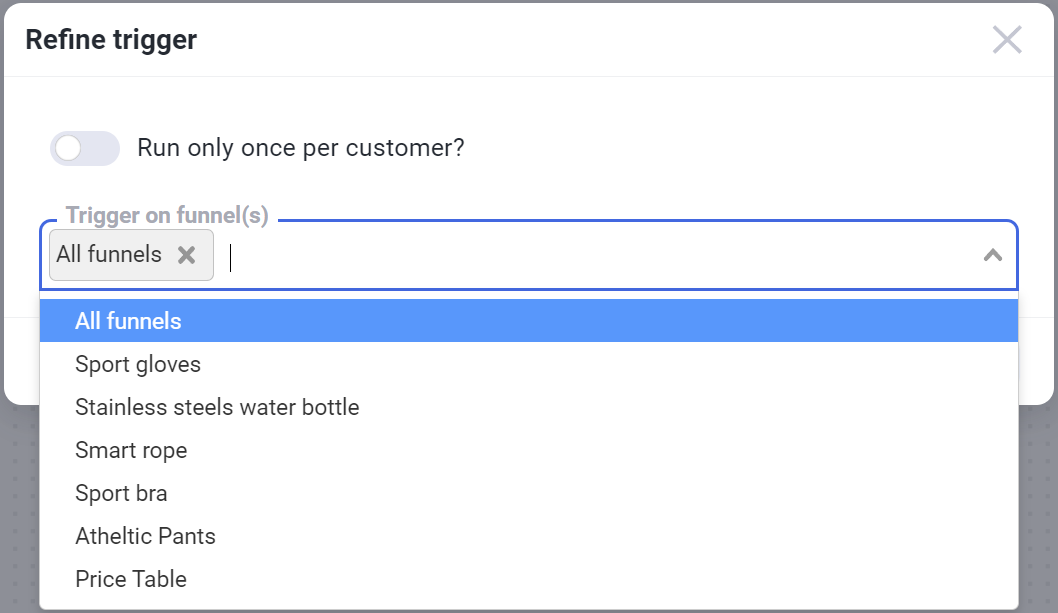
Add your trigger. When you select it, you’ll choose which resources the automation applies to, for example specific funnels or all of them. This is how you scope a global automation: leave it wide for account-wide behavior, or narrow it to just the funnels it belongs to.
-
Add your actions (more on this below).
-
Give the automation a name at the top, click Save, and switch the toggle to Active.
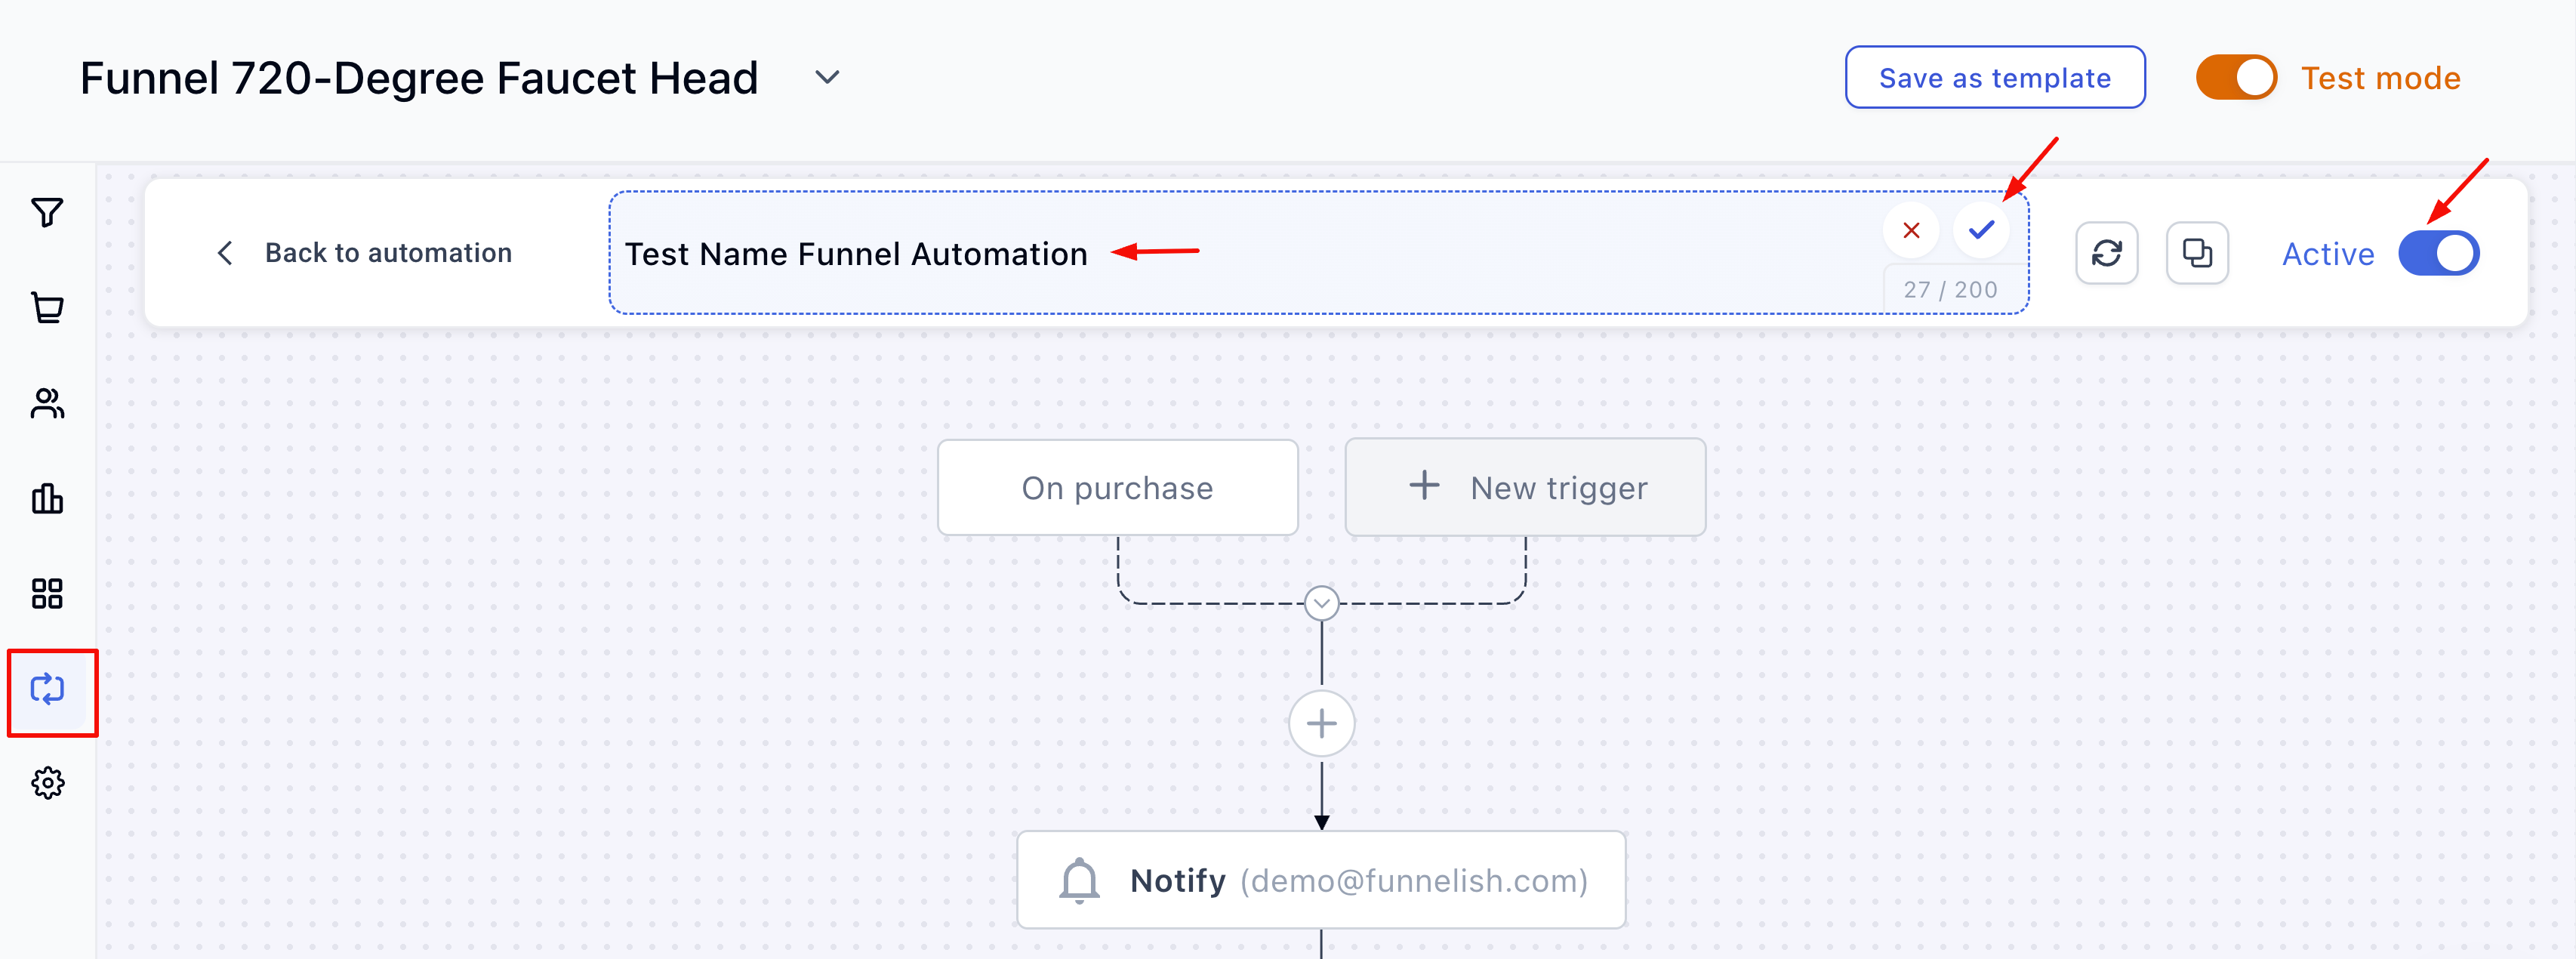
An automation that isn’t switched to Active does nothing, no matter how complete it looks. If a flow seems dead, check the toggle first.
Create a funnel automation
Funnel automations live inside one funnel and only run there.
-
Open the funnel.
-
Click Automations in the side panel.
-
Click Create a new automation, select Start from scratch, and click Create.
-
Add your trigger. Here you’ll refine which steps it fires on: all steps, or specific ones from the dropdown. For example, an optin trigger scoped to your optin step only.
-
Add your actions, name the automation, save, and switch it to Active.
Build the flow
Every workflow automation is a trigger followed by a chain of actions.
-
The trigger starts the flow: a purchase, a purchase attempt, an optin, a refund, a subscription event. Each trigger has a couple of settings worth knowing, like running once per customer even if they pass through your funnel several times. The full list is in Triggers and trigger filters.
-
Actions run in sequence. Click the + button to add one: send an email, wait a delay, check a condition, add a tag, fire a webhook, notify your team, or push data to a connected integration. Chain them to build real sequences, like email, wait one day, check if purchased, email again. The full set is in the Actions reference.
Test before you rely on it
Run the flow yourself before trusting it with real customers:
-
Make sure the automation is Active.
-
Go through your funnel and trigger it for real: place a test purchase, submit the optin form, or abandon the checkout, depending on your trigger.
-
Confirm every action fired: the email arrived, the tag was applied, the webhook hit its endpoint.
For purchase-based triggers, test payments before launch covers how to place safe test orders.
Keep Learning
-
Triggers and trigger filters: every event that can start an automation, and how to scope where it runs.
-
Actions reference: delays, conditions, jumps, tags, webhooks, and notifications.
-
Recipe: abandoned cart recovery emails: a complete worked example using everything above.
Questions about building automations? Reply below or ask in Ask the community and the community will help you out.