An order bump is a checkbox offer sitting right at the checkout: “add this to my order”. The buyer is already paying, so one tick adds the product with zero extra steps, which is why bumps are the cheapest average-order-value lift in any funnel.
New to the editor? Start with the Page Builder overview.
Add the element
Drag the Order Bump widget onto your checkout page and click it once to open its settings.
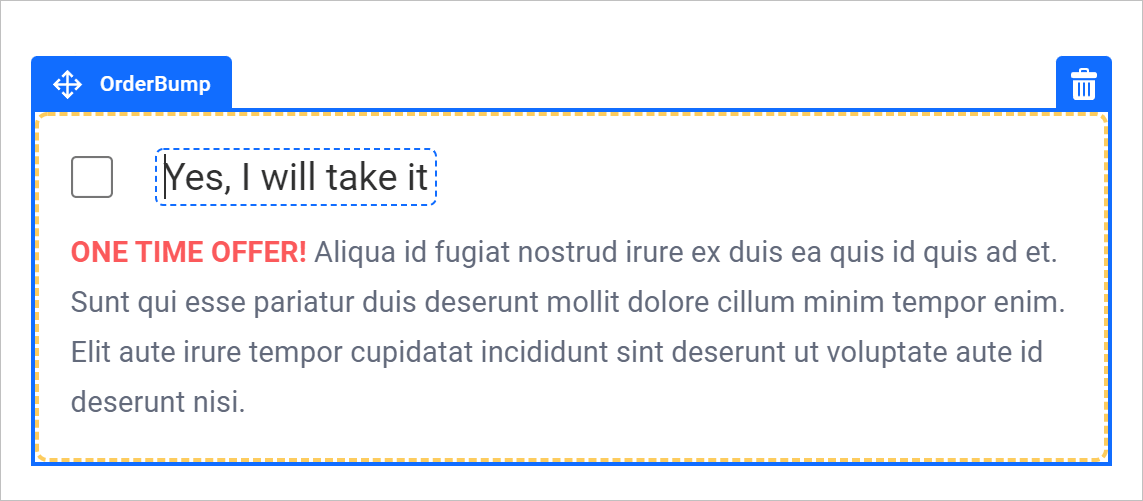
(Using the 2-Step Form? It has this same field built in: click the number 2, scroll to the Order Bump field, and everything below applies unchanged.)
Set it up
-
Write the sales text in the field, this is the pitch next to the checkbox, so lead with the benefit: “Add the cleaning kit and keep it like new — just $12”
-
Style it under the Style tab
-
Link the bump product (next section)
-
Decide whether the checkbox starts ticked: the Selected toggle in the side panel pre-selects the bump by default (off by default, buyers tick it themselves)
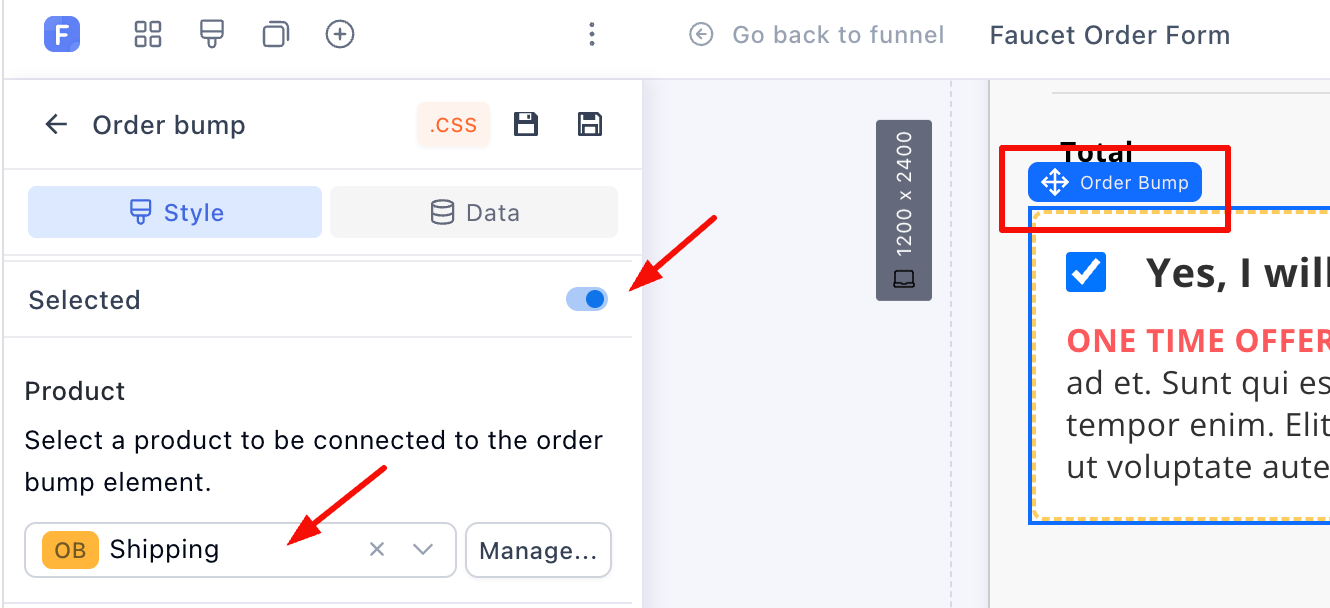
Pre-selecting inflates take-rate but also refunds and disputes, buyers who didn’t notice the charge complain later. If you pre-select, make the sales text unmissable.
Create the bump product
The bump needs its own product, marked as an order bump so it stays out of your main product list:
-
Click the Order Bump field, then Manage in the side panel
-
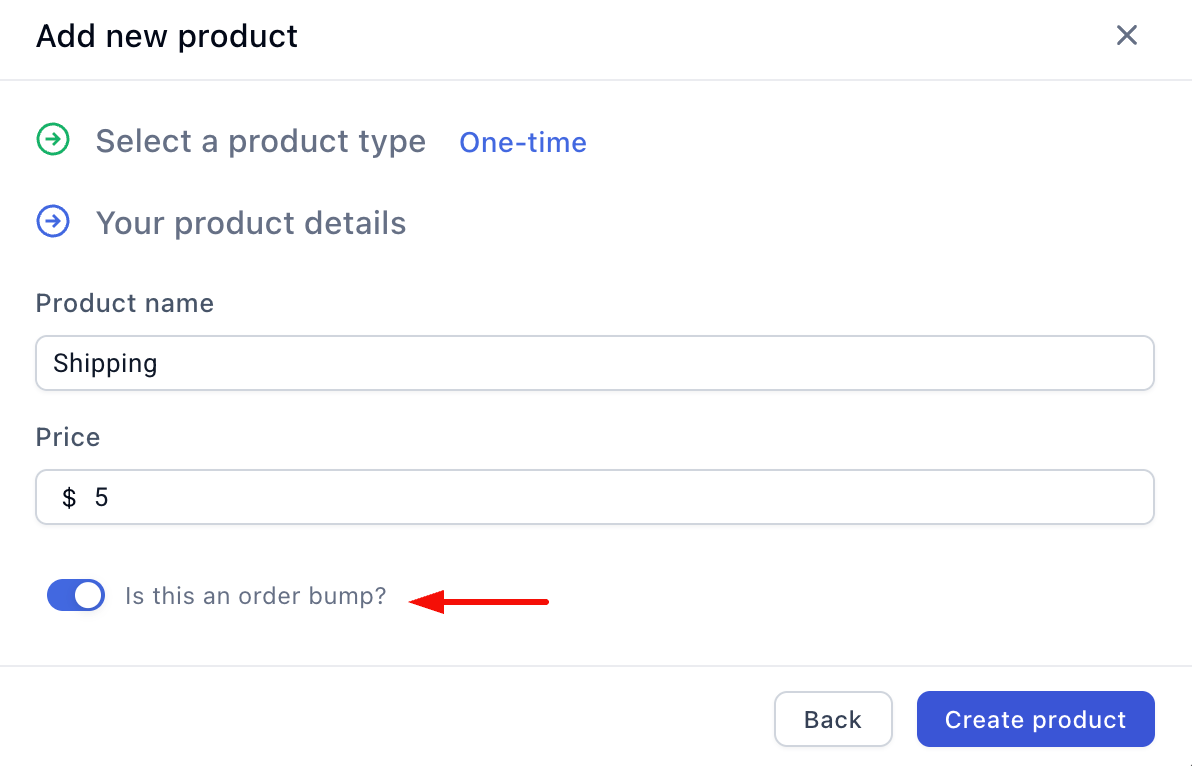
Click Add a new product, one-time or subscription
-
Add the description and price, and switch on the order bump toggle
-
Click Create product
The product appears in the step’s list with an OB badge:
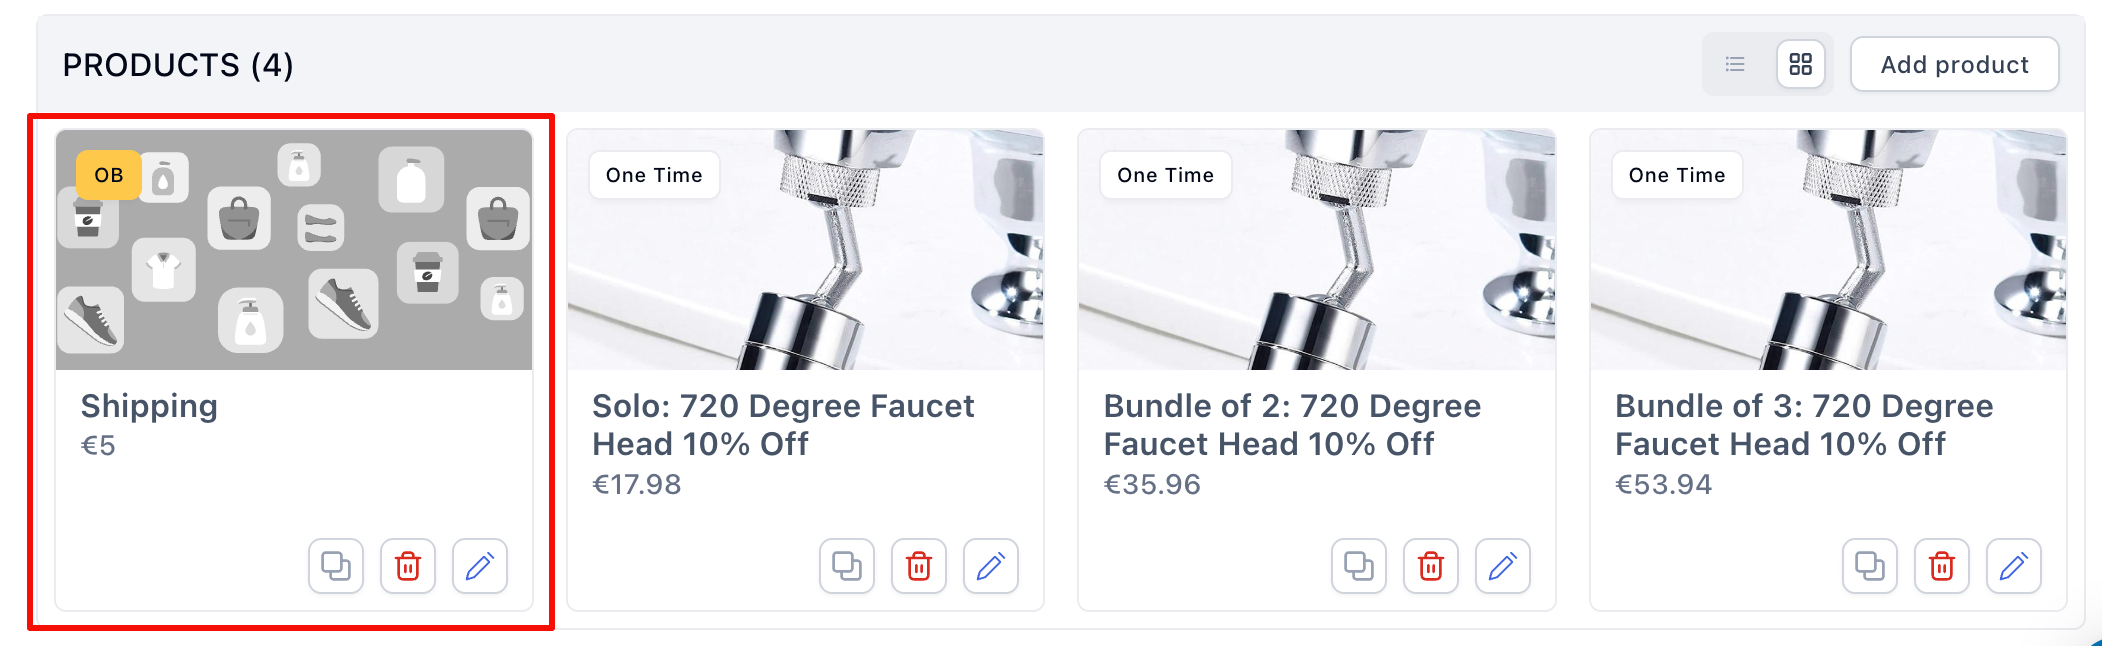
To edit it later: click the field, Manage, click the product’s name, change, save.
Add an image
A small product shot next to the pitch helps the offer register at a glance:
-
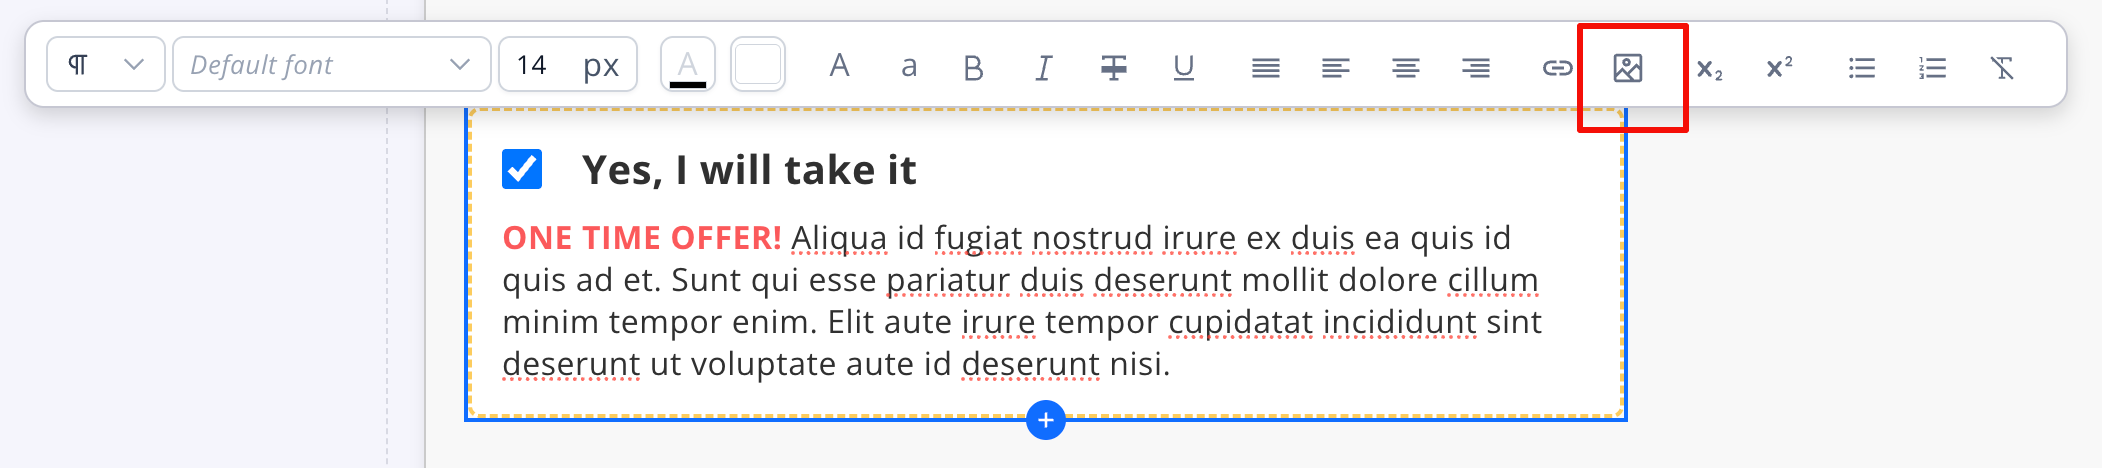
Click the order bump element, then the image icon
-
Upload the file and click the image, it lands in the field
-
Resize it, then save
Beyond the checkbox: any element can be a bump
The Order Bump element is no longer the only way to sell optional upgrades. With data binding, any container you design can be bound to a product and behave exactly like a bump: click to select, added to the order.
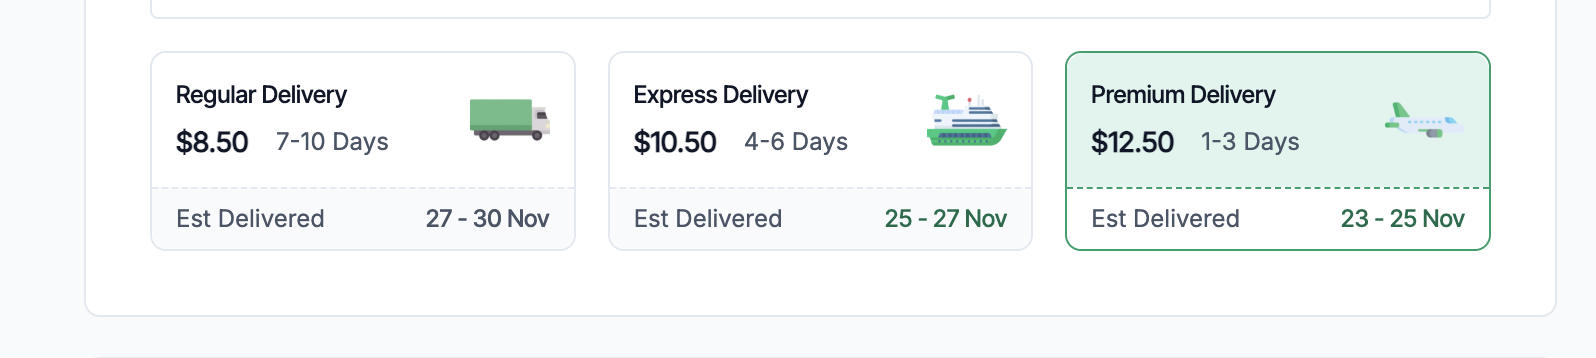
Example: three delivery tiers built as cards, Regular $8.50, Express $10.50, Premium $12.50, each card a container bound to its own product, with icons, delivery estimates and a designed Selected state. No stock element looks like that.
The trade-off is simple:
-
Order Bump element: fastest. Checkbox, text, image, done
-
Product-bound container: fully yours. Any layout, any content, single-select by default (a bound container implies its own selection control), or add a checkbox form element inside for a multi-select “add-on” feel
The full walkthrough is in Product Lists → custom lists with data binding.
Order bumps that work
The mechanics take five minutes; the offer decides the take-rate. Patterns that keep proving themselves:
-
Express shipping or priority processing. Works on almost any physical product as long as the price stays small next to the order, buyers self-select for speed, and it costs you a queue rule rather than inventory
-
Shipping protection / insurance. Strongest on electronics, fragile and higher-value items, entire businesses (Route and its clones) exist because buyers reliably pay a small fee for delivery peace of mind
-
Extended warranty. The classic electronics attach, the same offer big-box retail has pushed at every register for decades because the margin on it beats the product’s
-
A consumable refill or second unit at a discount. For anything that runs out: “double your order for 30% less” turns one purchase cycle into two
-
A digital companion. A guide, tutorial or premium content next to a physical product, effectively 100% margin, nothing to ship
-
Gift wrap and gift notes. Seasonal, but in Q4 it’s the easiest yes on the page
Two rules across all of them: keep the bump at roughly 10–30% of the main offer’s price so it reads as an easy yes, and never pick a bump that needs explaining, if it needs its own pitch, it’s an upsell, not a bump. Bump at the checkout, one-click upsell after payment: the two stack, they don’t compete.
Preview and test
Save and preview: tick the box, confirm the order total updates, then run a test payment with the bump both ticked and unticked.
Keep learning
-
Page Builder overview: the map of the whole editor and every element
-
Product Lists: custom product-bound containers, the flexible alternative to this element
-
Payment Form: the element that charges the order, bump included
-
One-Click Upsells & Downsells: the post-purchase half of the AOV stack
-
Want checkouts with bumps already built? Clone a funnel from Templates
 Questions? Reply below or ask in Ask the community.
 Missing an editor feature? Suggest it in Feature requests — the most-voted requests shape the roadmap.