The Checkout step is the beating heart of your ecommerce funnels. You have successfully warmed up your traffic, showcased your products, and convinced your visitors to buy. Now, your only goal is to eliminate friction and collect the payment securely.
Whether you are scaling a dropshipping winner or upgrading your DTC brand from a rigid standard Shopify checkout, Funnelish gives you total control to design a hyper-optimized, high-converting checkout experience.
Here is how to configure your Checkout step, manage payment gateways, and customize your forms to maximize conversions.
 Choosing Your Checkout Flow: 1-Step vs. 2-Step
To collect payments, you need a checkout widget on your page. Funnelish offers two primary styles, and choosing the right one depends entirely on your offer strategy.
The 1-Step Payment Form (Recommended Standard)
For the vast majority of ecommerce funnels, the standalone 1-Step Payment Form is highly recommended. It provides maximum design flexibility, allowing the customer to enter their shipping info, billing info, and credit card details seamlessly on a single, frictionless page. It’s the gold standard for direct-response ecommerce.
The 2-Step Order Form
This widget splits the checkout process into two sections: “Shipping” (where you collect the name and email) and “Your Info” (where they select the product and pay).
- When to use it: The 2-step form is ideal for Free + Shipping offers, digital products, or highly promotional giveaways. Because the customer is getting “something” for free, they are much more willing to hand over their contact details upfront on Step 1 before seeing the shipping costs or payment fields on Step 2.
Critical Warning: You can place only ONE payment widget (hidden or visible) on a single step. Duplicate payment forms can lead to duplicate charges!
 Customizing Form Fields & Auto-Optin
Every extra field you ask a customer to fill out introduces friction. You should only collect the information you absolutely need to fulfill the order.
Editing Your Form Fields
Whether you use the 1-Step or 2-Step form, you can easily customize the required inputs:
-
Click on the form field you want to edit. The settings panel will open on the left.
-
From here, you can change the Input Type (e.g., changing a standard text field into a Phone Number field).
-
You can toggle a field’s status from Required to Not Required.
-
To delete a field, click it once and click the Trash Icon. To add a new field, click the (+) icon at the top of the form and drag the new input to your preferred location.
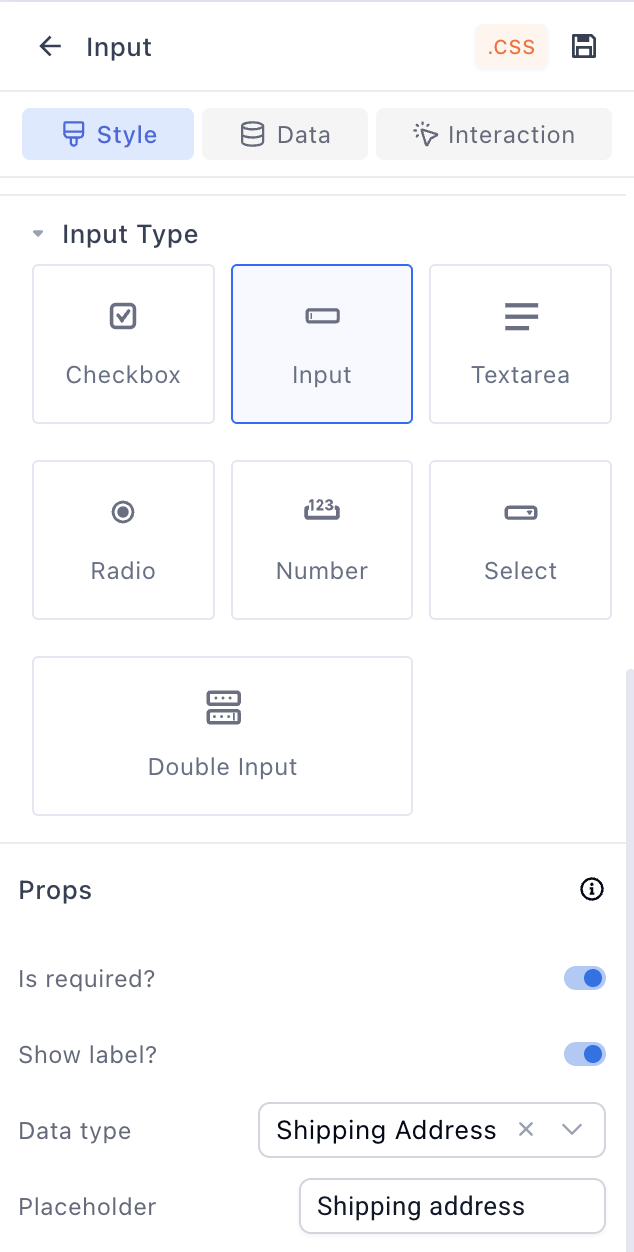
Changing the Field Type.
The Auto-Optin Feature (Advanced Cart Recovery)
Funnelish supports an incredibly powerful Auto-Optin feature for emails and phone numbers. When enabled, this tool automatically captures the customer’s contact details as they type them into the form—before they even hit the submit button! This is perfect for building your abandoned cart recovery lists.
LEGAL NOTICE: Before enabling the Auto-Optin feature, merchants must check this practice against their local privacy laws (such as GDPR, CCPA, or the laws in the regions where you are actively selling). Only enable this option when all legal requirements and consent regulations are strictly met.
 Displaying Products & Boosting AOV (Funnelish v2)
Once your checkout form is set up, you need to display your offers and irresistible cross-sells to maximize your Average Order Value.
While Funnelish still supports our legacy “Product List” and “Order Bump” widgets, Funnelish v2 introduces a game-changing feature for scaling brands: Custom Product Blocks via Data Binding.
Using custom data binding (which we cover extensively in our guide on Adding Products to Your Ecommerce Funnels), you can build highly stylized, completely custom selection blocks.
Because these blocks are infinitely more flexible than a static product list, you can make them behave as:
-
Custom Shipping Options: Create beautifully branded radio buttons that let customers select between “Standard Shipping (Free)” or “VIP Premium Processing ($4.99).”
-
Advanced Order Bumps & Upgrades: Ditch the standard bump layout and design your own multi-select checkboxes for extra accessories, extended warranties, or priority support.
-
Tiered Bundles: Build interactive grid layouts for your core offers that look and feel like a custom-coded Shopify store, all without writing a single line of code.
 Connecting Payment Gateways
You need to connect your payment processors to actually charge credit cards.
If using the standalone 1-Step Payment Form: Click the widget once to open its settings panel.
If using the 2-Step Form: Click the number “2” on the canvas, scroll down, click the Payment Form area, and click Edit payment options in the left panel.

Adding Your Payment Methods
-
Switch on the Funnelish Pay toggle to activate the form.
-
Click the Add a new payment method button.
-
Select your preferred gateway (Credit Card via Stripe, PayPal, Klarna, Airwallex, etc.) and enter your account credentials.
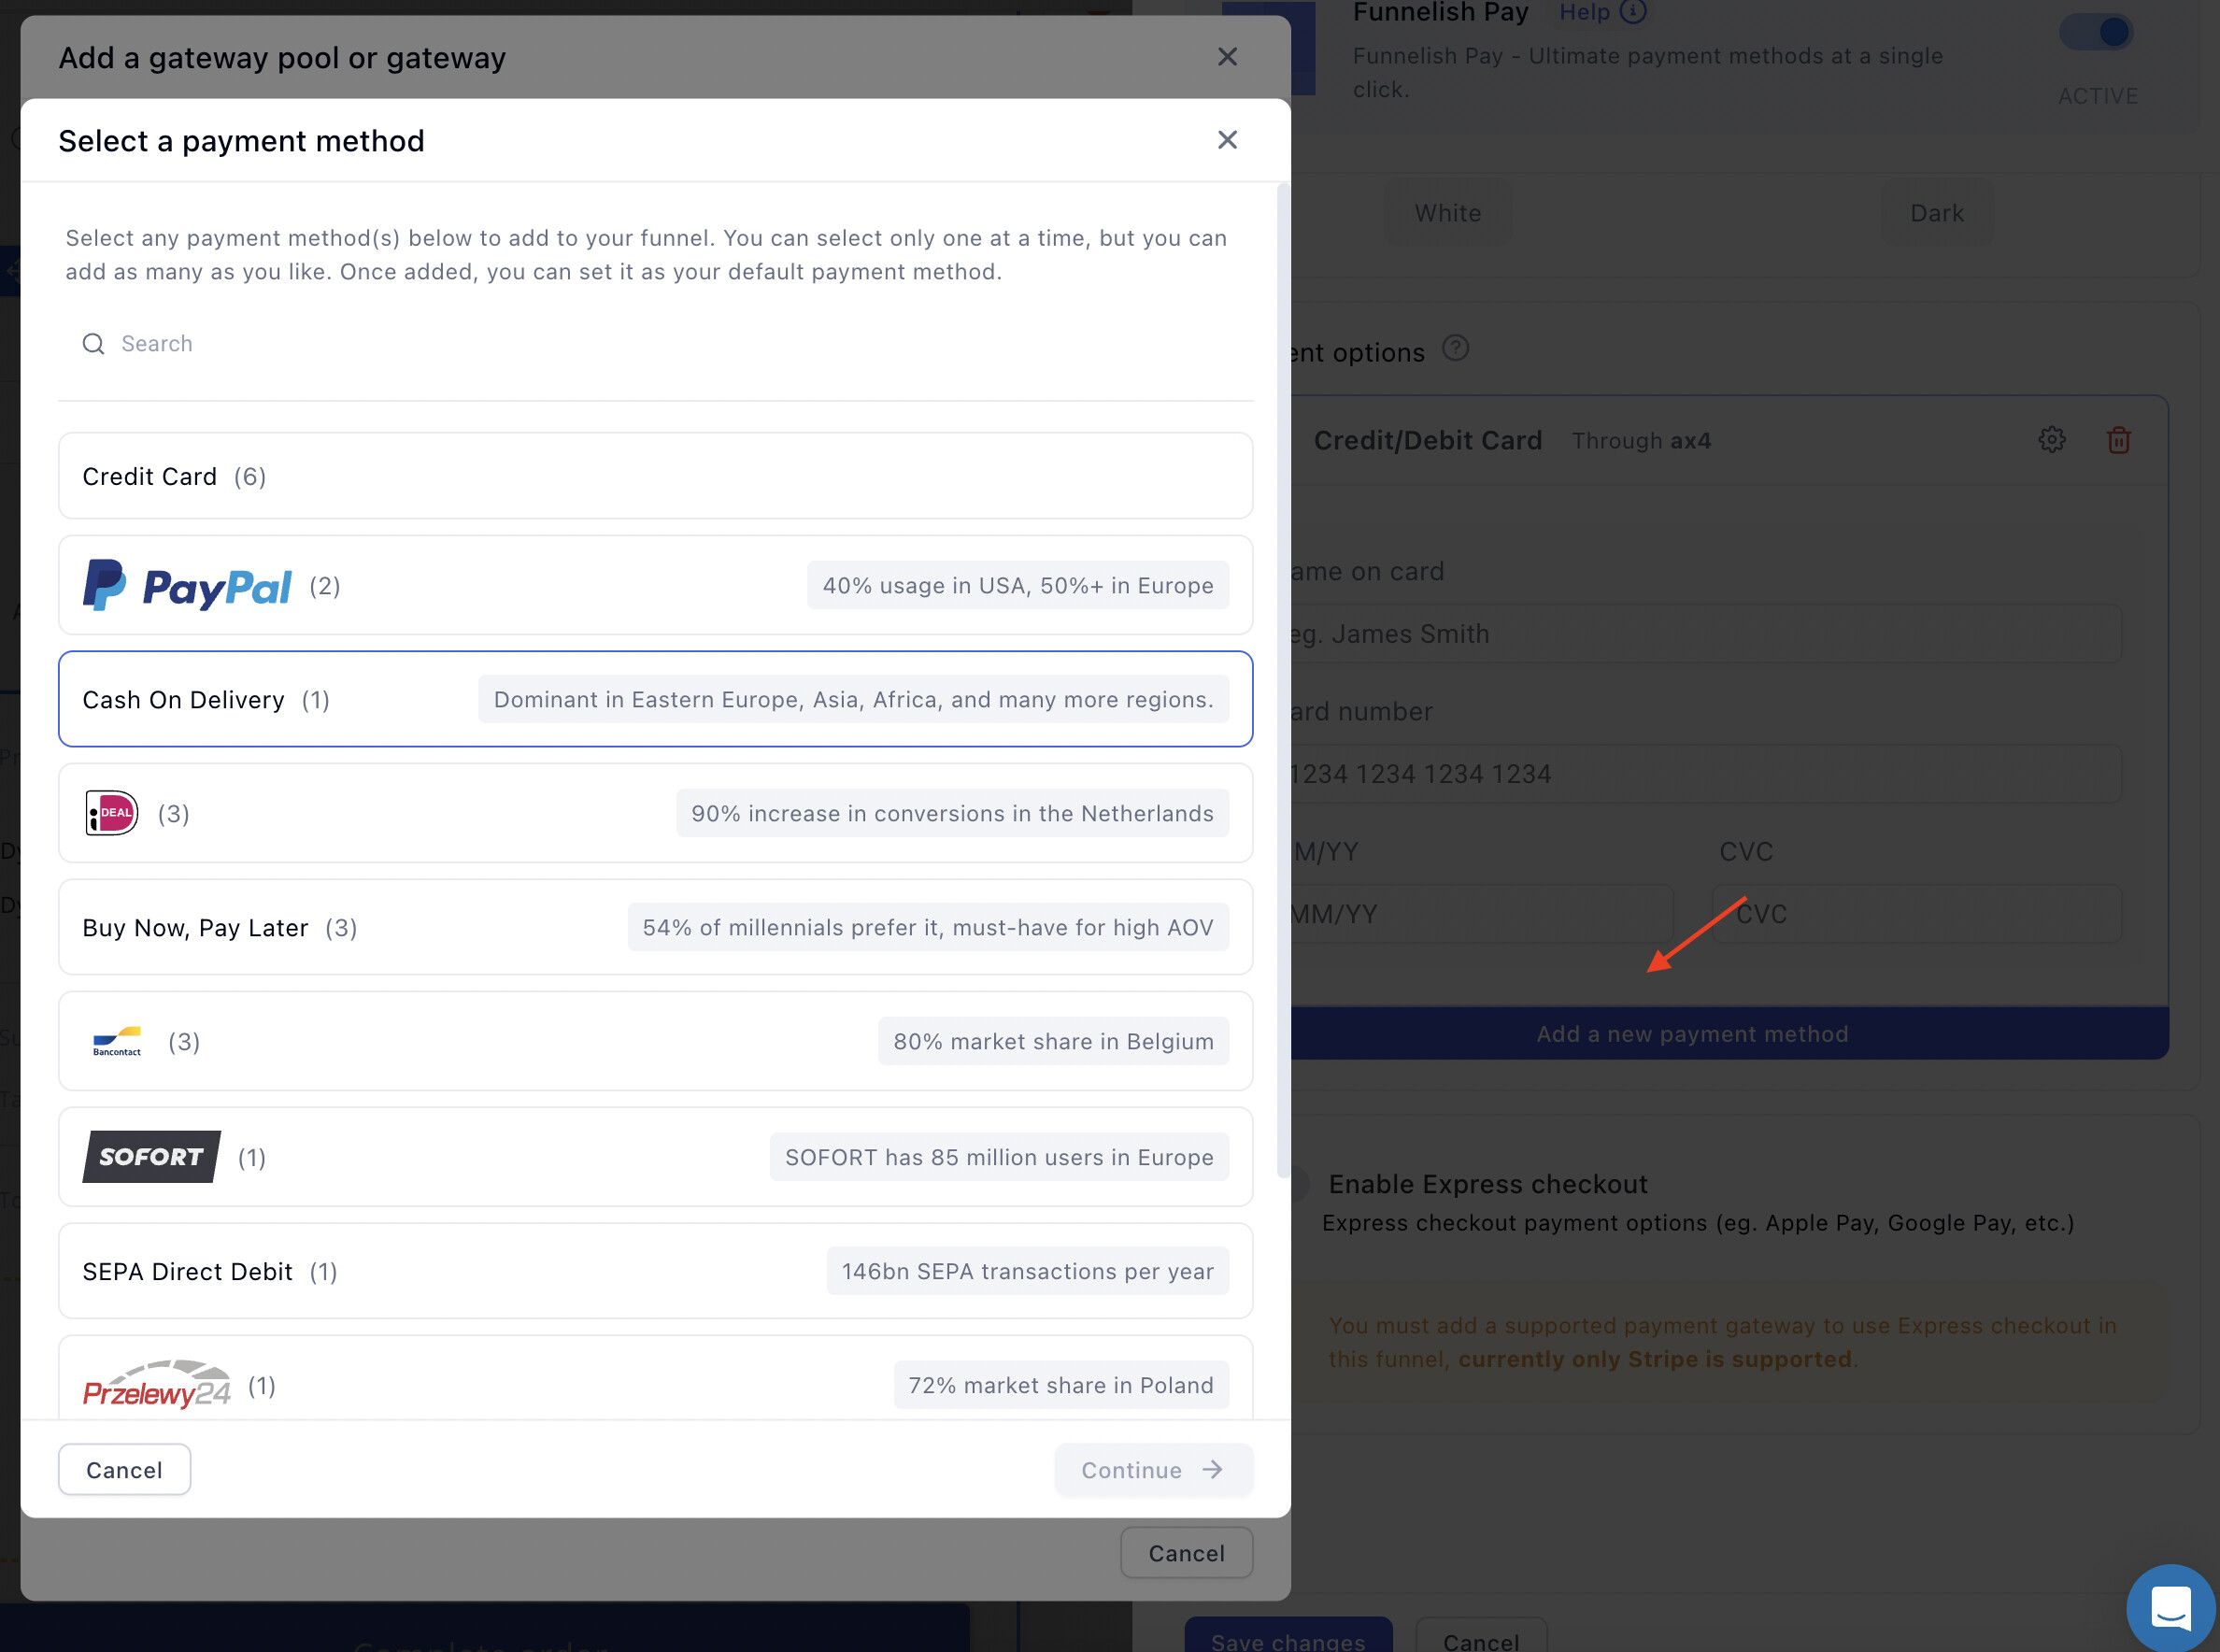
Connecting a New Payment Method
Customizing the Payment Form Display
Once your gateways are connected, you can refine how they look to the buyer:
-
Default Method: Click the radio button next to a gateway to make it the default selected option when the page loads.
-
Themes: Pick a visual theme for the form (e.g., standard white background or modern minimal) to match your DTC branding.
-
Translations: In many cases, you can fully customize and translate the credit card field labels into different languages to support international dropshipping campaigns.
 Finalizing the Checkout Layout
Before you publish your checkout page, make sure you optimize these final elements:
1. The Order Summary
This widget dynamically generates a receipt showing the customer exactly what they are paying for (including taxes and shipping). While you cannot change the internal structure of this field, you can click it to customize the fonts, colors, and margins so it fits seamlessly into your design.
2. The CTA Button
Click your main Call-To-Action button (the “Pay Now” button) to change the label. We highly recommend adding a Sub-headline beneath the button (e.g., “100% secure and encrypted payment”) to reinforce trust at the exact moment they are ready to buy.
 Next Up:
Your customer just completed their purchase, but the sales journey isn’t over! It’s time to double your profits with post-purchase offers.
Read the next guide: One-Click Upsells & Downsells (OTOs)